

Introduction
Logging in Amazon S3 is a feature that allows you to track and record access requests to your S3 bucket. When you enable S3 access logging, it creates log files that record information about requests made to your bucket, such as who accessed the bucket, what actions were taken, and when they occurred.
In this article, we will explain how to enable logging in Amazon S3 in simple steps.
Step 1. Open the S3 Service
- In the search bar at the top of the AWS Console, type S3.
- Click on the S3 service to open the dashboard.
Step 2. Choose Your Bucket
From the list of buckets, click on the name of the bucket for which you want to enable logging.

Step 3. Enable Server Access Logging
- Go to the Properties tab of the selected bucket.

- Scroll down to find the Server Access Logging section.
- Click on Edit to make changes.

Step 4. Configure Logging
- First, Click on enable.
- Choose a Target Bucket. Select a bucket where the logs will be stored.
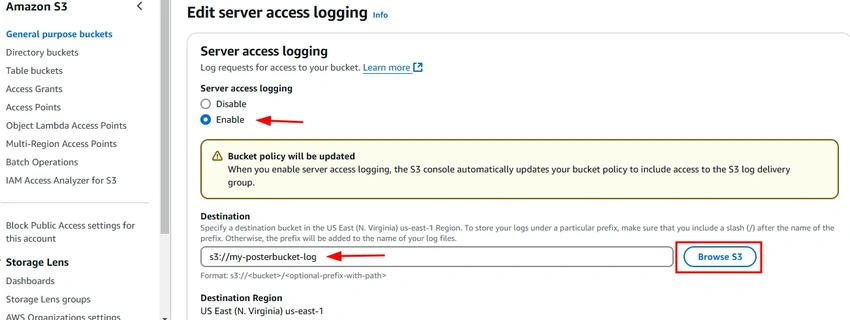
- It’s a good idea to use a different bucket for storing logs to keep things organized. You can create a new bucket if needed.
- Click on Save Changes to apply the settings.
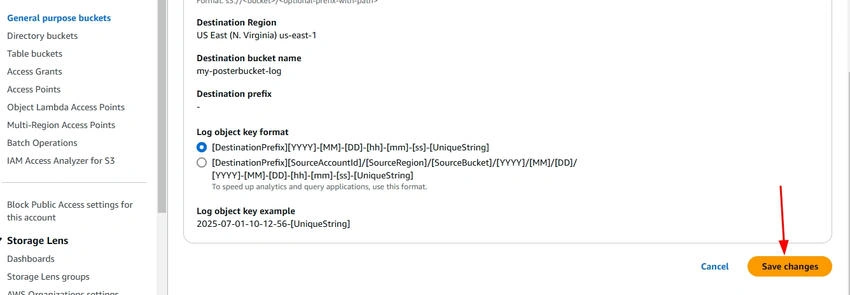
Now, we will upload some files where you've enabled logging. This action will be logged, and the details will be saved in the target bucket (the bucket you selected for storing logs).
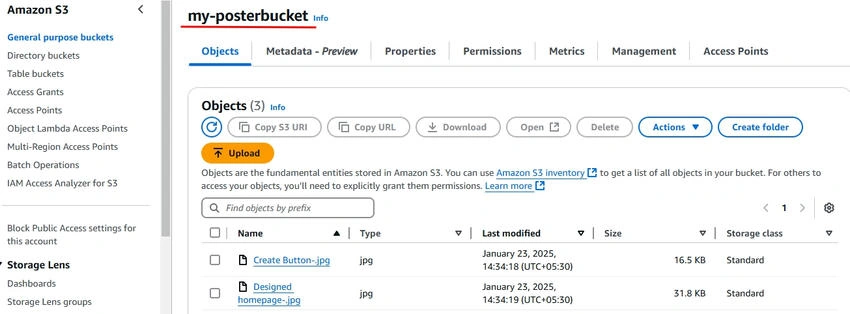
- Go to your Source bucket and click on the upload button.
- Add some files to your bucket and click upload.
- Here are the files we have uploaded in the bucket.
Step 5. Test and Check Logs
- Perform actions like uploading or downloading files in the bucket where logging is enabled.
- Wait for a few minutes (logs can take up to an hour to appear).
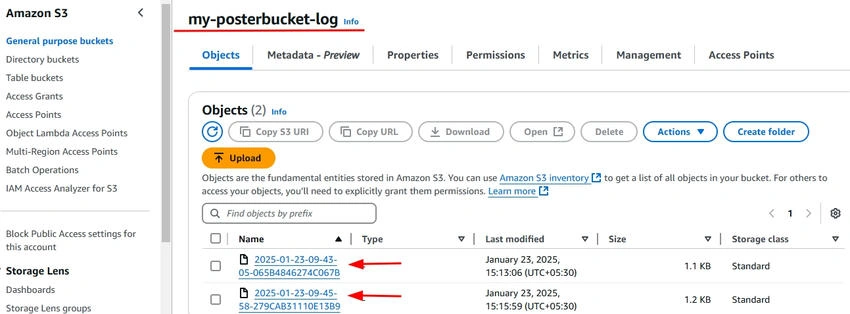
- Click on the target bucket.

- Now you can see the log files in the target bucket.
Conclusion
By enabling access logging on your S3 bucket, you can monitor all actions performed on the bucket. This is particularly useful for security auditing, compliance, and troubleshooting access-related issues. Remember to regularly review the log files stored in your target bucket to ensure everything is running smoothly.
Join the conversation! Your thoughts help the community grow.