

Introduction
In this article, I will show you how to create a virtual network manager in Azure using the proper and easiest method.
Managing virtual networks (VNets) across multiple subscriptions and regions can become a complex undertaking. Azure Virtual Network Manager (AVNM) simplifies this process by providing a centralized platform to manage connectivity, security, and routing for your virtual networks at scale; think of it as a control plane for your global network infrastructure.
Without a centralized solution, managing VNets involves configuring each network individually. This can be time-consuming, error-prone, and difficult to maintain, especially as your cloud footprint grows. Consistency in security policies and routing configurations becomes a significant challenge.
AVNM addresses these challenges by offering a hierarchical management structure. It allows you to group your VNets into logical units called "network groups," enabling you to apply policies and configurations to multiple VNets simultaneously. This simplifies management and ensures consistency across your network.
Key Features and Benefits
- Centralized Management: Manage all your VNets from a single pane of glass, regardless of their location or subscription.
- Network Groups: Organize your VNets into logical groups based on application, environment, or any other criteria that suit your needs. This allows for granular control and targeted policy application.
- Global Connectivity: Establish connectivity between VNets across regions using various methods like hub-and-spoke or mesh topologies. AVNM simplifies the configuration and management of these connections.
- Security Management: Define and apply security policies consistently across your network groups, ensuring compliance and reducing security risks.
- Route Management: Control traffic flow within and between your VNets with centralized route management.
- Policy Administration: Define and apply policies for connectivity, security, and routing to network groups. This ensures consistent configuration and simplifies compliance.
- Simplified Operations: Automate network management tasks and reduce manual configuration, freeing up your team to focus on other critical tasks.
- Scalability: AVNM is designed to scale with your growing cloud infrastructure, providing consistent management regardless of the size of your network.
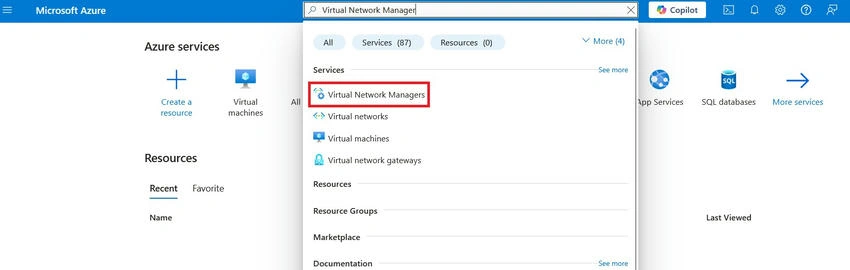
Step 1. On your Azure portal type “Virtual Network Manager” and hit enter.
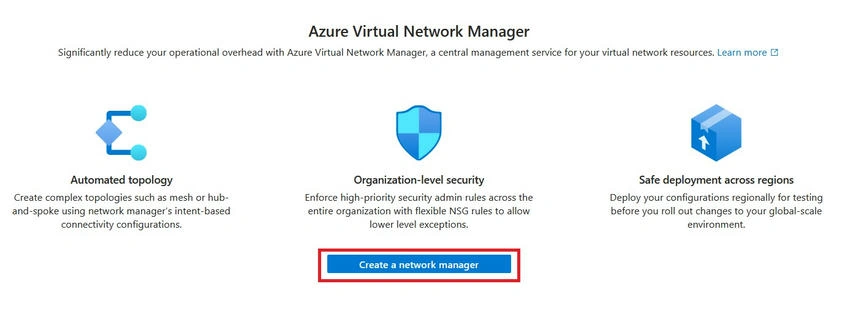
Step 2. Click “Create A Network Manager”.
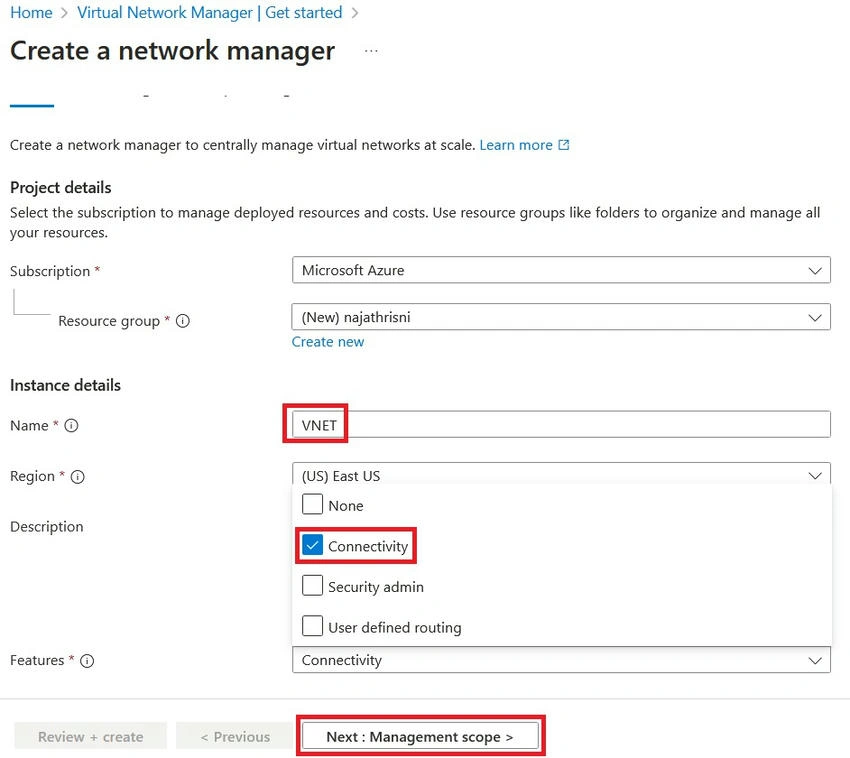
Step 3. Click “Features” select “Connectivity” and give your virtual network manager name after selecting “Review + Create”.
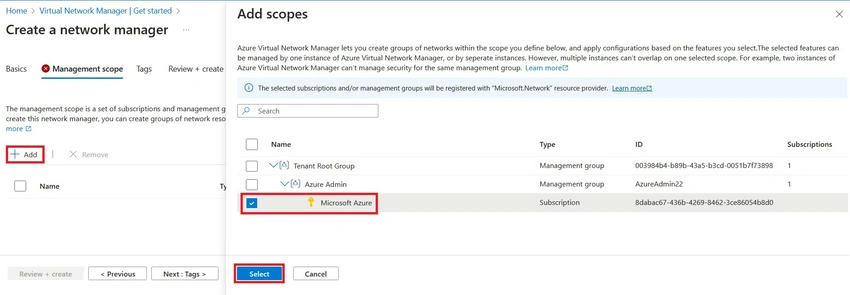
Step 4. Click “Add” and select your “Microsoft Azure Subscription Plan” after clicking “Select”.
Step 5. Click “Tags”.
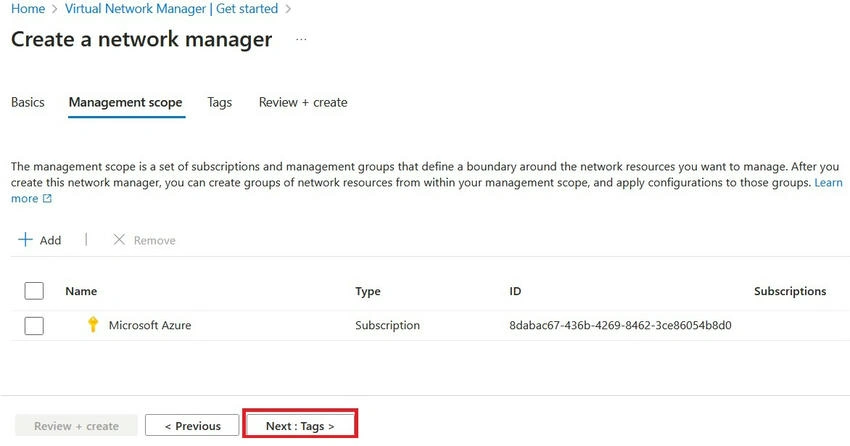
Step 6. After clicking “Review + Create”.
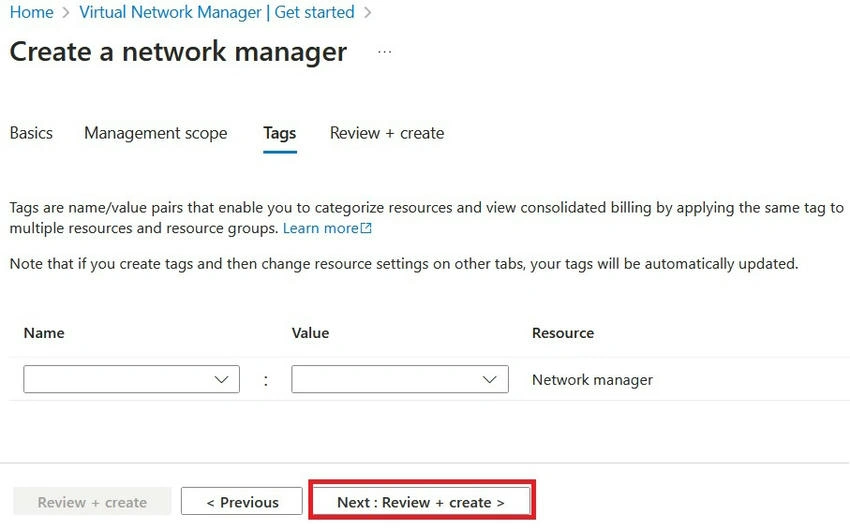
Step 7. Click “Create”.
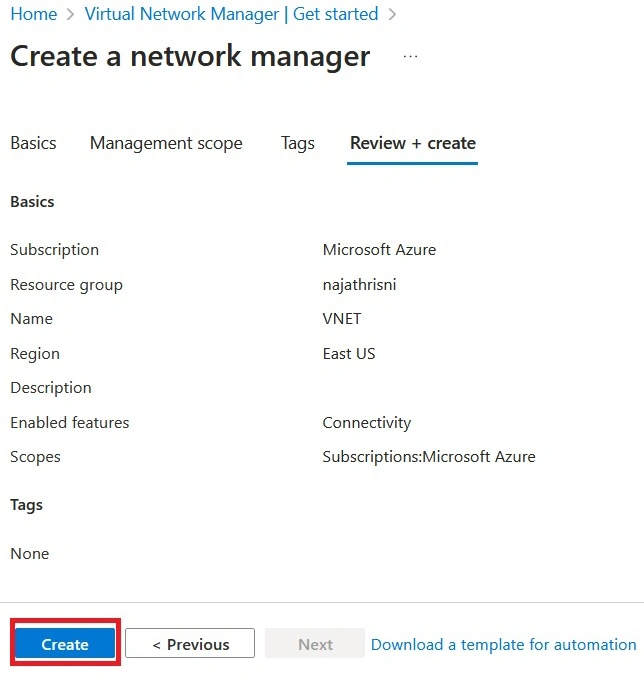
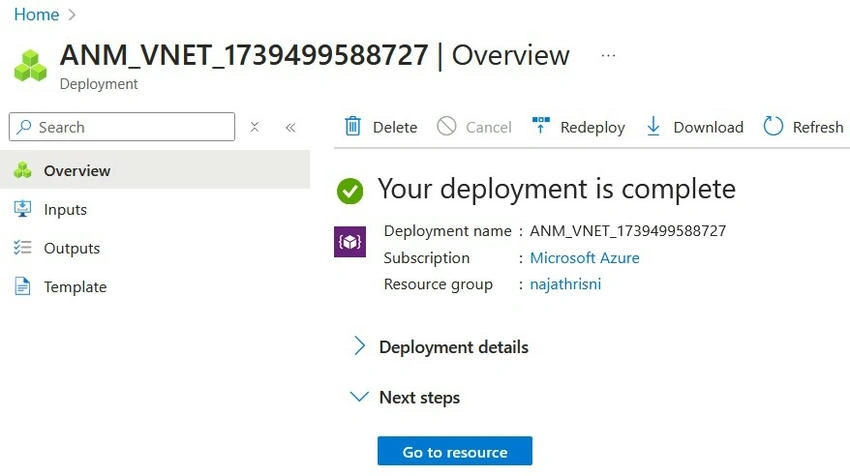
Now you can see after successfully creating a virtual network manager.
Conclusion
We all clearly understand how to create a virtual network manager in Azure using the proper and easiest method and easiest way. If you need clarification regarding this topic, feel free to contact me.
Join the conversation! Your thoughts help the community grow.