

Introduction
The library is an additional and very helpful feature in the Windows family. We can also use this feature in Windows 10 to organize all the folders in one place as well.
Libraries are the virtual collections of folders in your system. Libraries are the centralized place for bringing together all the related similar files and folders like documents, music, pictures, videos, and other files. By using the libraries, the user can easily organize all the similar shortcut files and folders in one place.
By default, Windows 10 comes with six different libraries.
- Camera Roll
- Documents
- Music
- Pictures
- Saved Pictures
- Videos
This tutorial will show you various ways on how to create a new library in Windows 10.
Enable the Library View In Windows 10
Step 1
Open the "File Explorer" by pressing the "Windows + E" key.
Step 2
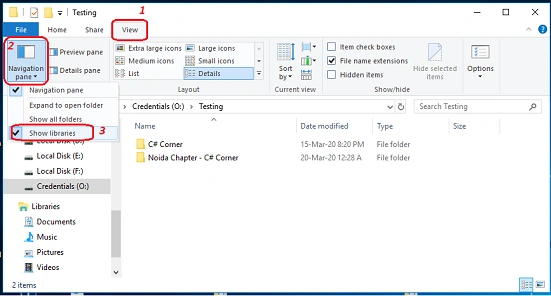
In the menu bar, click on the "View" tab.
Step 3
Under the 'View" tab, click on the "Navigation pane" and then click on the "Show libraries" option.
Create New Library In Windows 10
By using the Libraries folder, the user can easily create a new library. Follow the below instructions to proceed.
Method 1: By using the Libraries
Step 1
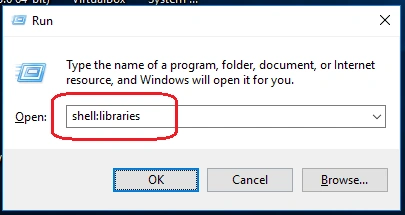
From the Start menu, open the Run dialog box. (Alternatively, you can press the "Window + R" key to open the RUN window).
Step 2
Type "shell:libraries" and press enter key to open "Libraries".
Step 3
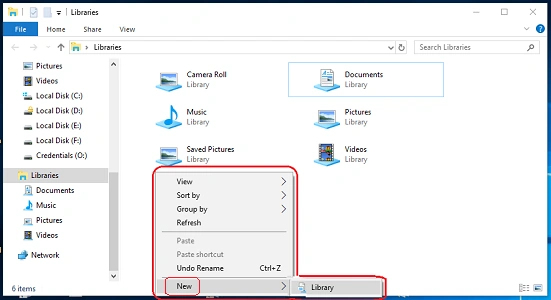
Right-click on the empty space and click on New > Library.
`
Step 4
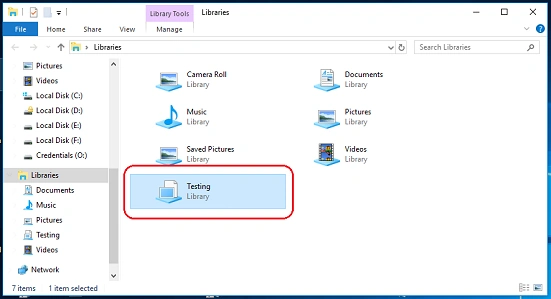
Give a name to the newly created library.
Step 5
Double-click on the newly created library then, click on "Include a folder" to include folders to the newly created library.
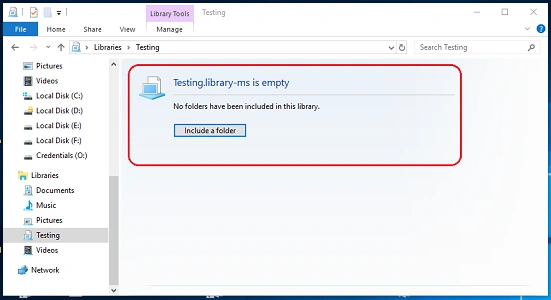
Note:
Alternatively, you can create a new library by click on the Home > New item > Library.
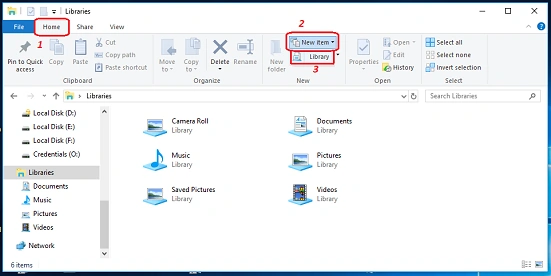
By using File Explorer, the user can also create a new library. Follow the below instructions to proceed.
Step 1
Open the File Explorer by pressing the "Windows + E" key.
Step 2
Navigate to the folder that you want to include in the library.
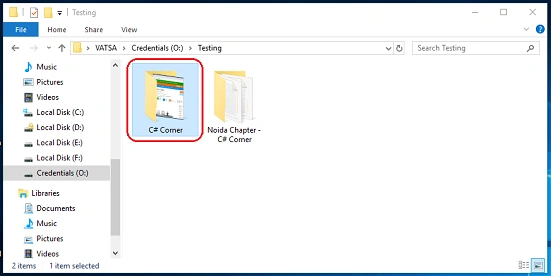
Step 3
Right-click on it and select, Include in Library > Create new library.
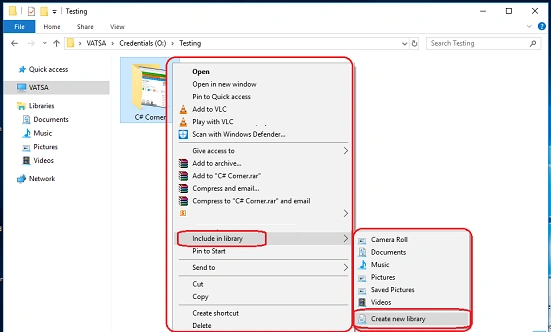
Now, the new library will be created. And the new library will be named the same as the included folder.
Rename the Libraries Folder In Windows 10
The user can easily rename the "Libraries" folder through Registry Editor, follow the below instructions to proceed.
Step 1
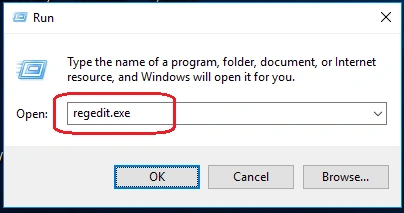
From the Start menu, open the Run dialog box. (Alternatively, you can press the "Window + R" key to open the RUN window).
Step 2
Type "regedit.exe" and press enter key to open "Registry Editor".
Step 3
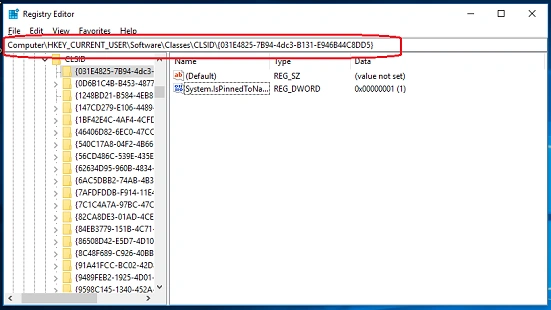
Navigate the following path: HKEY_CURRENT_USER\Software\Classes\CLSID\{031E4825-7B94-4dc3-B131-E946B44C8DD5}.
Step 4
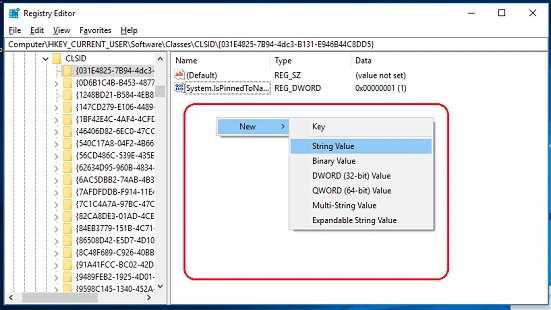
Right-click on the empty area, and select New > String Value.
Step 5
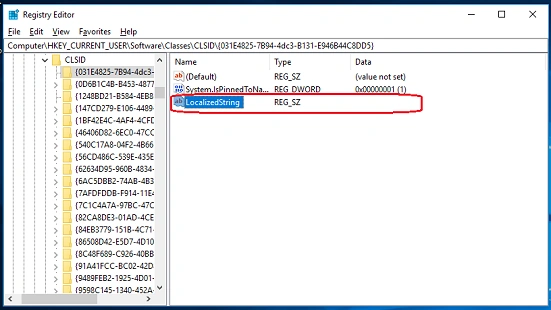
Change its name to "LocalizedString".
Step 6
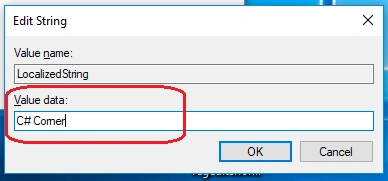
Step 7
Restart or Sign out and Sign in your system to see the effects.
Conclusion
By following any of the above methods, you can create a new library in Windows 10.
I hope you enjoyed this article. Follow C# Corner to learn more new and amazing things about Windows 10.
Thanks for reading this article.
Join the conversation! Your thoughts help the community grow.