

Introduction
In this article, we will learn to create a new Angular 11 project using ng new command and then we will install material design using ng add command. After that we will create a simple matTabs example in Visual Studio code.
Step 1
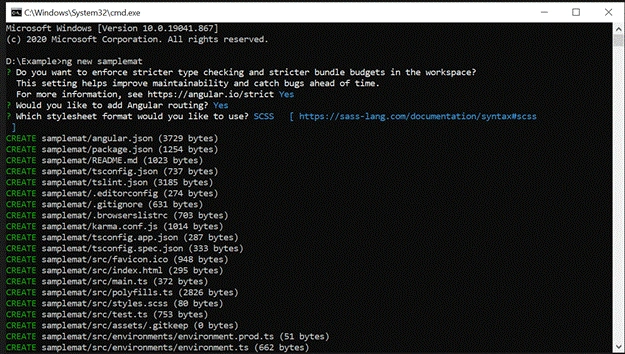
Create an Angular project setup using the below commands or however you create your Angular app
ng new samplemat
Step 2
Open a new terminal and run the following below commands
Install Angular Material,
Install Material module in Your App.
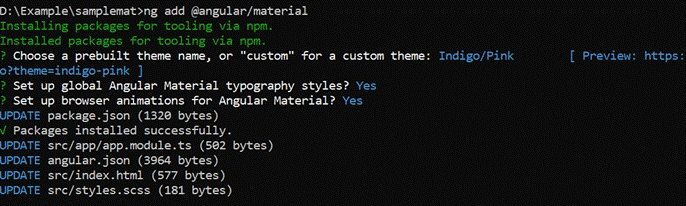
ng add @angular/material
ng add command will install Angular Material, the Component Dev Kit (CDK) and Angular Animations
They will ask some question on installation,
- Choose a prebuilt theme name, or "custom" for a custom theme:
You can choose from prebuilt material design themes or set up an extensible custom theme.
- Set up global Angular Material typography styles:
Whether to apply the global typography styles to your application.
- Set up browser animations for Angular Material:
Importing the BrowserAnimationsModule into your application enables Angular's animation system. Declining this will disable most of Angular Material's animations.
The ng add command will additionally perform the following configurations,
- Add project dependencies to package.json
- Add the Roboto font to your index.html
- Add the Material Design icon font to your index.html
- Add a few global CSS styles to:
- Remove margins from body
- Set height: 100% on html and body
- Set Roboto as the default application font
Now we are done and Angular Material is now configured to be used in our application.
Step 3 - App.module.ts
Now we will declarae material in app.module.ts
- import { NgModule } from '@angular/core';
- import { BrowserModule } from '@angular/platform-browser';
- import { BrowserAnimationsModule } from '@angular/platform-browser/animations';
- import {
- MatTabsModule,
- MatButtonModule,
- MatToolbarModule
- } from '@angular/material';
- import { AppComponent } from './app.component';
- @NgModule({
- imports: [ BrowserModule, BrowserAnimationsModule, MatTabsModule, MatButtonModule, MatToolbarModule ],
- declarations: [ AppComponent ],
- bootstrap: [ AppComponent ]
- })
- export class AppModule { }
Step 4
Now, we will write integartion on App.component.html
- <p>
- Material Tabs ui
- </p>
- <mat-toolbar>
- Get the change event!
- </mat-toolbar>
- <mat-tab-group style="margin-bottom: 20px;" #changeEvent (selectedIndexChange)="tabChanged($event)">
- <mat-tab label="Tab 1">Tab 1</mat-tab>
- <mat-tab label="Tab 2">Tab 2</mat-tab>
- </mat-tab-group>
- <mat-toolbar>
- Get the tabs
- </mat-toolbar>
- <mat-tab-group #selectTabs>
- <mat-tab label="Tab 1">Tab 1</mat-tab>
- <mat-tab label="Tab 2">Tab 2</mat-tab>
- <mat-tab label="Tab 3">Tab 3</mat-tab>
- </mat-tab-group>
Step 5
Next, we can open the app.component.ts and write some code.
- import { Component, OnInit, AfterViewInit, ViewChild, ViewChildren, QueryList } from '@angular/core';
- import {MatTabGroup} from '@angular/material'
- @Component({
- selector: 'my-app',
- templateUrl: './app.component.html',
- styleUrls: [ './app.component.css' ]
- })
- export class AppComponent implements OnInit, AfterViewInit {
- ngOnInit() {
- }
- @ViewChildren("selectTabs") selectTabs: QueryList<any>
- ngAfterViewInit() {
- console.log('total tabs: ' + this.selectTabs.first._tabs.length);
- }
- tabChanged(tabChangeEvent: number) {
- console.log('tab selected: ' + tabChangeEvent);
- }
- }
In style.scss
- /* Add application styles & imports to this file! */
- @import '~@angular/material/theming';
- @include mat-core();
- $candy-app-primary: mat-palette($mat-blue);
- $candy-app-accent: mat-palette($mat-pink, A200, A100, A400);
- $candy-app-warn: mat-palette($mat-red);
- $candy-app-theme: mat-light-theme($candy-app-primary, $candy-app-accent, $candy-app-warn);
- @include angular-material-theme($candy-app-theme);
Step 6
Now we will run the application,
ng serve --port 1223
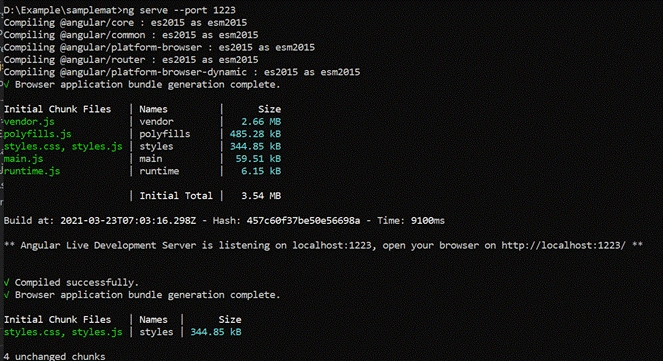
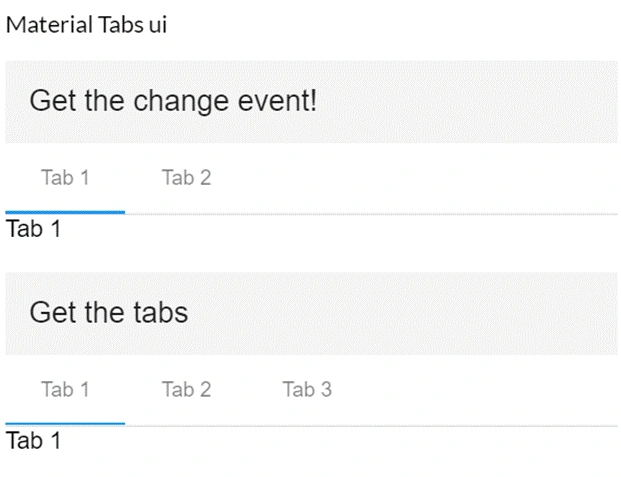
On successful execution of the above command, it will show the browser,
Join the conversation! Your thoughts help the community grow.