

Introduction
Android is one of the most popular operating systems for mobile. Users can access the internet through the browser. Each Android mobile has a calendar view. The calendar is an important thing to handle events and commitments. So, I will show you how to create a calendar view in Android applications using an android studio. Android is a kernel-based operating system. It allows the user to modify the GUI components and source code.
Requirements
- Android studio
- Little bit XML and JAVA Knowledge.
- Android emulator (or) android mobile
- Download link (android studio)
Steps should be followed
Carefully follow my steps to create a calendar view in android applications using an android studio and I have included the source code below.
Step 1
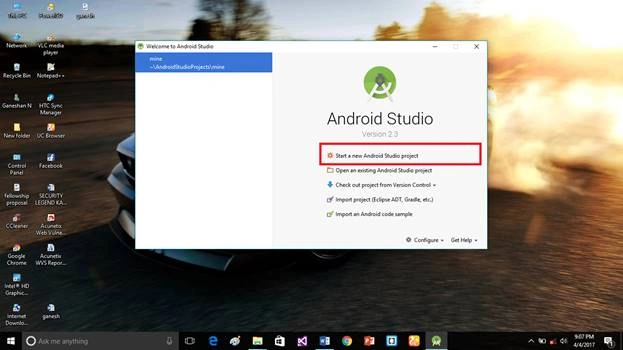
Open the android studio to start the new project.
 Step 2
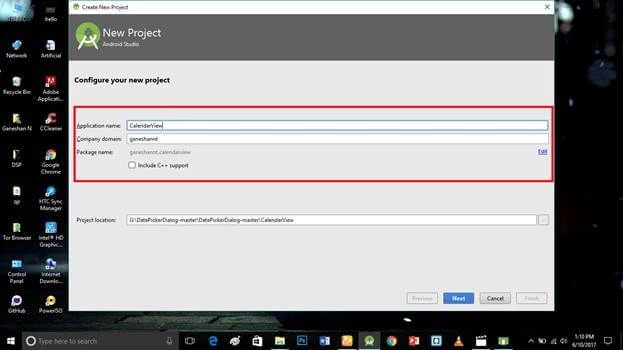
Put the application name and company domain. If you wish to use c++ for code the project, mark the Include c++ support then click next.
 Step 3
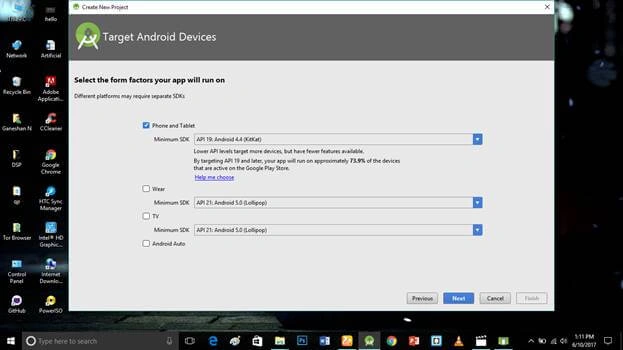
Select the android minimum SDK. After you chose the minimum SDK it will show the approximate percentage of people use that SDK then click next.
 Step 4
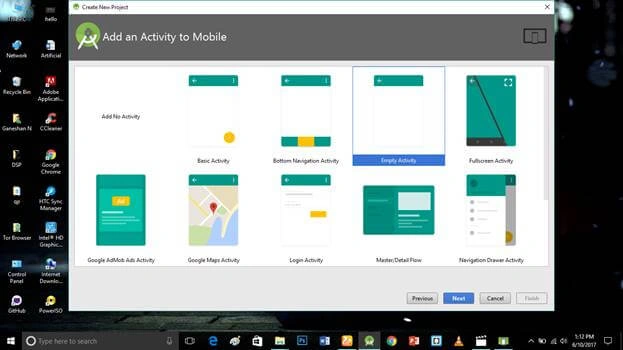
Choose the basic activity then click next.
 Step 5
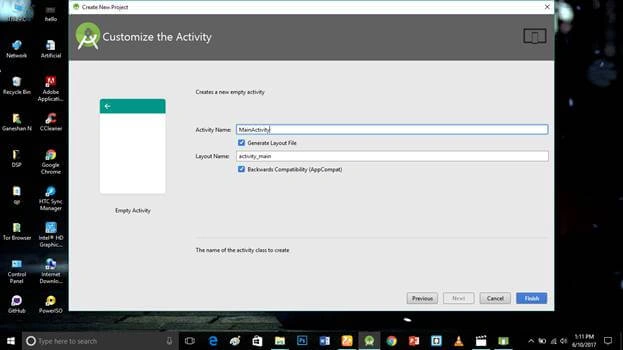
Put the activity name and layout name. Android studio basically takes the java class name is what you provide the activity name and click finish.
 Step 6
Go to activity_main.xml then click the text bottom. This XML file contains the designing code for the android app. Into the activity_main.xml copy and paste the below code.
Activity_main.xml code
- <?xml version="1.0" encoding="utf-8"?>
- <android.support.constraint.ConstraintLayout xmlns:android="http://schemas.android.com/apk/res/android"
- xmlns:app="http://schemas.android.com/apk/res-auto"
- xmlns:tools="http://schemas.android.com/tools"
- android:layout_width="match_parent"
- android:layout_height="match_parent"
- tools:context="ganeshannt.calendarview.MainActivity">
- <TextView
- android:id="@+id/date"
- android:layout_width="0dp"
- android:layout_height="51dp"
- android:text="Date"
- android:textAlignment="center"
- android:textSize="45dp"
- android:visibility="visible"
- app:layout_constraintBottom_toBottomOf="parent"
- app:layout_constraintHorizontal_bias="0.0"
- app:layout_constraintLeft_toLeftOf="parent"
- app:layout_constraintRight_toRightOf="parent"
- app:layout_constraintTop_toTopOf="parent"
- app:layout_constraintVertical_bias="0.219" />
- <Button
- android:id="@+id/btngocalendar"
- android:layout_width="266dp"
- android:layout_height="47dp"
- android:text="Go to calendar"
- tools:layout_editor_absoluteX="47dp"
- tools:layout_editor_absoluteY="8dp" />
- </android.support.constraint.ConstraintLayout>
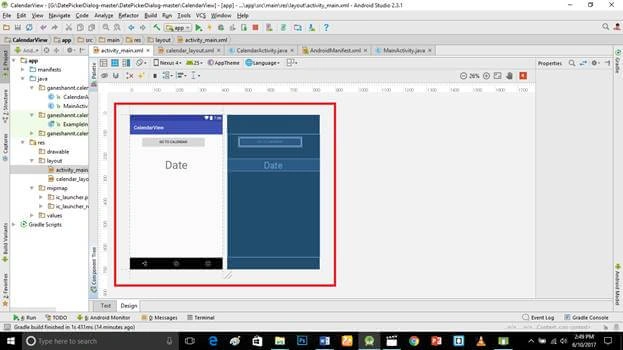
Create a new calendar_layout.xml file (File ⇒ New ⇒Activity⇒Empty_activity).
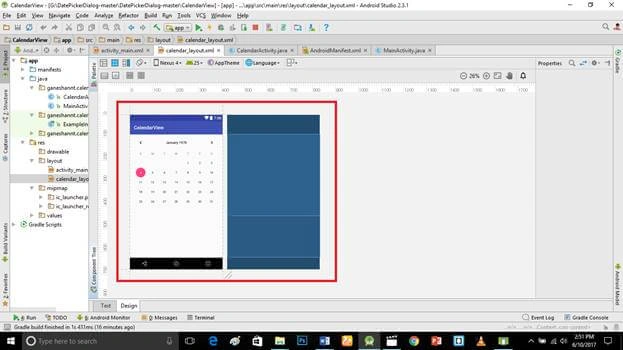
Go to calendar_layout.xml then click the text bottom. This XML file contains the designing code for android app. Into the calendar_layout.xml copy and paste the below code.
calendar_layout.xml code
- <?xml version="1.0" encoding="utf-8"?>
- <LinearLayout xmlns:android="http://schemas.android.com/apk/res/android"
- android:orientation="vertical" android:layout_width="match_parent"
- android:layout_height="match_parent">
- <CalendarView
- android:id="@+id/calendarView"
- android:layout_width="match_parent"
- android:layout_height="wrap_content" />
- </LinearLayout>
- package ganeshannt.calendarview;
- import android.content.Intent;
- import android.os.Bundle;
- import android.support.v7.app.AppCompatActivity;
- import android.view.View;
- import android.widget.Button;
- import android.widget.TextView;
- public class MainActivity extends AppCompatActivity {
- private static final String TAG = "MainActivity";
- private TextView thedate;
- private Button btngocalendar;
- @Override
- protected void onCreate(Bundle savedInstanceState) {
- super.onCreate(savedInstanceState);
- setContentView(R.layout.activity_main);
- thedate = (TextView) findViewById(R.id.date);
- btngocalendar = (Button) findViewById(R.id.btngocalendar);
- Intent incoming = getIntent();
- String date = incoming.getStringExtra("date");
- thedate.setText(date);
- btngocalendar.setOnClickListener(new View.OnClickListener() {
- @Override
- public void onClick(View v) {
- Intent intent = new Intent(MainActivity.this,CalendarActivity.class);
- startActivity(intent);
- }
- });
- }
- }
Step 9
Create a new CalendarActivity.java file (File ⇒ New ⇒Java class).
Into the CalendarActivity.java copy and paste the below code.java programming is the backend language for android. Do not replace your package name otherwise, the app will not run.
CalendarActivity.java code
- package ganeshannt.calendarview;
- import android.content.Intent;
- import android.os.Bundle;
- import android.support.annotation.Nullable;
- import android.support.v7.app.AppCompatActivity;
- import android.util.Log;
- import android.widget.CalendarView;
- /**
- * Created by ganesh on 6/10/2017.
- */
- public class CalendarActivity extends AppCompatActivity {
- private static final String TAG = "CalendarActivity";
- private CalendarView mCalendarView;
- @Override
- protected void onCreate(@Nullable Bundle savedInstanceState) {
- super.onCreate(savedInstanceState);
- setContentView(R.layout.calendar_layout);
- mCalendarView = (CalendarView) findViewById(R.id.calendarView);
- mCalendarView.setOnDateChangeListener(new CalendarView.OnDateChangeListener() {
- @Override
- public void onSelectedDayChange(CalendarView CalendarView, int year, int month, int dayOfMonth) {
- String date = year + "/" + month + "/"+ dayOfMonth ;
- Log.d(TAG, "onSelectedDayChange: yyyy/mm/dd:" + date);
- Intent intent = new Intent(CalendarActivity.this,MainActivity.class);
- intent.putExtra("date",date);
- startActivity(intent);
- }
- });
- }
- }
- Step 10
- Add the calendaractivity into the androidmanifest.xml so add below code into the AndroidManifest.xml.
- AndroidManifest.xml code
- <?xml version="1.0" encoding="utf-8"?>
- <manifest xmlns:android="http://schemas.android.com/apk/res/android"
- package="ganeshannt.calendarview">
- <application
- android:allowBackup="true"
- android:icon="@mipmap/ic_launcher"
- android:label="@string/app_name"
- android:roundIcon="@mipmap/ic_launcher_round"
- android:supportsRtl="true"
- android:theme="@style/AppTheme">
- <activity android:name=".MainActivity">
- <intent-filter>
- <action android:name="android.intent.action.MAIN" />
- <category android:name="android.intent.category.LAUNCHER" />
- </intent-filter>
- </activity>
- <activity android:name=".CalendarActivity"></activity>
- </application>
- </manifest>
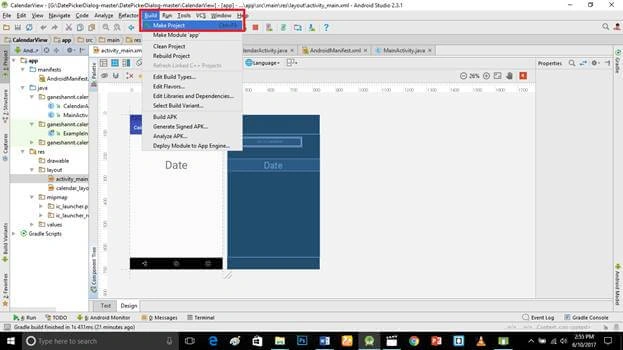
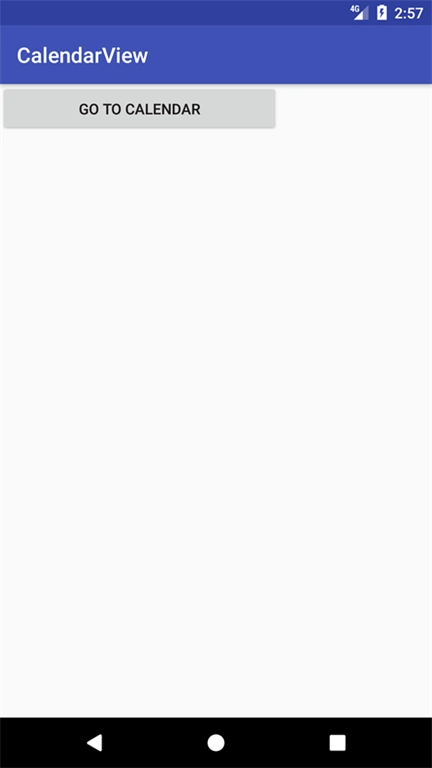
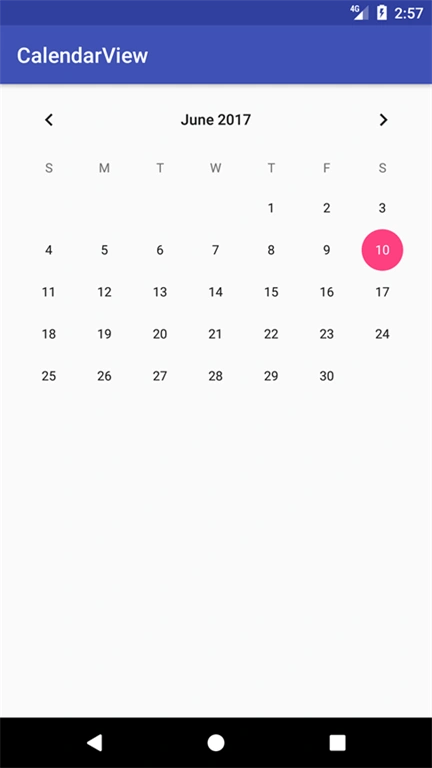
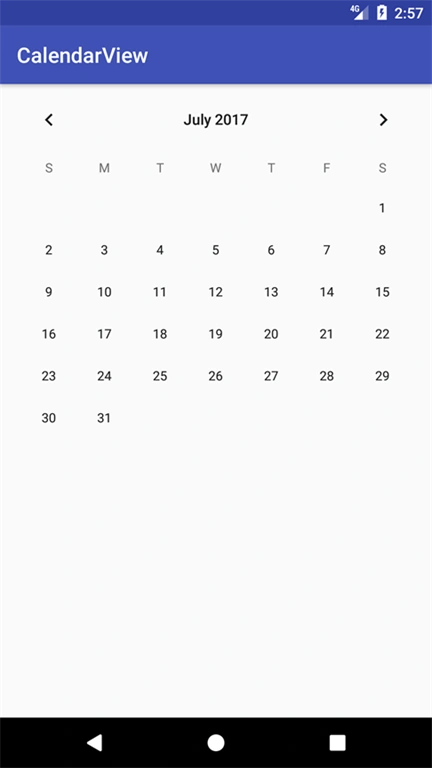
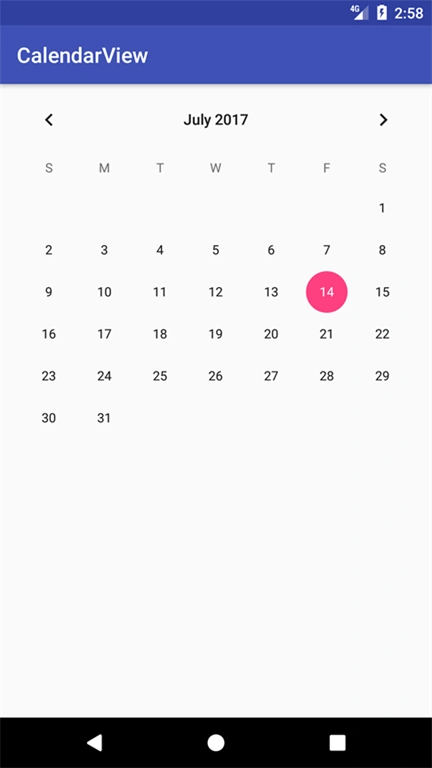
This is our user interface of the application. Click the make project option.
 Deliverables
Here calendar view in the android application was successfully created and executed.
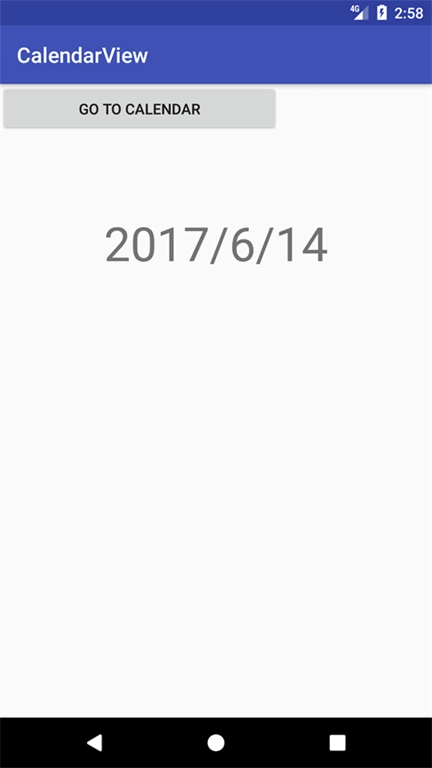 Don’t forget to like and follow me. If you have any doubts just comment below.
Vaibhav JainPosted Oct 24, 2018, 11:59 PM
This layout shows calendar view in vertical direction not like you show above in pictures so please tell what should to change in this layout?
Bruno RodriguesPosted Sep 25, 2018, 4:44 AM
Hello, is it possible to import google calendar into an android application? how do I do? thank you
Ganeshan NPosted Jun 12, 2017, 10:40 PM
Source code available here :https://github.com/GaneshanNT/CalendarView