

Introduction
Ninety percent of people today use Android smartphones. In our day to day life, we perform mathematical operations with the help of a calculator. Thus, I will show you how to create a Calculator App for Android, using Android Studio. Android is the Kernel-based operating system. It allows the user, to modify GUI components and the source code.
Requirements
- Android Studio.
- Little bit XML and JAVA knowledge.
Download link (Android Studio): https://developer.android.com/studio/index.html.
Steps to be followed are given below
Carefully follow my steps to create a Calculator App for an Android and I have included the source code given below.
Step 1
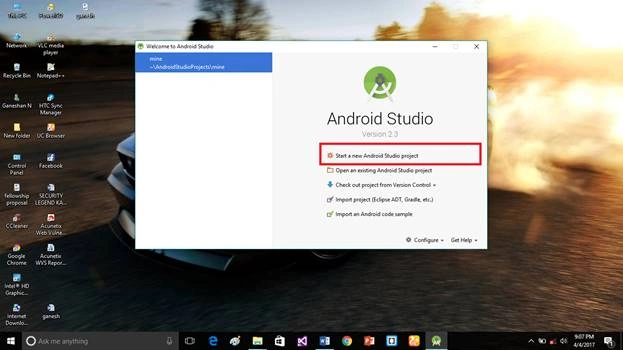
Open an Android Studio. Start the new project.
Step 2
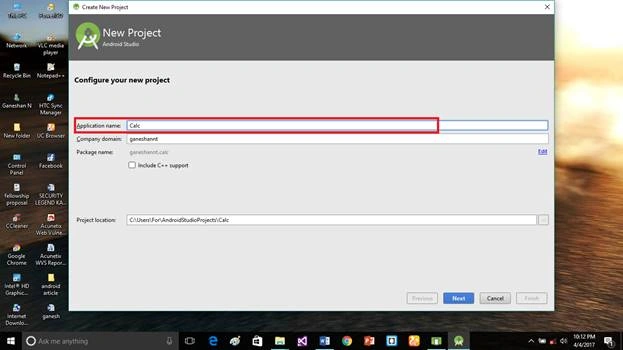
Put the Application name and company domain. If you wish to use C++ for coding the project, mark the Include C++ support, followed by clicking Next.
Step 3
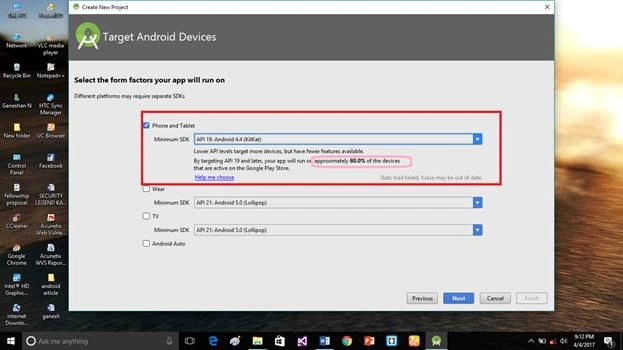
Select the Android minimum SDK. Afterward, you chose the minimum SDK and it will show the approximate percentage of the people, who use SDK, followed by clicking Next.
Step 4
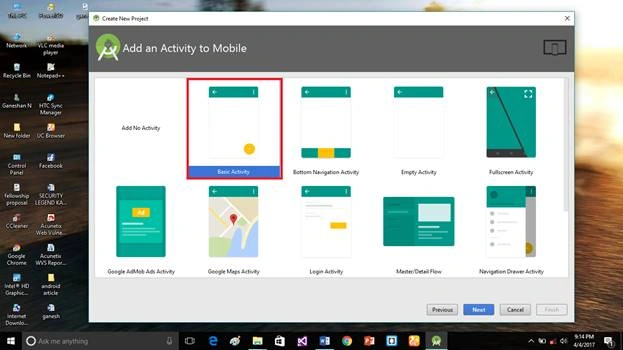
Choose the basic activity, followed by clicking Next.
Step 5
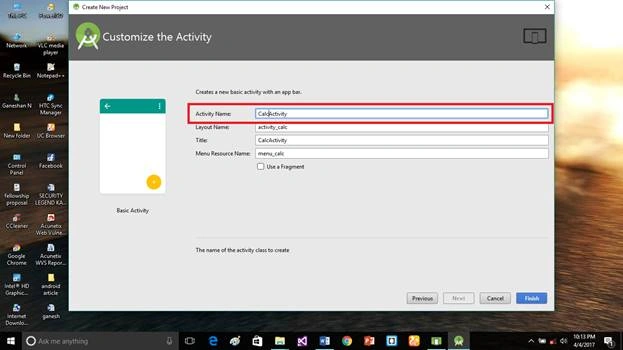
Put the activity name and layout name. Android Studio basically takes a Java class name, which is provided by you in the activity name
Step 6
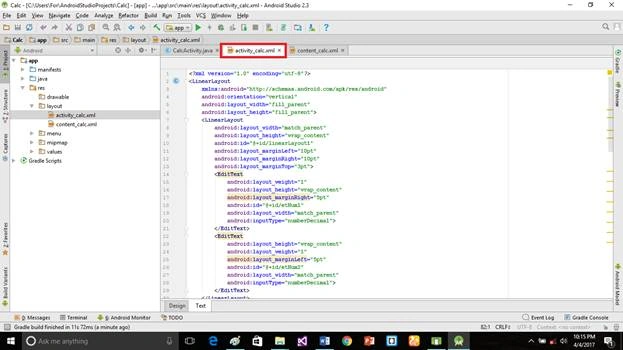
Go to activity_calc.xml, followed by clicking the bottom text. This XML file contains the designing code for an Android app in the activity_calc.xml; copy and paste the code given below.
activity_calc.xml code
- <?xml version="1.0" encoding="utf-8"?>
- <LinearLayout
- xmlns:android="http://schemas.android.com/apk/res/android"
- android:orientation="vertical"
- android:layout_width="fill_parent"
- android:layout_height="fill_parent">
- <LinearLayout
- android:layout_width="match_parent"
- android:layout_height="wrap_content"
- android:id="@+id/linearLayout1"
- android:layout_marginLeft="10pt"
- android:layout_marginRight="10pt"
- android:layout_marginTop="3pt">
- <EditText
- android:layout_weight="1"
- android:layout_height="wrap_content"
- android:layout_marginRight="5pt"
- android:id="@+id/etNum1"
- android:layout_width="match_parent"
- android:inputType="numberDecimal">
- </EditText>
- <EditText
- android:layout_height="wrap_content"
- android:layout_weight="1"
- android:layout_marginLeft="5pt"
- android:id="@+id/etNum2"
- android:layout_width="match_parent"
- android:inputType="numberDecimal">
- </EditText>
- </LinearLayout>
- <LinearLayout
- android:layout_width="match_parent"
- android:layout_height="wrap_content"
- android:id="@+id/linearLayout2"
- android:layout_marginTop="3pt"
- android:layout_marginLeft="5pt"
- android:layout_marginRight="5pt">
- <Button
- android:layout_height="wrap_content"
- android:layout_width="match_parent"
- android:layout_weight="1"
- android:text="+"
- android:textSize="15pt"
- android:id="@+id/btnAdd">
- </Button>
- <Button
- android:layout_height="wrap_content"
- android:layout_width="match_parent"
- android:layout_weight="1"
- android:text="-"
- android:textSize="15pt"
- android:id="@+id/btnSub">
- </Button>
- <Button
- android:layout_height="wrap_content"
- android:layout_width="match_parent"
- android:layout_weight="1"
- android:text="*"
- android:textSize="15pt"
- android:id="@+id/btnMult">
- </Button>
- <Button
- android:layout_height="wrap_content"
- android:layout_width="match_parent"
- android:layout_weight="1"
- android:text="/"
- android:textSize="15pt"
- android:id="@+id/btnDiv">
- </Button>
- </LinearLayout>
- <TextView
- android:layout_height="wrap_content"
- android:layout_width="match_parent"
- android:layout_marginLeft="5pt"
- android:layout_marginRight="5pt"
- android:textSize="12pt"
- android:layout_marginTop="3pt"
- android:id="@+id/tvResult"
- android:gravity="center_horizontal">
- </TextView>
- </LinearLayout>
In CalcActivity.java, copy and paste the code of Java programming given below, which is the backend language for an Android. Do not replace your package name, else an app will not run. The code given below contains my package name.
CalcActivity.java code
- package ganeshannt.calc;
- import android.app.Activity;
- import android.os.Bundle;
- import android.text.TextUtils;
- import android.view.View;
- import android.view.View.OnClickListener;
- import android.widget.Button;
- import android.widget.EditText;
- import android.widget.TextView;
- public class CalcActivity extends Activity implements
- OnClickListener
- {
- EditText input1;
- EditText input2;
- Button addition;
- Button subtraction;
- Button multiplication;
- Button division;
- TextView tvResult;
- String oper = "";
- @Override
- public void onCreate(Bundle savedInstanceState)
- {
- super.onCreate(savedInstanceState);
- setContentView(R.layout.activity_calc);
- input1 = (EditText) findViewById(R.id.etNum1);
- input2 = (EditText) findViewById(R.id.etNum2);
- addition = (Button) findViewById(R.id.btnAdd);
- subtraction = (Button) findViewById(R.id.btnSub);
- multiplication = (Button) findViewById(R.id.btnMult);
- division = (Button) findViewById(R.id.btnDiv);
- tvResult = (TextView) findViewById(R.id.tvResult);
- // set a listener
- addition.setOnClickListener(this);
- subtraction.setOnClickListener(this);
- multiplication.setOnClickListener(this);
- division.setOnClickListener(this);
- }
- @Override
- public void onClick(View v)
- {
- // TODO Auto-generated method stub
- float num1 = 0;
- float num2 = 0;
- float result = 0;
- // check if the fields are empty
- if (TextUtils.isEmpty(input1.getText().toString())
- || TextUtils.isEmpty(input2.getText().toString()))
- {
- return;
- }
- // read EditText and fill variables with numbers
- num1 = Float.parseFloat(input1.getText().toString());
- num2 = Float.parseFloat(input2.getText().toString());
- // defines the button that has been clicked and performs the corresponding operation
- // write operation into oper, we will use it later for output
- switch (v.getId())
- {
- case R.id.btnAdd:
- oper = "+";
- result = num1 + num2;
- break;
- case R.id.btnSub:
- oper = "-";
- result = num1 - num2;
- break;
- case R.id.btnMult:
- oper = "*";
- result = num1 * num2;
- break;
- case R.id.btnDiv:
- oper = "/";
- result = num1 / num2;
- break;
- default:
- break;
- }
- // form the output line
- tvResult.setText(num1 + " " + oper + " " + num2 + " = " + result);
- }
- }
Step 9
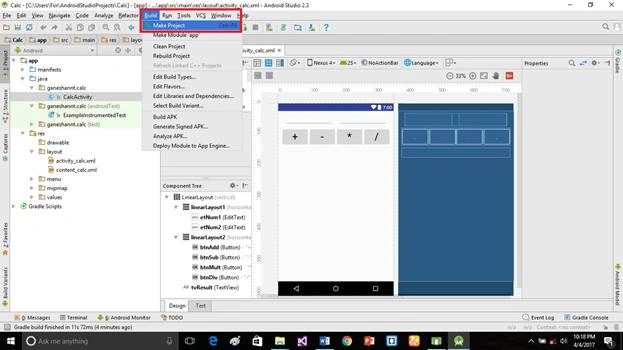
This is our user interface of the Application. Click Make project option.
Step 10
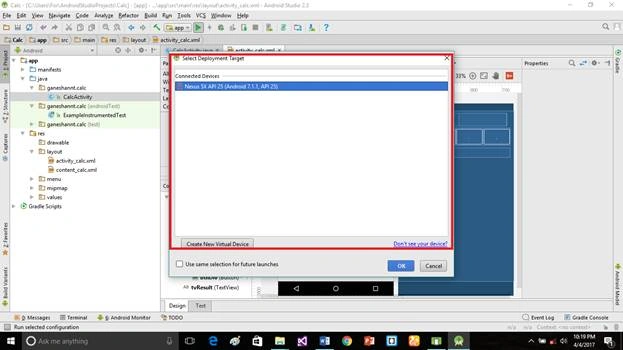
Run the Application, followed by choosing the virtual machine. Click OK.
Deliverables
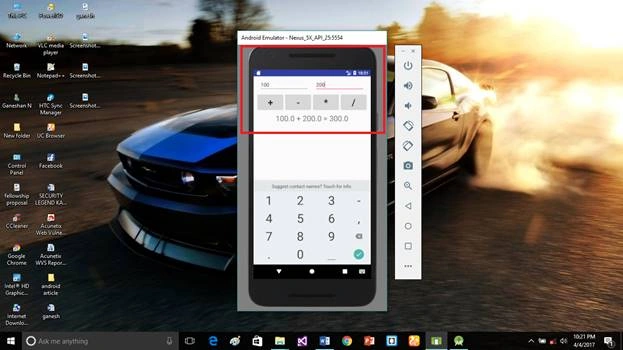
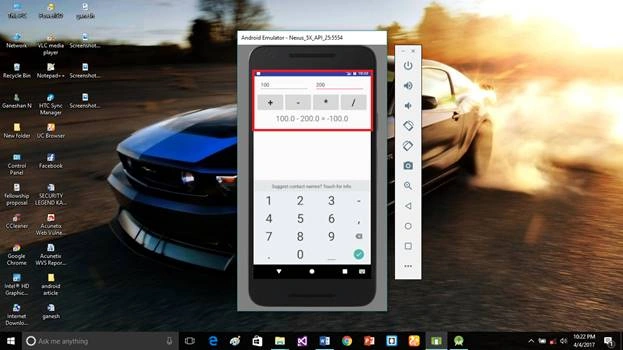
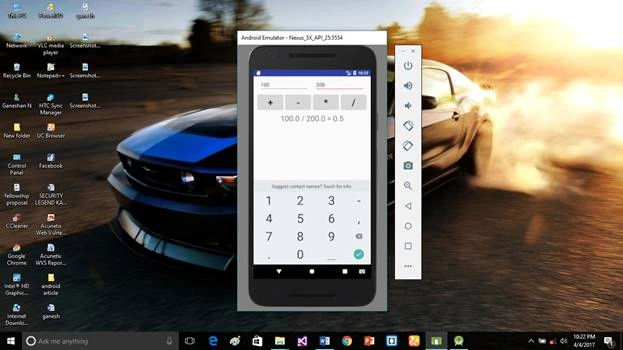
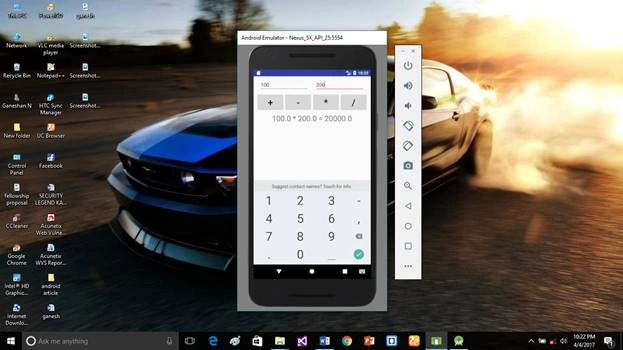
Here, we successfully created a Calculator app for an Android, using an Android Studio Application, which was created and executed.
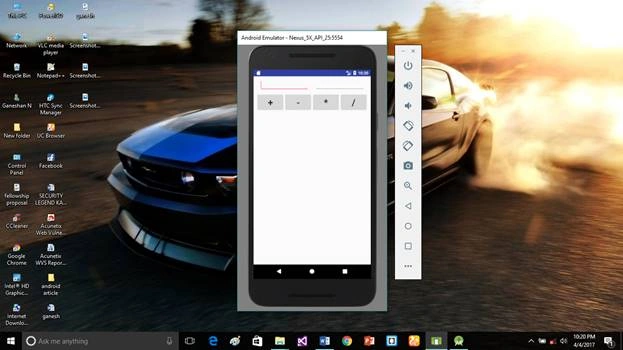
Addition operation
Subtraction operation
Divide operation
Multiplication operation
If you have any doubts, just comment below.
Join the conversation! Your thoughts help the community grow.