

This is my fifth article about learning Azure. I will recommend going through previous four articles (links are given below) on Azure,
This article is in continuation of a previous article - “Understanding Cloud Storage in Azure”, where we created a storage account and a Blob container with the name “images”.
In this article, I will explain about how we can create Blobs in Microsoft Azure using Azure APIs in C#.
Let’s get started.
- Create an ASP.NET MVC project – Open Visual Studio 2015, create a new project and select the ASP.NET Web Application project template, as shown below.
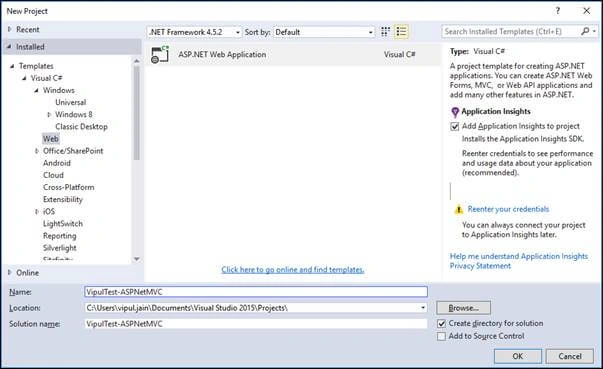
- Select the MVC Template.
- Add the Azure assemblies in the project using Nuget Manager
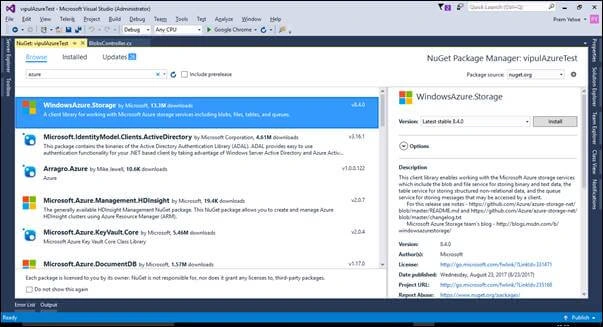
- Create an MVC Controller
In the Solution Explorer, right-click Controllers, and, from the context menu, select Add->Controller. On the Add Scaffold dialog, select MVC 5 Controller - Empty, and select Add.
Give a name to the controller class, I have given as BlobsController.cs.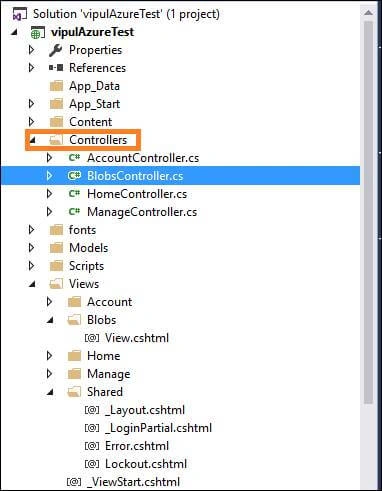
- Add the following using directives to the BlobsController.cs file
- using Microsoft.Azure;
- using Microsoft.WindowsAzure.Storage;
- using Microsoft.WindowsAzure.Storage.Auth;
- using Microsoft.WindowsAzure.Storage.Blob;
- Create a Blob Container
In BlobsController.cs file, follow the below steps for creating a Blob.
- Add a method called UploadBlobthat returns an EmptyResult.
- Within the UploadBlobmethod, get a CloudStorageAccountobject that represents your storage account information.

- Get a CloudBlobClientobject represents a blob service client.
- Get a CloudBlobContainerobject that represents a reference to the desired blob container name.
- As explained earlier, Azure storage supports different blob types. To retrieve a reference to a page blob, call the GetPageBlobReferencemethod. To retrieve a reference to a block blob, call the CloudBlobContainer.GetBlockBlobReferencemethod.
- Once you have a blob reference, you can upload any data stream to it by calling the blob reference object's UploadFromStream.
- In the Solution Explorer, expand the Viewsfolder, right-click Blobs, and from the context menu, select Add->View.
- In the Solution Explorer, expand the Views->Sharedfolder, and open _Layout.cshtml.
- After the last ActionLink, add the following Html.ActionLink,
<li>@Html.ActionLink("Upload blob", "UploadBlob", "Blobs")</li>
- Run the application, and select the “Upload Blob” from the screen, as shown,

- The complete code of the MVC application is shown below.

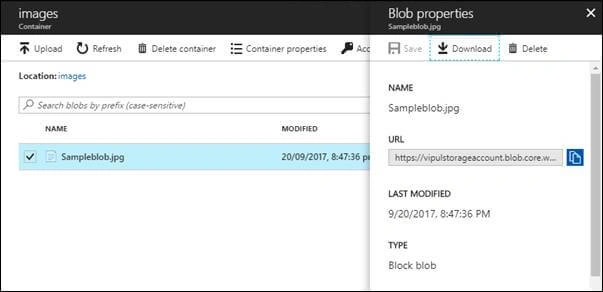
- Once you click on “Upload Blob” link, you will find that a Blob with the name “Sampleblob.jpg” (as given in code) is created in the Azure Portal, as shown below
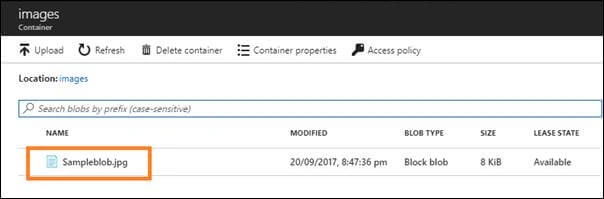
- Click on the Blob in Azure Portal and you will see all the properties related to that Blob. You will find the URL to access that blob over the Internet. In addition, you can download the Blob using the Download button.
I used my photo - Vipul.jpg (as shown in Visual Studio code above) as sample, for this test application and when downloaded from Azure (Blob), I got the below image,

Summary
In this article, we saw how we could upload a Blob in Azure using C#.
Join the conversation! Your thoughts help the community grow.