

In this article, we will learn how to create an ASP.NET Core MVC web application step by step. Prior to creating the application, let's know about the ASP.NET Core.
What is ASP.NET Core?
ASP.NET Core is an open-source cross-platform framework for developing and building web, cloud, and IoT applications.
Why should we use ASP.NET Core?
- ASP.NET is an open-source platform that runs on Microsoft .NET Core Framework.
- We can build and run the ASP.NET core application on a cross-platform environment such as Windows, macOS, Linux, etc.
- We can build modern apps such as Cloud, IoT, Web apps, mobile backend, etc. and those can be easily enabled to run over the cloud platform.
- We can host applications on any modern platform such as docker, AKS, or any environment.
- Saves the efforts of the developer with built-in features such as dependency injection, you can enable docker, containerization, and swagger support in just one click.
Now let's start creating an ASP.NET Core MVC web application.
Step 1. Open Visual Studio.
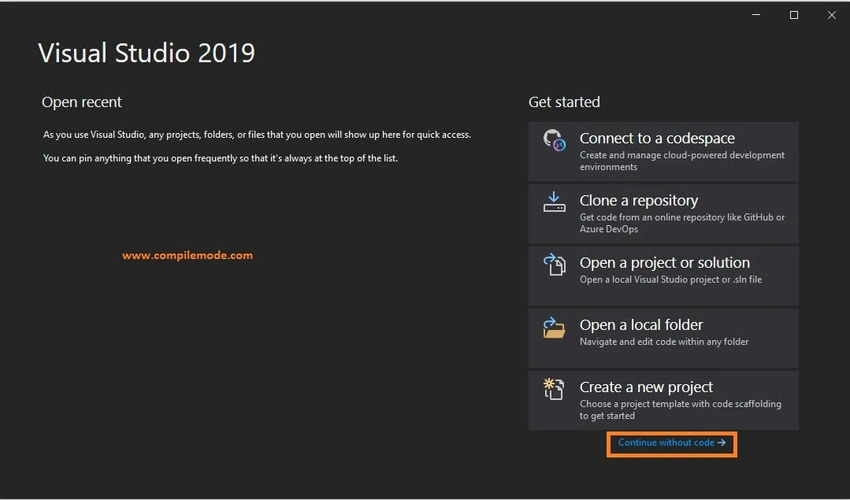
- Open Visual Studio ( I am using 2019)
- Once the Visual Studio Opens, Then click on Continue Without Code as shown in the following image.
- Then from the Visual Studio Menu, click on File => New Project, as shown in the following image.
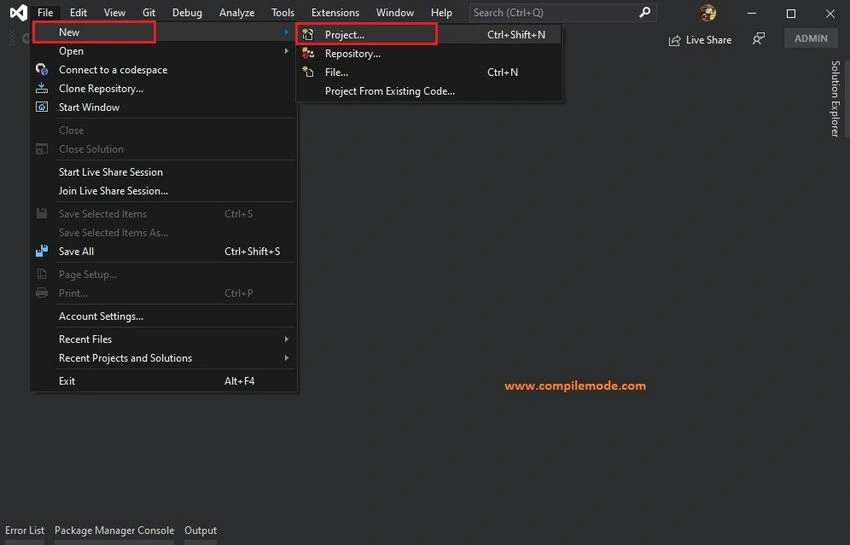
- Click on the New Project, then the following window appears as shown in step 2.
Step 2. Choose Project Template.
You will see the two project templates.
- ASP.NET Core Web App: This project template creates the web application with Razor pages without a Model, View, or Controller.
- ASP.NET Core Web App (Model-View-Controller): This project template creates the web application with Model, View, Controller (MVC).
Choose the ASP.NET Core Web App(Model-View-Controller) Template as shown in the following image.
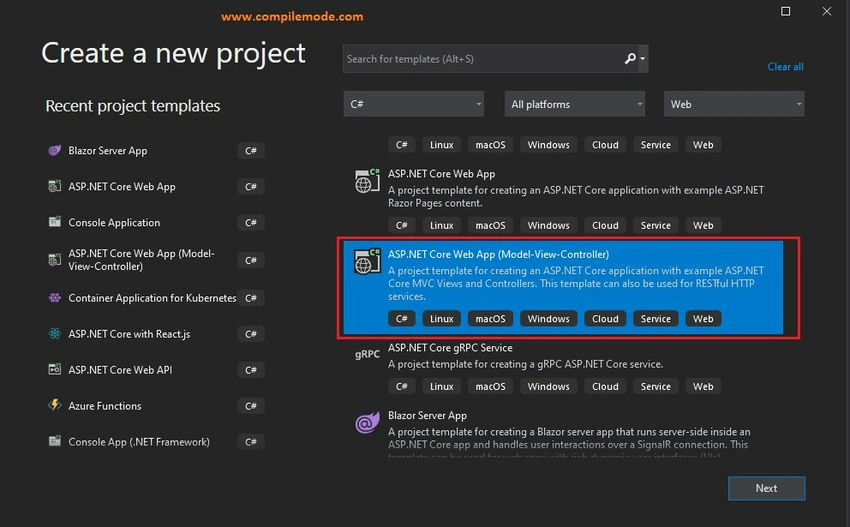
After choosing the project template click on Next.
Step 3. Define Project Name and Location.
In the project configuration window, you will see the following options.
- Project Name: Define any name for your project as per your choice.
- Location: Choose the location to save the project files on your hard drive of the machine. I have chosen the Project/VS folder of the E drive of the machine, and obviously, it's different on your computer.
- Solution Name: The solution name is auto-defined based on the project name, but you can change the name based on your own choice.
Additionally, there is a checkbox, if you have checked it, then the solution file (.sln) and project files will be saved in the same folder. Now Choose the minimum details for ease of understanding as shown in the following image.
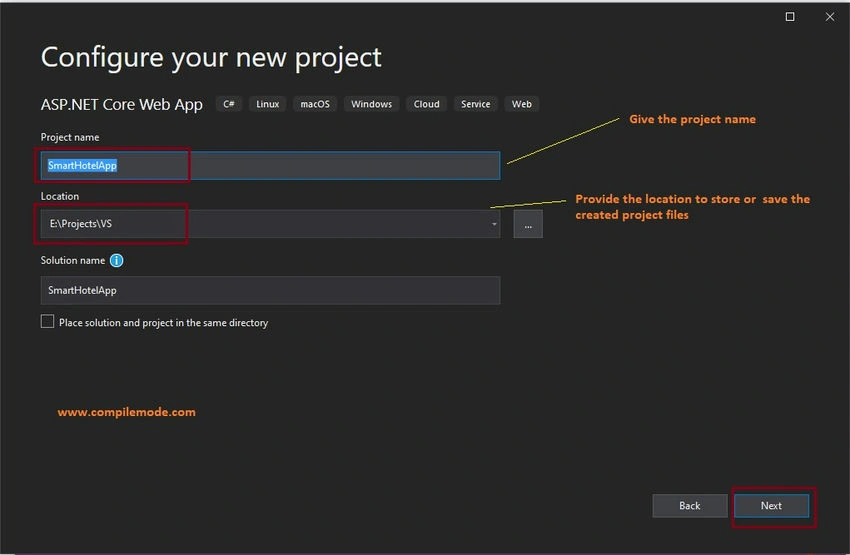
After defining the required details, click on the Next.
Step 4. Choose the Target Framework.
Choose the target framework .NET 5 which is the latest or you can choose based on your requirements, skip the other details for ease of understanding as shown in the following image.
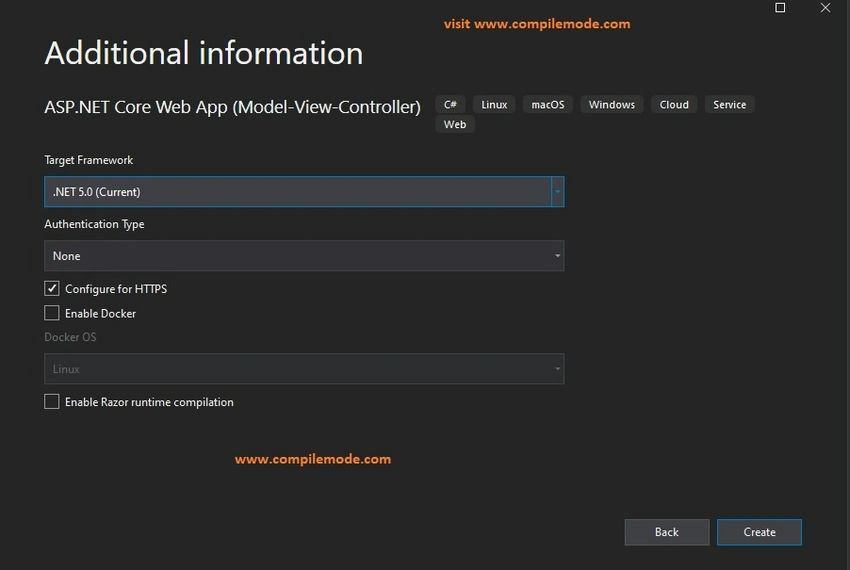
After providing the required details, click the create button. It will create the ASP.NET Core MVC web application as shown in step 5.
Step 5. Understanding ASP.NET Core MVC Folder Structure.
The following is the default folder structure of the ASP.NET Core ASP.NET MVC application.
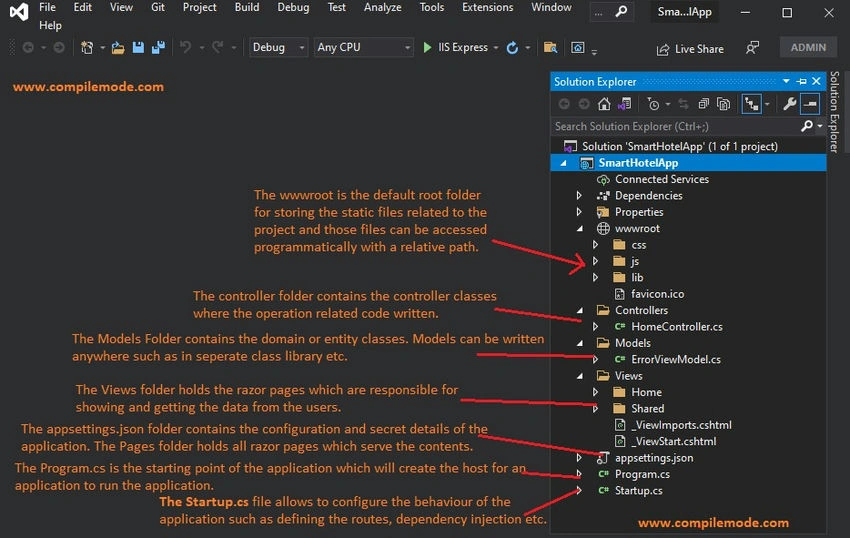
Let's understand the preceding project folder structure in brief.
- The wwwroot folder: The wwwroot is the default root folder for storing the static files related to the project and those files can be accessed programmatically with a relative path.
- Controller Folder: The controller folder contains the controller classes where the operation-related code is written.
- Model Folder: The Models Folder contains the domain or entity classes. Models can be written anywhere in the solution such as in a separate class library or folder etc.
- Views Folder: The Views folder holds the razor pages which are responsible for showing and getting the data from the users.
- The appsettings.json File: The appsettings.json folder contains the configuration and secret details of the application.
- Program.cs File: The Program.cs is the starting point of the application which will create the host for an application to run the application.
- Startup.cs File: The Startup.cs file allows to configuration of the behavior of the application such as defining the routes, dependency injection, etc.
Step 6. Run the ASP.NET Core MVC Application.
You can run the application with default contents or let open the Index.cshtml file and put some contents there. Now press F5 on the keyboard or use the run option from Visual Studio to run the application in the browser. After running the application, it will show in the browser as shown in the following image.
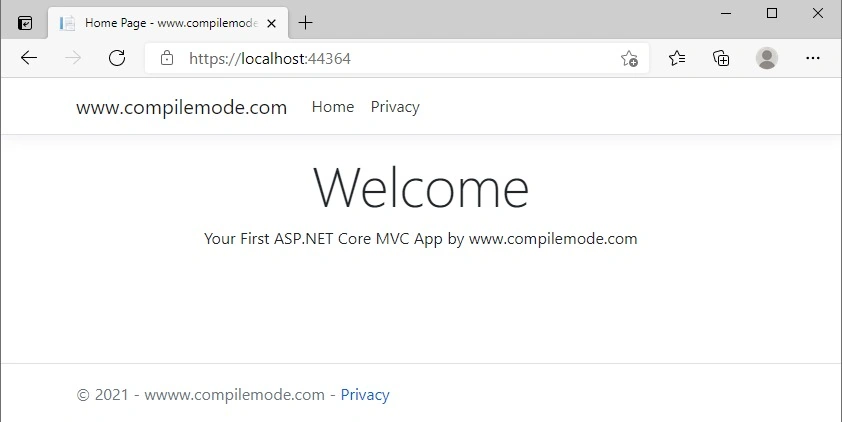
I hope from the preceding step-by-step demonstration, you have learned how to create the ASP.NET Core MVC Web Application.
Summary
I hope this article is useful in understanding how to create an ASP.NET Core MVC web application. In the next article, we will learn how to perform the CRUD operation in an ASP.NET Core MVC application.
Read more articles on ASP.NET.
Join the conversation! Your thoughts help the community grow.