

Article Overview
Prerequisites
Create local project
Create New Project
Run function locally
Deploy and execute function in Azure
Sign in to Azure
Create resources in Azure
Deploy project to Azure
Run function in Azure
Clean up resources
Summary
In this article let’s walk through the full process of creating, testing, and deploying an Azure Function in C# using Visual Studio Code. First a new project will create and function is executed locally. After that function is deploy and execute in Azure (Create resources in Azure - Deploy project to Azure - Run function in Azure). At the end, resources will clean up. Let's go step-by-step.
1. Prerequisites
Following things are required before start:
Visual Studio Code
.NET 8 target framework.
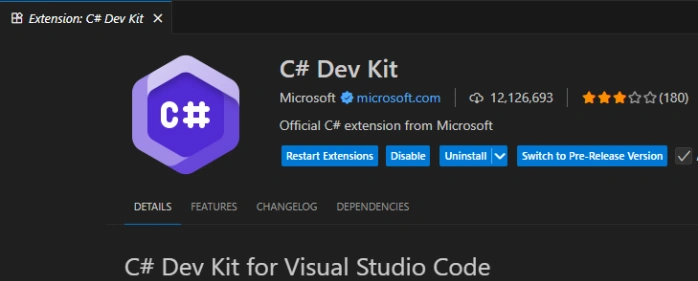
C# Dev Kit for Visual Studio Code
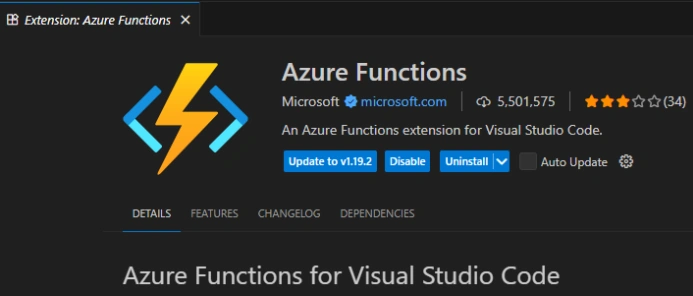
Azure Functions Extension for Visual Studio Code
Azure subscription - for the deployment
Azure Functions Core Tools version 4.x. Execute the below commands in the terminal to install Azure Functions Core Tools.
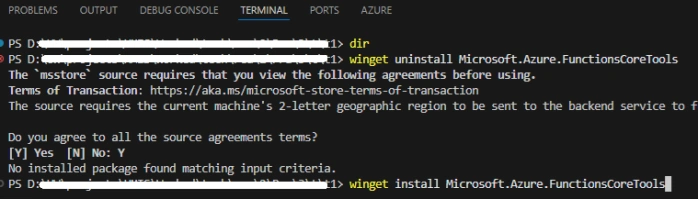
winget uninstall Microsoft.Azure.FunctionsCoreTools
winget install Microsoft.Azure.FunctionsCoreTools
2.Create local project
Let’s first create new Azure Function local project and run the function locally.
In this section following two activities will be performed:
2.1. Create New Project
2.2. Run function locally
2.1. Create New Project
To create a new project step by step provide the appropriate information:
Open Visual Studio Code, open the command palette either press F1 or Ctrl + Shift + P or go to View and than click on Command Palette.

Search and run the command Azure Functions: Create New Project.…

Select project directory location for project workspace and choose Select.

Folder selection for function project - Select Browse... and than select a folder path of app.
Language selection - Select C#

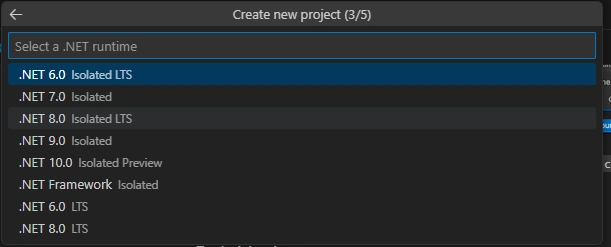
.NET runtime selection - Select .NET 8.0 Isolated.
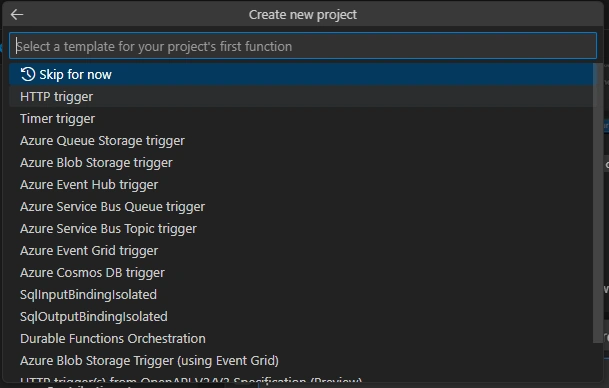
Template select for project's first function - Select HTTP trigger. Depending on VS Code settings, one can change template filter option.
Function name provide - Enter HttpExample = HttpTrigger1

namespace provide - Enter My.Function = Company.Function

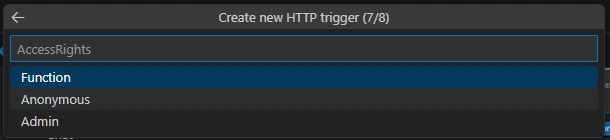
Authorization level selection - Select Anonymous, to enable anyone function endpoint call.
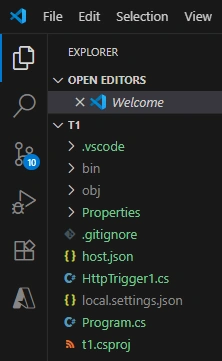
Based on the provided details Visual Studio Code will generate an Azure Functions project with HTTP trigger. Below is the file and folder structure for the created new project.
2.2. Run function locally
Azure Functions Core tools allows to run the project on local development before publish to Azure from Visual Studio Code.
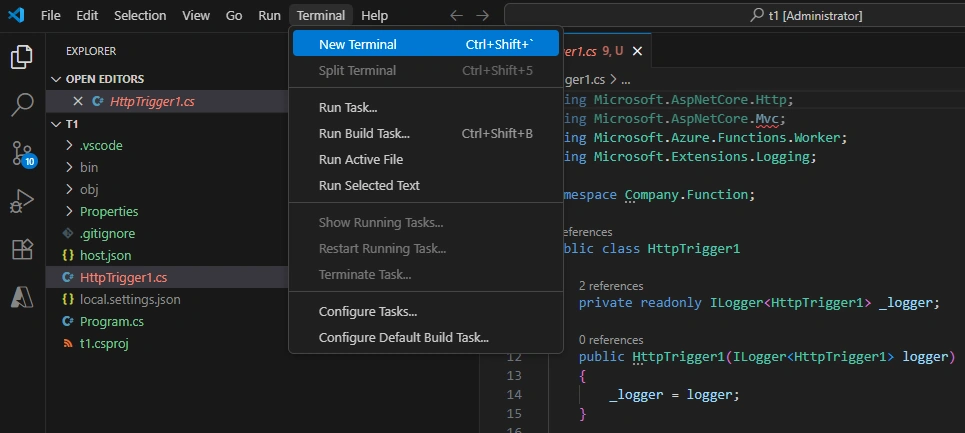
Open New Terminal in Visual Studio Code. Go to Terminal menu bar and then click on New Terminal.
Start Debugging by pressing F5 in Terminal panel or Go to Run menu bar and then click on Start Debugging.

Output: App starts in Terminal panel and output will be displayed in Terminal panel. It shows the URL endpoint of the HTTP-triggered function which are running locally.
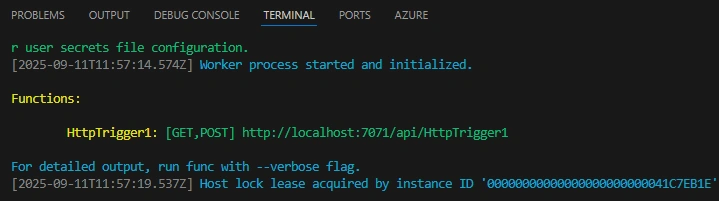
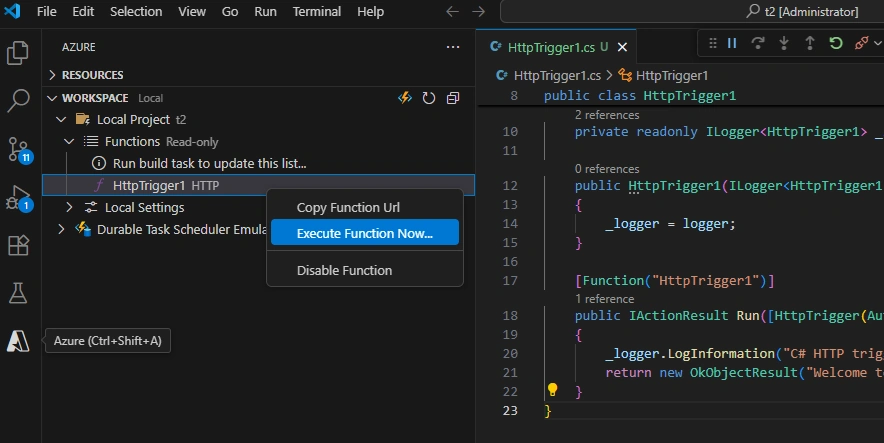
Execute Function from Azure extension by clicking on Azure extension than expand to Workspace section with Local Project and Function option. Now right click HttpTrigger1 and select the option Execute Function Now…
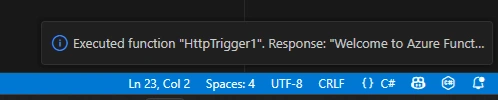
Enter request body by typing in request message body value of { "name": "Azure" } and than press Enter key to send typed request message to the function.

Output: While executing function locally it returns a response as a notification at bottom right notification bell icon. To view the notification select notification bell icon. Function execution details shown in Terminal panel.
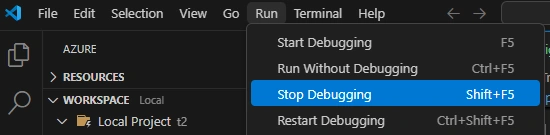
Stop Debugging by press Shift+F5 in Terminal panel or Go to Run menu bar and then click on Stop Debugging. Debugger will be disconnected.
3.Deploy and Execute Function in Azure
Once function runs correctly locally and verified then next task it to publish them to Azure. For that first Sign in to Azure to create resources than deploy the project to Azure to run function in Azure.
In this section following four activities will be performed:
3.1. Sign in to Azure
3.2. Create resources in Azure
3.3. Deploy project to Azure
3.4. Run function in Azure
3.1. Sign in to Azure
Sign in to Azure is mandatory to publish the app. Follow the following steps to Sign in to Azure:
Click on Azure extension and than expand to Resources section and click on Sign in to Azure …
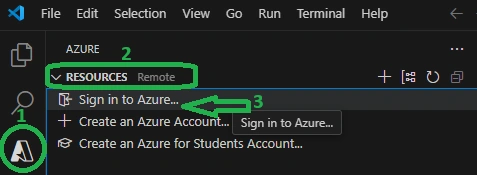
Select login Azure account and sign in using Azure account credentials. Azure account will be displayed in to Side bar.
3.2. Create resources in Azure
Now create the Azure resources which is required to deploy the local function app. Perform the below steps:
Click on Azure extension and than expand to Resources section and click on + button i.e. Create resource button.
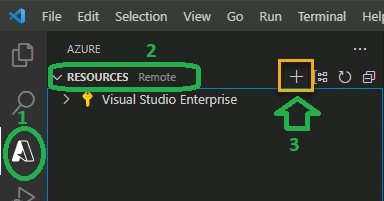
Step by step provide the appropriate information to create various resources in the Azure subscription based on function app name. i.e. provide proper action to respective prompt:
Resource selection - Select Create Function App in Azure...
Subscription selection - Select subscription to use.
Function app name - Enter globally unique name for function app Type name which is valid in a URL path, for example myfunctionapp. This name must be unique.
Location selection - Choose location for new resources. Select a region near to you for the better performance.
Runtime selection - Choose runtime stack. Select .NET 8.0 Isolated.
Resource authentication - Select resource authentication type. Select Secrets.
Azure extension will shows the status of individual resources which are being created in the AZURE area of the terminal window. Following Azure resources will be created in the subscription using names based on given function app name:
Resource group - It is a logical container for related resources.
Standard Azure Storage account - It maintains states and other information about the project.
Flex consumption plan - It defines the underlying host for the serverless function app.
Function app - It provides the environment for executing the function code. It groups all the functions as a logical unit for easier management, deployment, and sharing of resources within same hosting plan.
3.3. Deploy project to Azure
Once resources are created one can deploy project to Azure using following steps:
Press F1 or Ctrl + Shift + P or go to View and than click on Command Palette to open the command palette. Search and run the command Azure Functions: Deploy to Function App.…
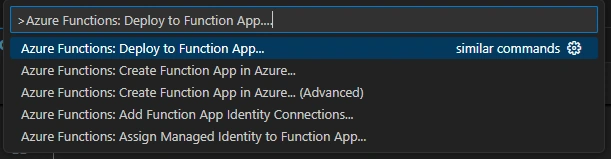
Select subscription which is being used during resources creation.
Select the created function app. Select Deploy option to deploy the function code to the new function app resource during overwriting previous deployments.
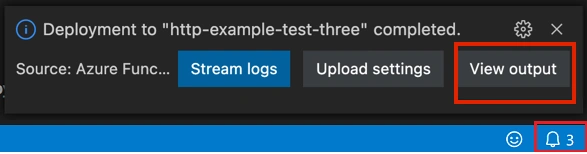
Once deployment completes, one can view the details of the deployment using View Output. Previous deployments will be overwrite during the publishing to existing function.
3.4. Run the function in Azure
This is similar as described in previous "Run function locally" section.
In side bar select the Resources area and expand function app and Functions. Now right-click to HttpExample function and select Execute Function Now....
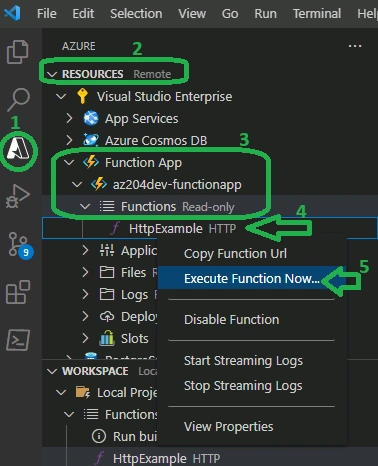
Enter request body by typing in request message body value of { "name": "Azure" } and than press Enter key to send typed request message to the function.
Output: While executing function it returns a response as a notification at bottom right notification bell icon. To view the notification select notification bell icon. Function execution details will be shown in Terminal panel.
4. Clean up resources
Once finished the exercise it’s recommended to delete cloud resources are being created to avoid the unnecessary resource usage and any future costs. Deleting a resource group will delete all resources contained within it.
In Visual Studio Code, select the Azure icon to open the Azure explorer.
In the Resource Groups section, select resource group to be deleted.
Right-click to selected resource group and select Delete.
5. Summary
Here, full process of creating, testing, and deploying an Azure Function in C# using Visual Studio Code is describes. First a new project is created and function is executed locally. After that function is deployed and executed in Azure (Create resources in Azure, Deploy project to Azure, Run function in Azure). Finally, resources are cleaned up.
Bhavik ChovatiyaPosted Nov 15, 2025, 6:26 AM
"Excellent guide! The step-by-step explanation of creating Azure Functions using Visual Studio Code is clear and practical. I really appreciate how you covered prerequisites, local development, and deployment to Azure in detail. Highlighting the benefits of serverless architecture and the simplicity of VS Code integration makes this post very helpful for developers. Great resource for anyone looking to build scalable and cost-effective solutions with Azure Functions!"
Jay PatelPosted Nov 11, 2025, 10:52 AM
Easy to understand like it.