

This article discusses Microsoft Azure in general, its offerings of services based on IaaS, PaaS, and SaaS. We will then learn about Virtual Machines and their importance in Cloud. The article mainly focuses on hands-on experience to create a virtual machine ( VM ) in Microsoft Azure.
C# Corner is organizing a week-long virtual Event on Azure. Check out the official website of the Azure Summit 2021 to register as an attendee or to be a speaker and share your knowledge with the community.
Microsoft Azure
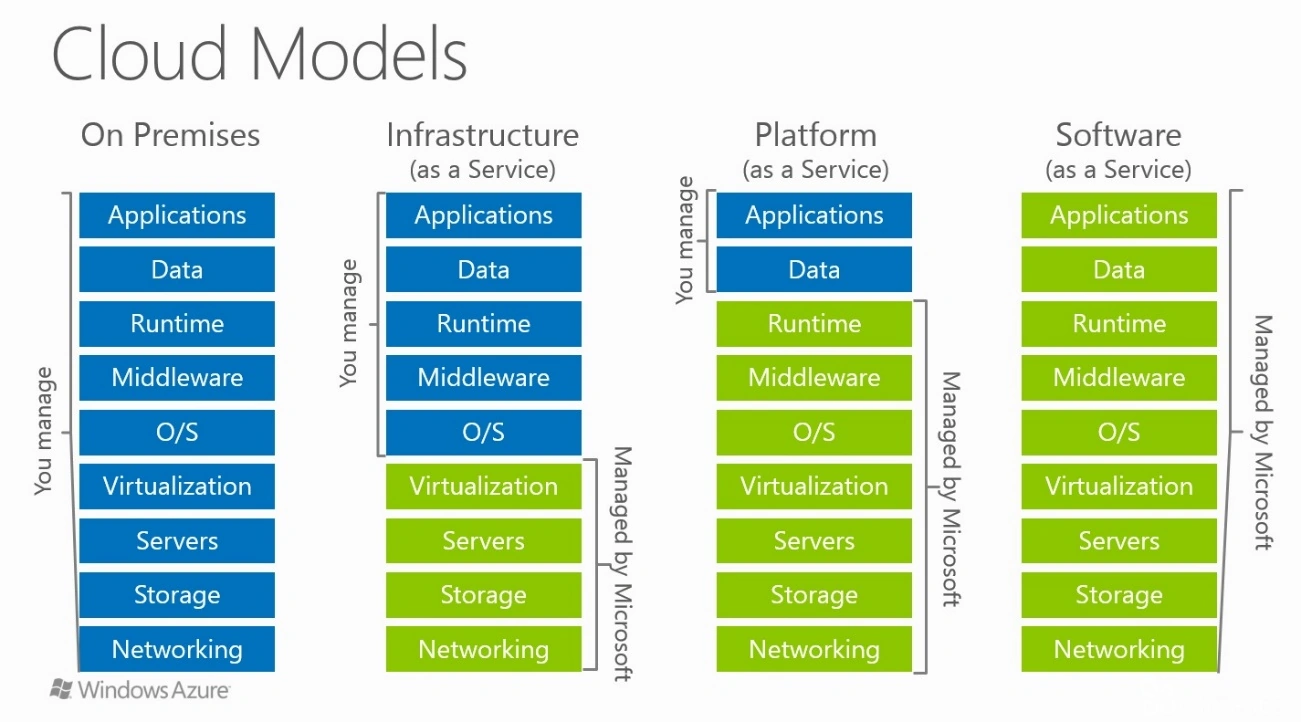
Azure is a cloud computing service developed by Microsoft which enables organizations and individuals to build, test, deploy and manage their applications in high availability and rapidly scalable platform with unparalleled security offerings and benefits in comparison to the traditional on-premises infrastructure.
Azure provides different options for various use case scenarios for the convenience of the user.
-
Infrastructure as a service (IaaS)
Azure provides an IAAS service option where users can access computer resources through virtualization. This saves organizations upfront cost having to invest to purchase the system thus the need to allocate huge sum early on. -
Platform as a service (PaaS)
With PaaS, Azure provides a platform to it clients which enable organizations to develop, run and maintain management of various application while the user doesn’t need to worry about the need to build and maintain the system resources. Azure App Services is an example of PaaS. -
Software as a service (SaaS)
SaaS in Azure enables users to use cloud-based apps and a multitude of tools of Microsoft. The hosted applications come under the SaaS feature of Azure.
Virtual Machines in Azure
A virtual machine is the emulation or virtualization of an entire computer system. The Virtual Machines (VM) performs like a physical computer system altogether. Software such as VMware has enabled virtual machines since 1998. Today, in order to fulfill the needs of organizations to set up databases and increase computer power from virtual machines, Azure Portal provides browser-based easy to use platforms to create and use Virtual Machines in Azure. With cloud computing like Microsoft Azure, it has never been this easier to deploy various copies of the same virtual machines to improve load handling. It is flexible and easier than having to take care of a physical server and installing OS on our own. Let us create a Virtual Machine (VM) using Azure Portal.
Step 1
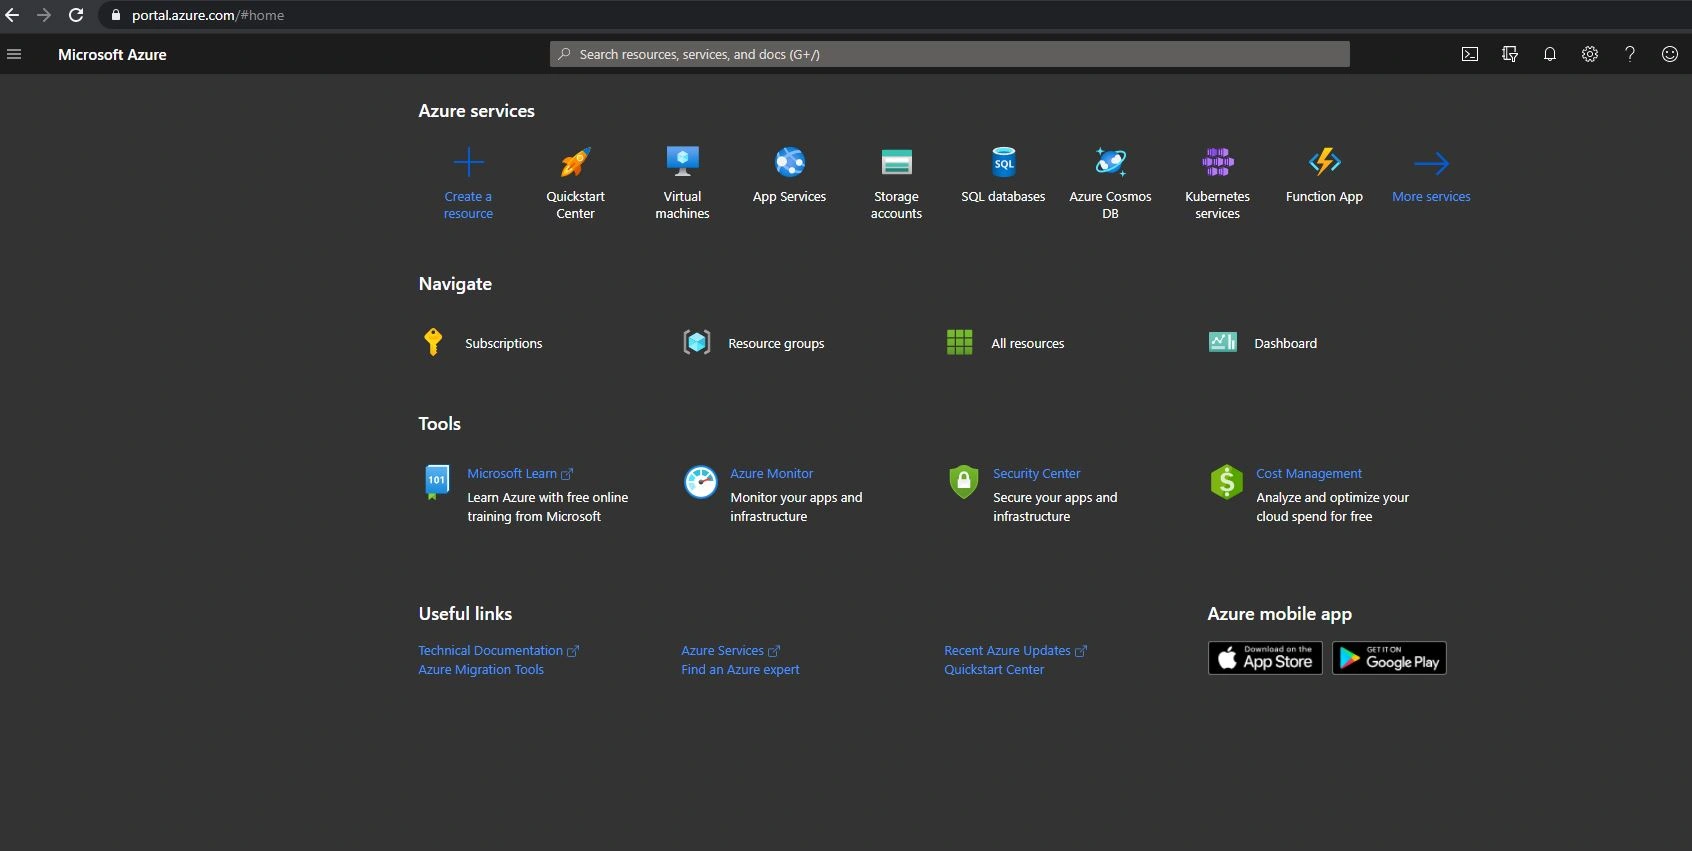
Firstly, Sign in to your Azure Portal. You’ll land on this page once you sign up.
Step 2
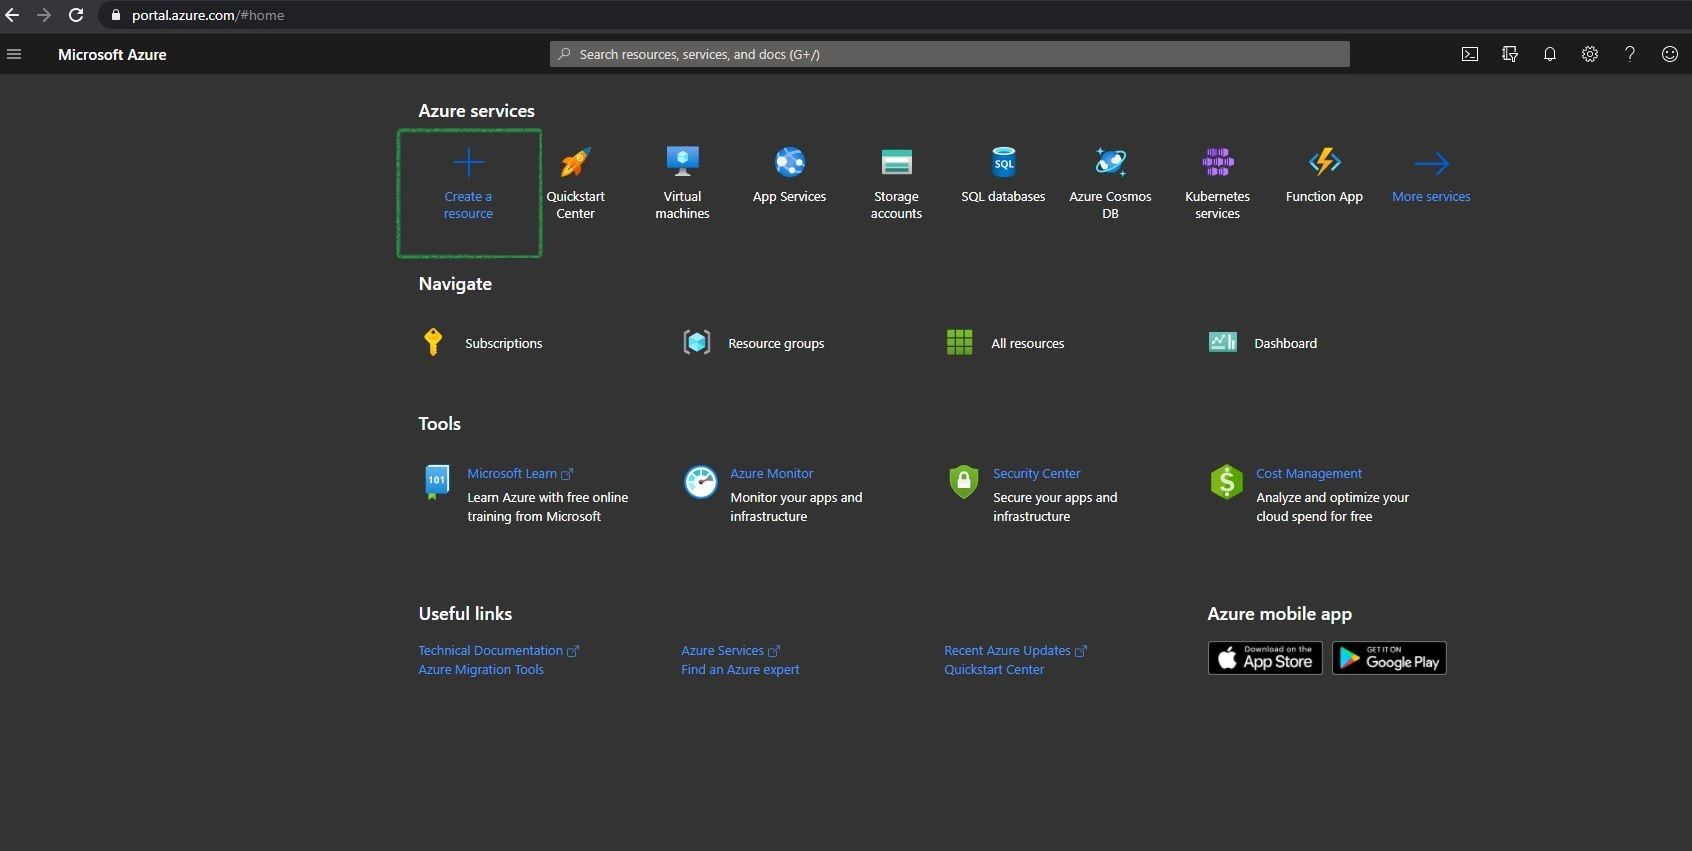
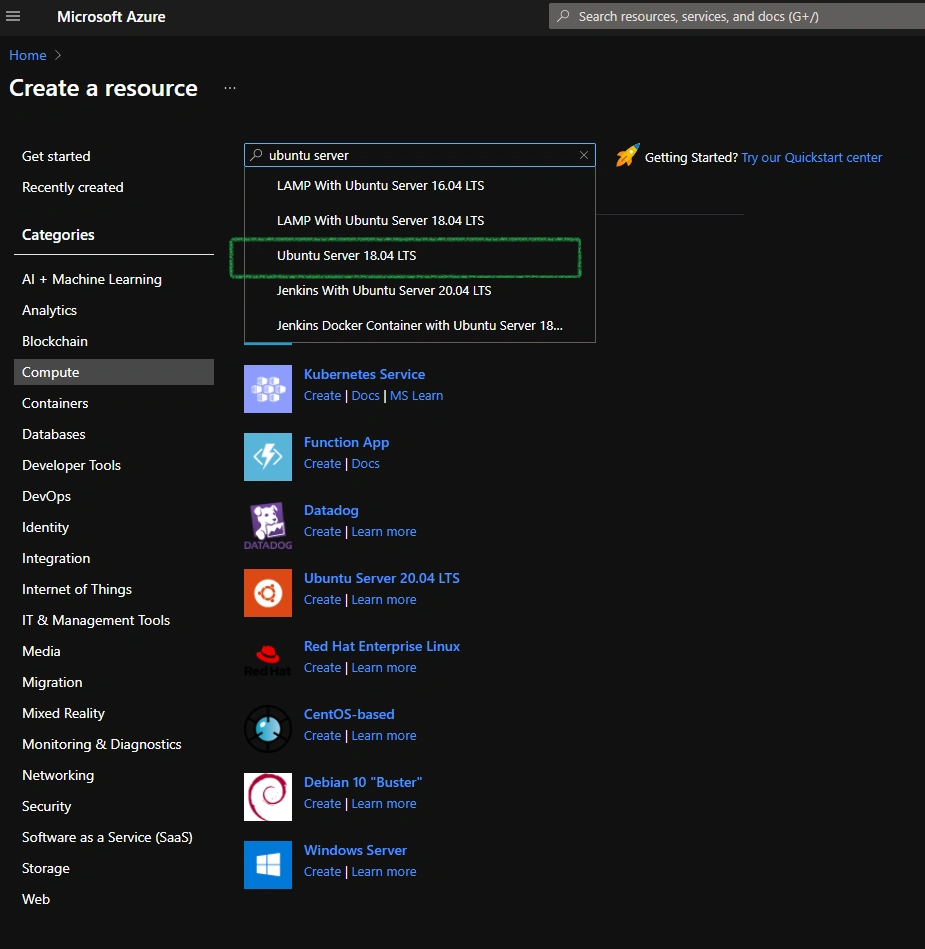
Click on Create a resource
Step 3
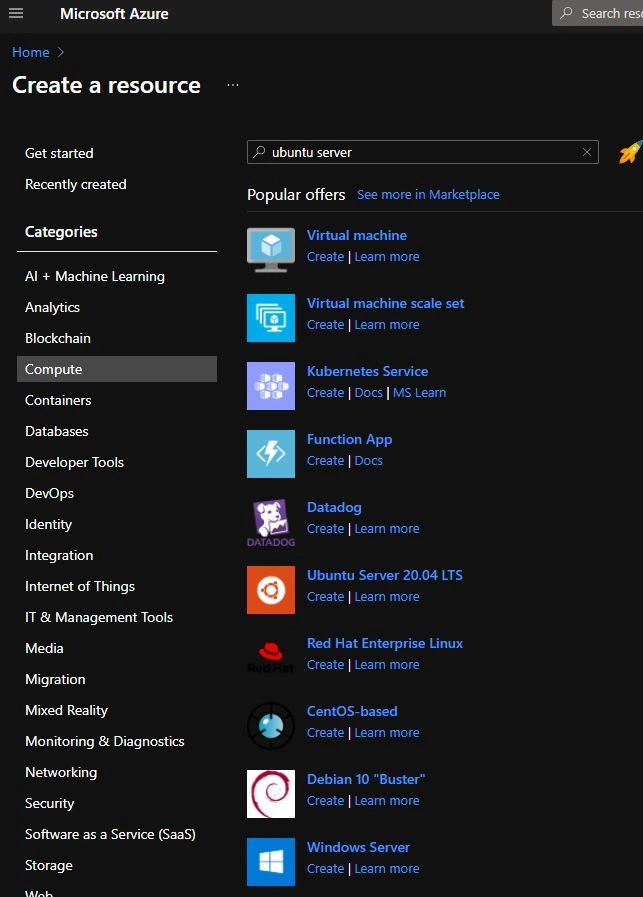
Now, choose to Compute in the Categories section on the left of the screen.
Step 4
Type in Ubuntu Server, on the search bar and Select Ubuntu Server 18.04 LTS
Step 5
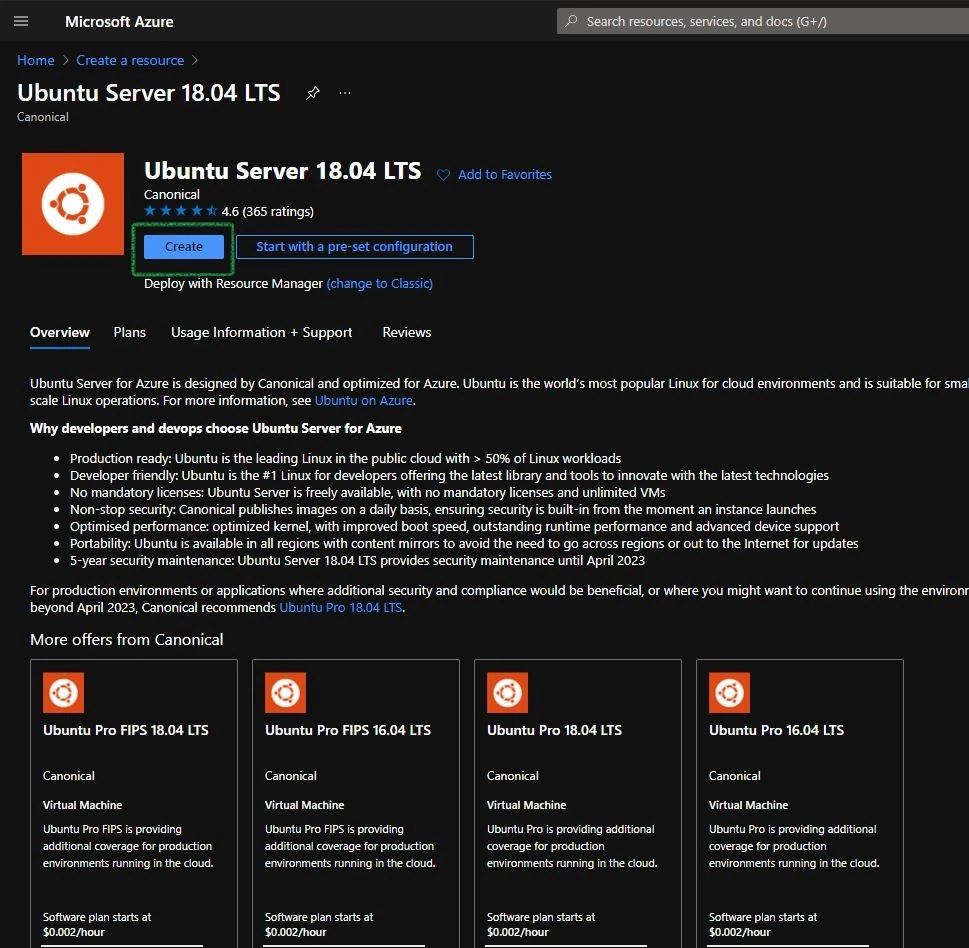
You’ll be led to Ubuntu Server 18.04 LTS Page. Now Click on Create.
Step 6
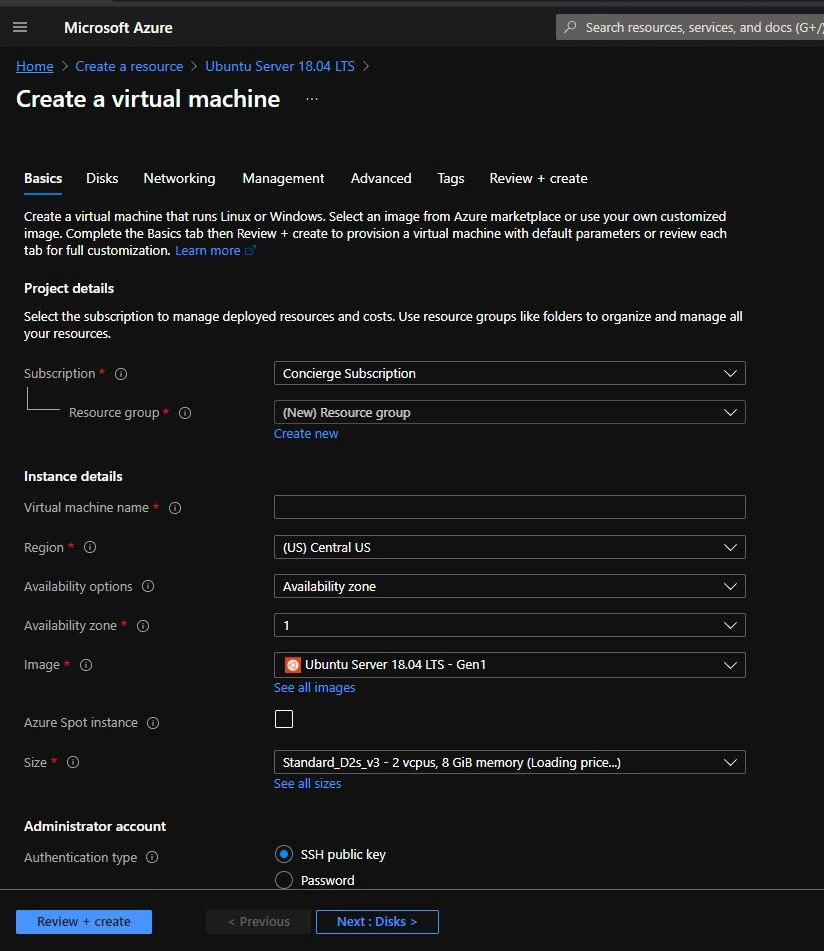
Fill in the details for your subscription, Virtual Machine Name, and Select the Region for the server nearest to your geographical location. Choose Ubuntu Server 18.04 LTS – Gen 1 in the Image and the Size of the server as per the need. Click on See all sizes to find your suitable need.
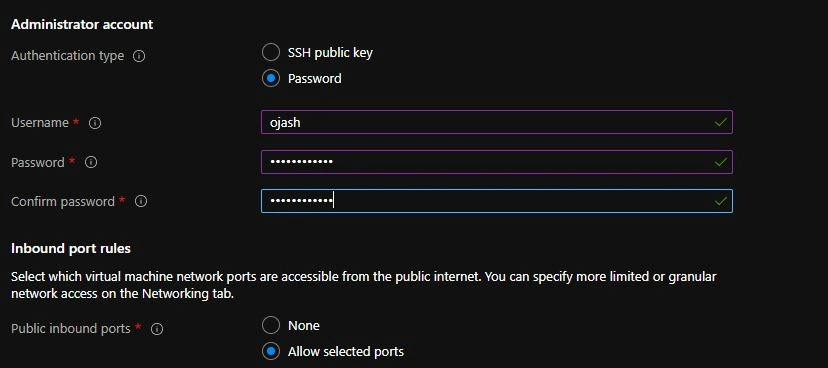
Fill in your Username and Password and retype the password to confirm it. The Tick Checkmarks on the left of the bar will confirm it once validated as per security level.
Step 7
Azure will validate your choices. Now click on Review and Create to review your choices and then click on Create.
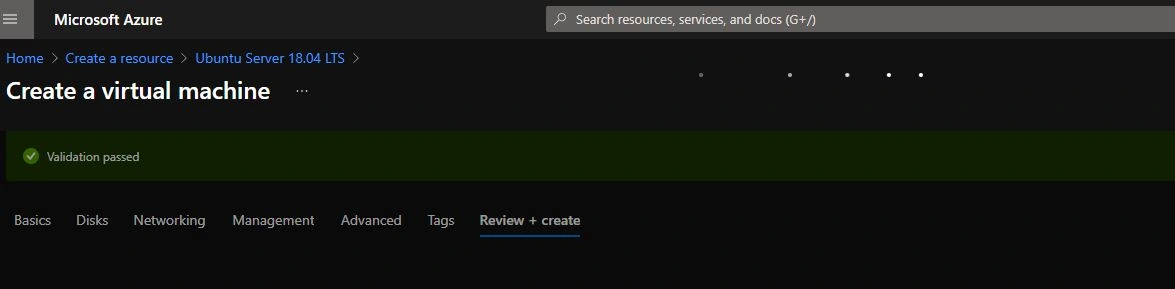
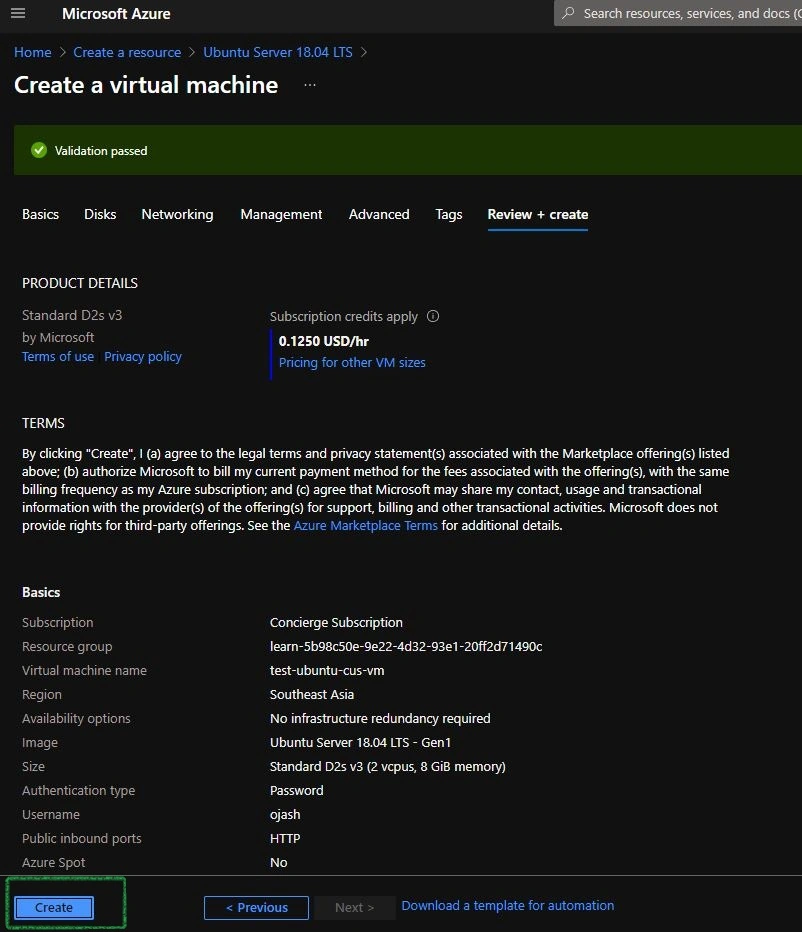
Step 8
Once you click on Create, the system will deploy your submission. A process in the notification bar can be seen.
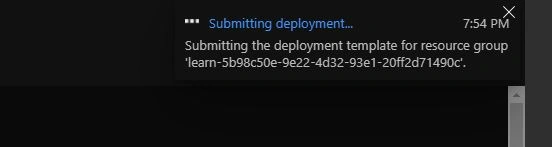
You can check out the progress of deployment in detail.
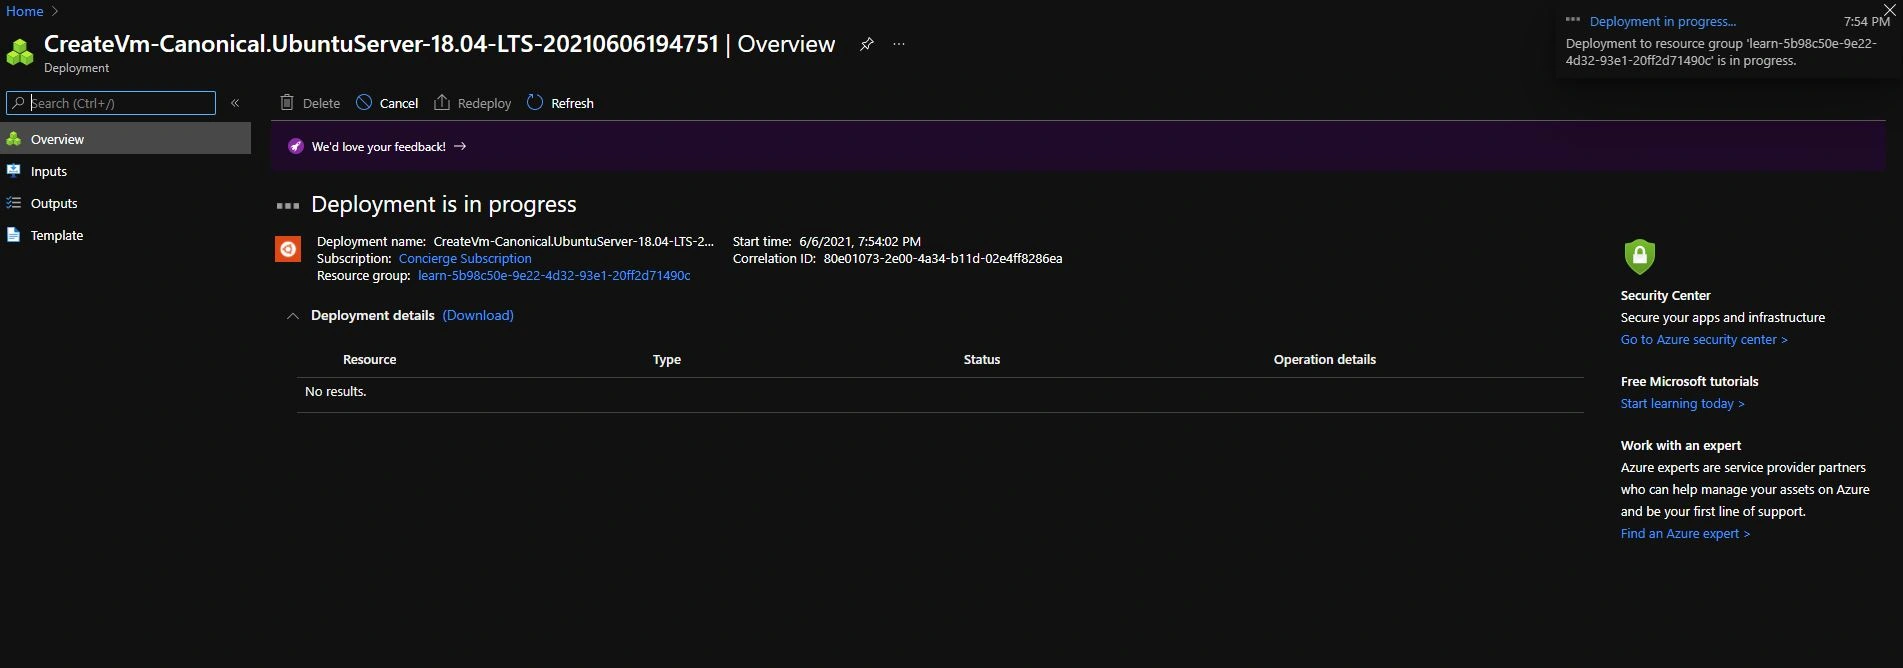
Step 9
Once the deployment is complete, you will be notified and you can check out your resources.
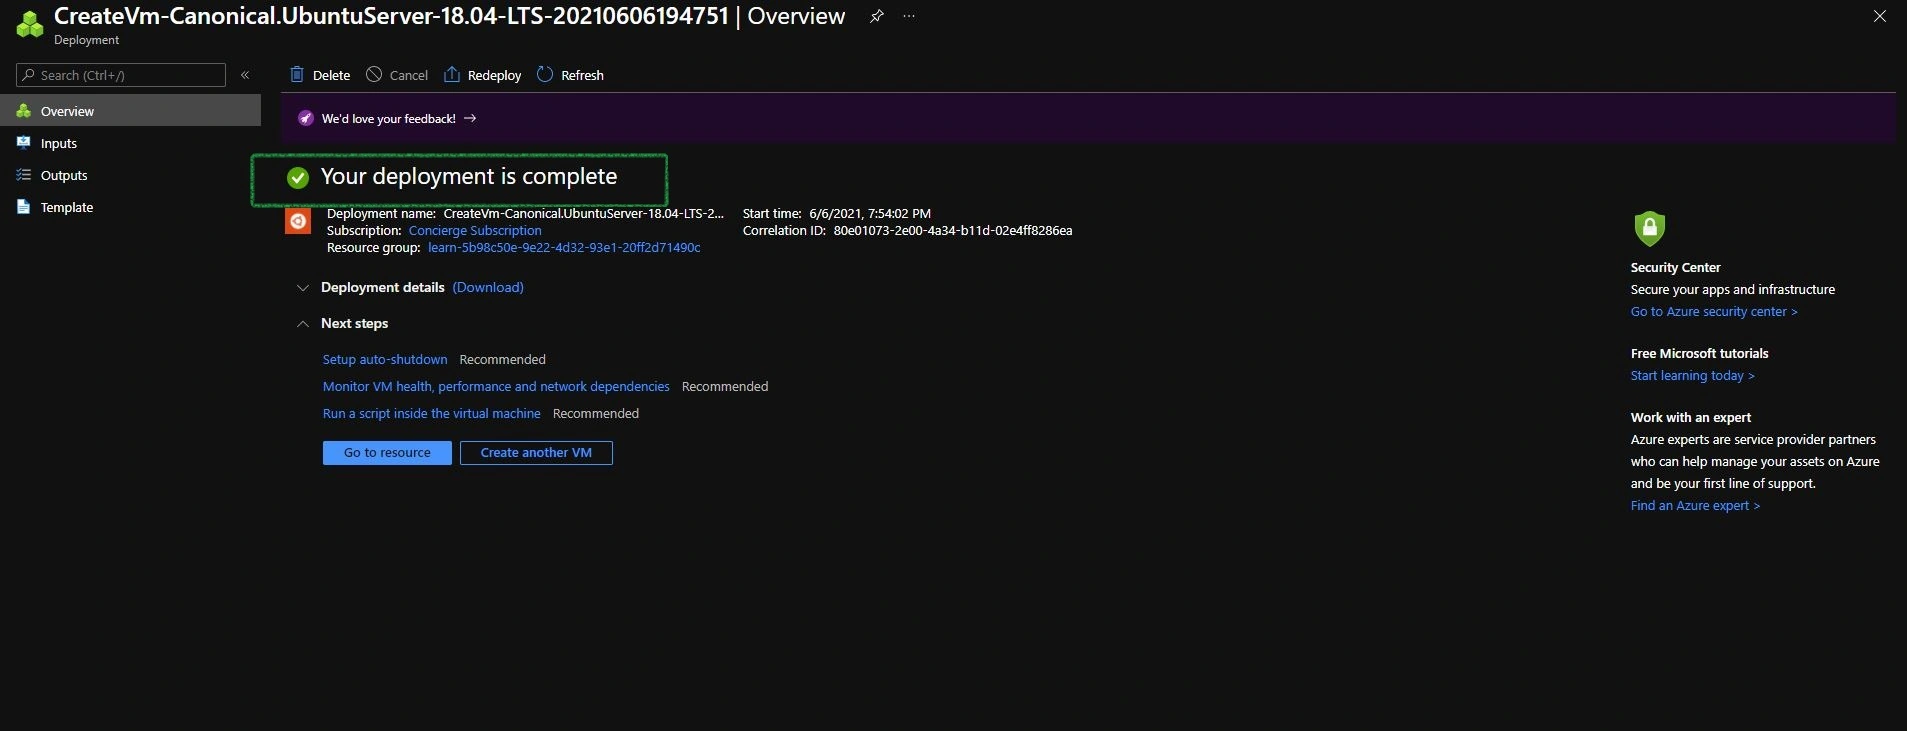
Your Virtual Machine is ready for usage.
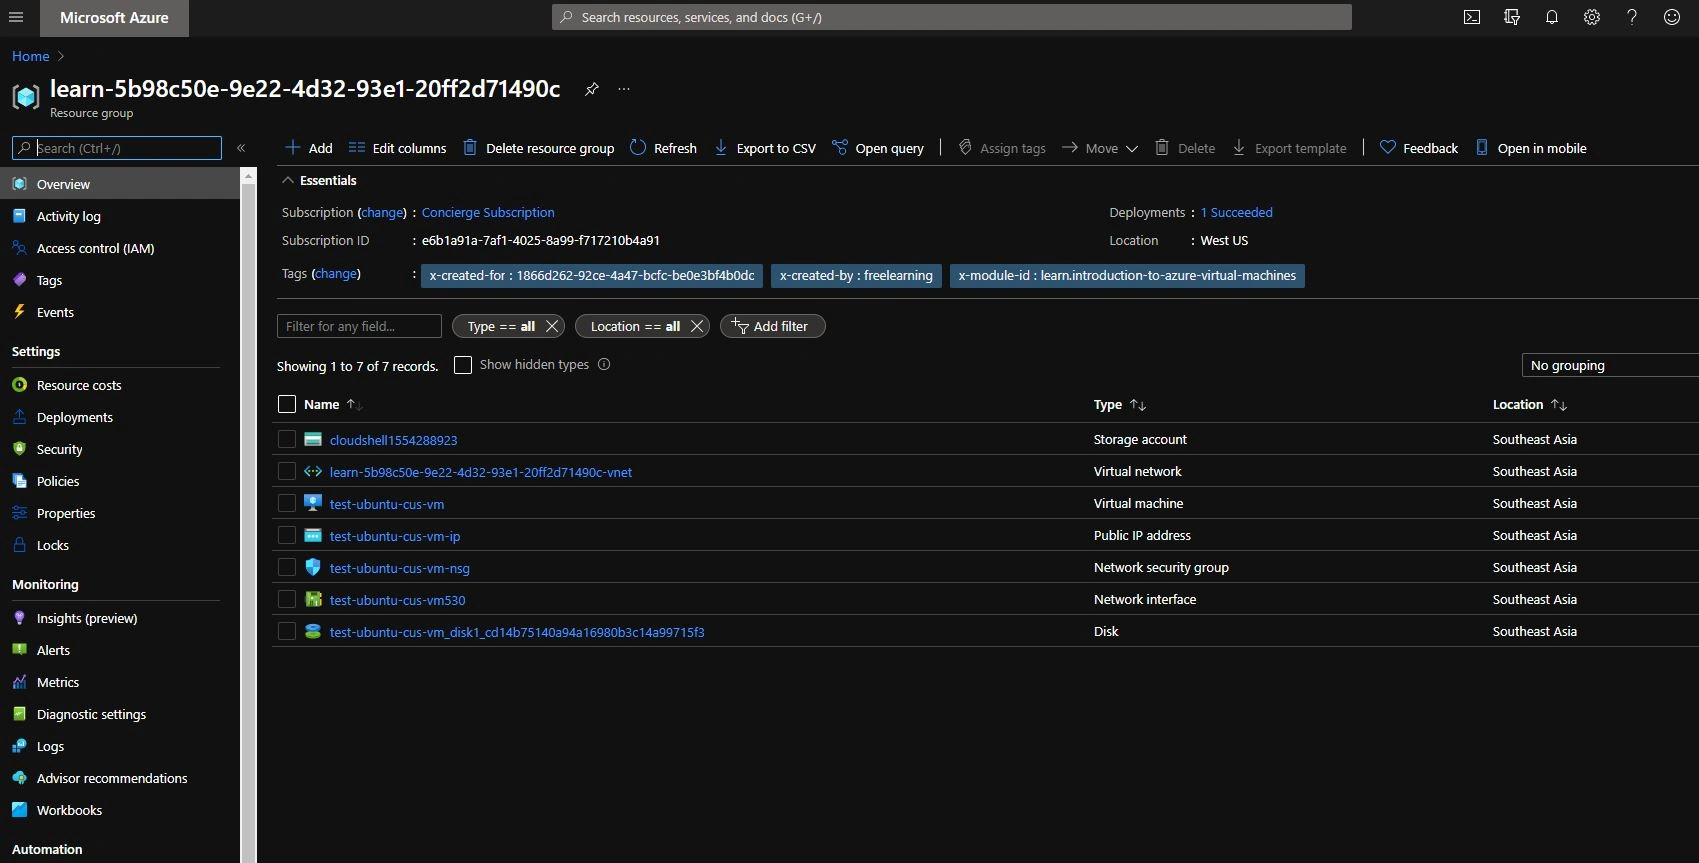
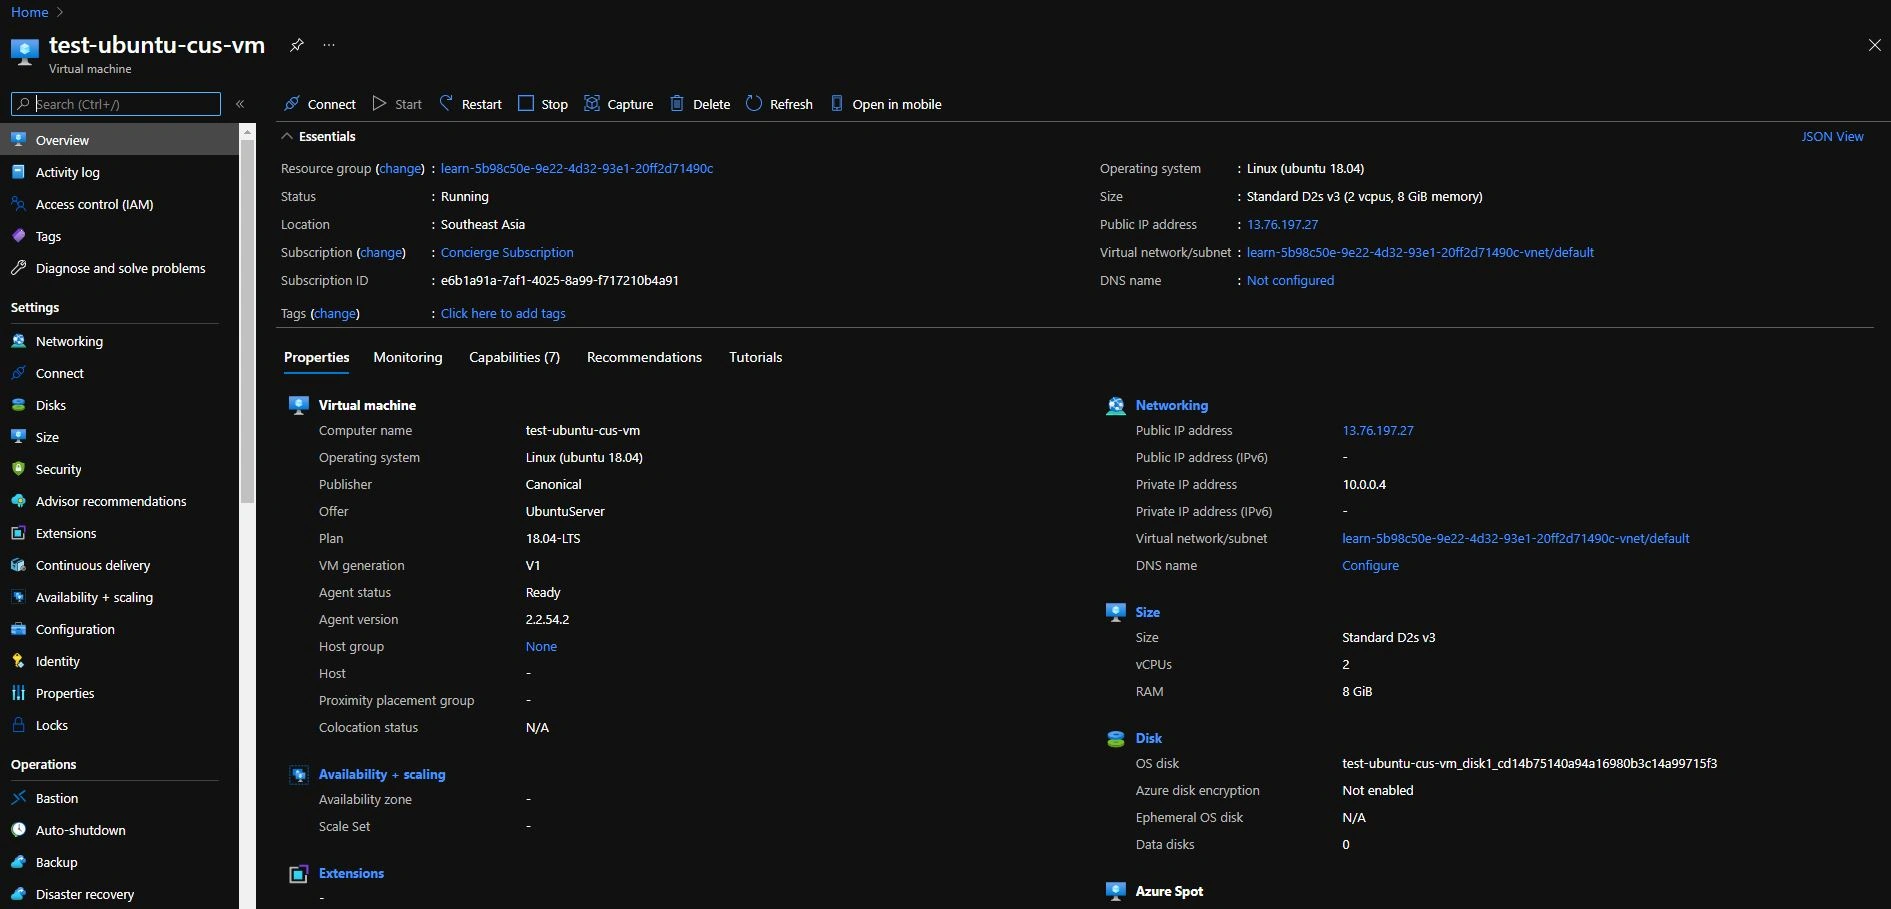
In this article, we learned about various IaaS, PaaS, and SaaS service options in Azure. We then learn about Virtual Machines, its need and then went on to a hands-on tutorial to create a virtual machine in Azure. Following these steps, you can easily create virtual machines as per your need. If you want to learn and try this out without an Azure Subscription, you can also check it out using Sandbox from Microsoft Learn.
Gurpreet AroraPosted Jun 30, 2021, 6:25 PM
Nice article