

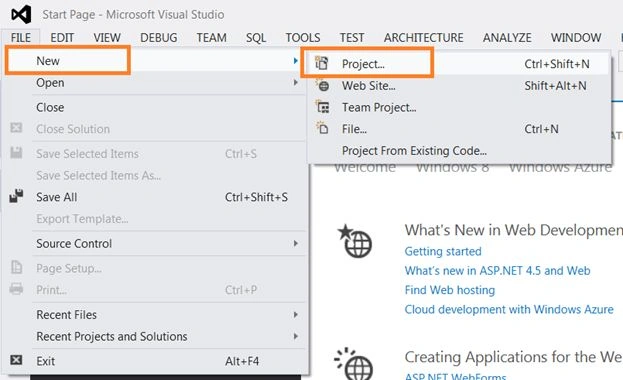
Step 1: From the Visual Studio menus select "File" -> "New" -> "Project...".
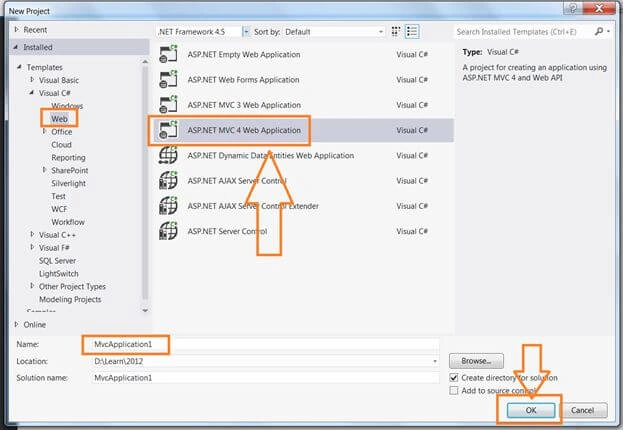
Step 2: Select the Template web the "ASP.NET MVC 4 Web Application".
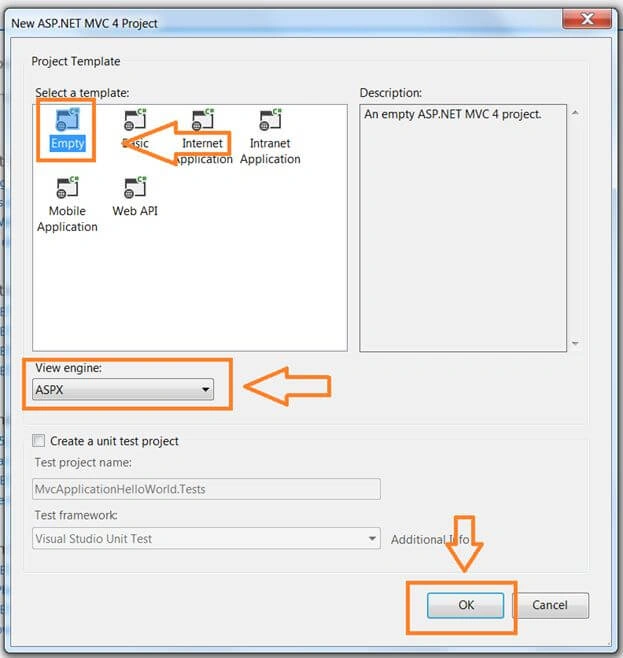
Then select the "Empty" template and Razor or ASPX View engine. I chose ASPX here to use ASPX pages for the view.
Now a MVC web application has been added to n the solution.
Step 3: In this step we will add the Controller to our application.
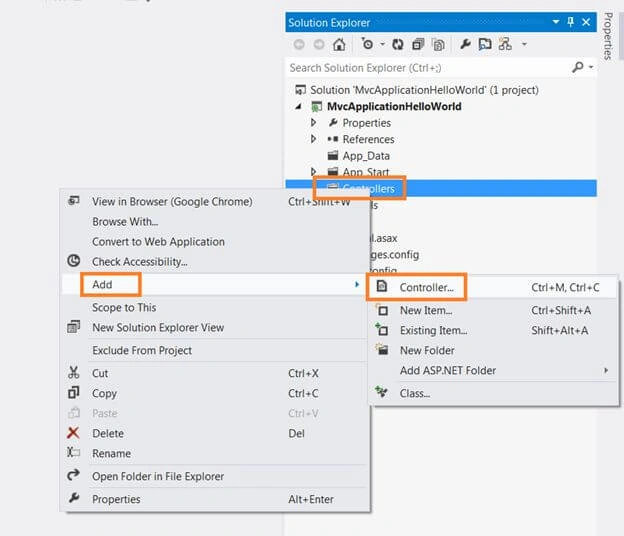
Then just right-click on Controller in the Solution window then "Add" -> "Controller".
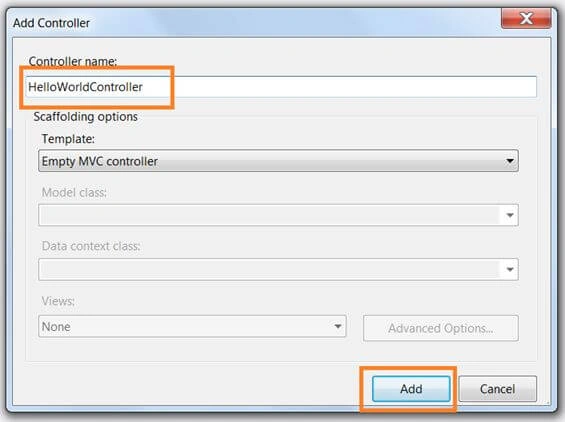
Step 4: Set the name for the controller and add it.
Step 5: In the next step we will add the view for our controller. To do that open the HelloWorld controller.
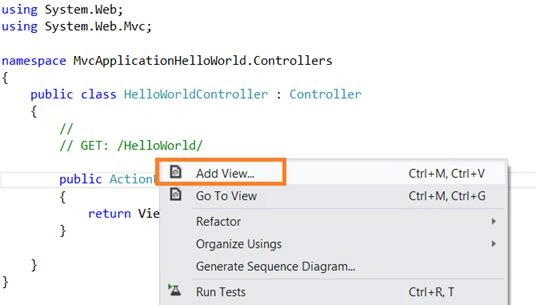
Right-click on the Index action and click on "Add View".
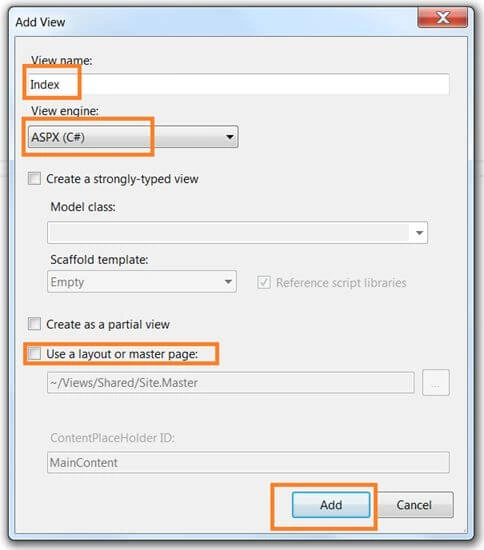
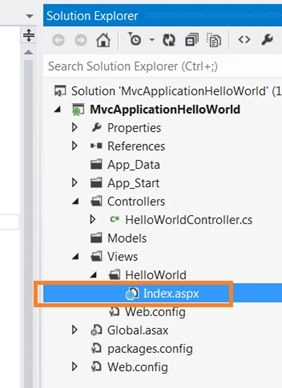
Do not check the "Use a layout or master page" because we do not have any master page in out application. After adding the view open the source and add your design. I will add one simple line in it, "Hello world! This is my first MVC application".
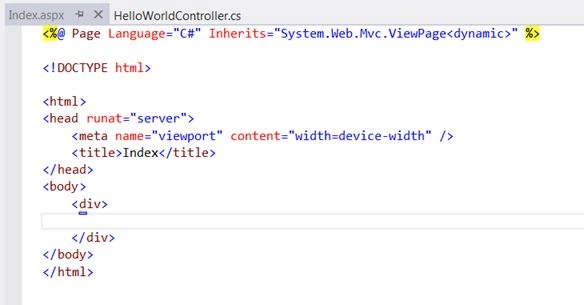
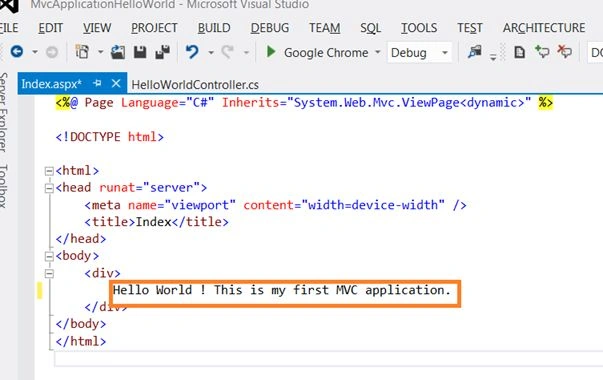
Final Step: Open the RouteConfig file and set the default Action to open.
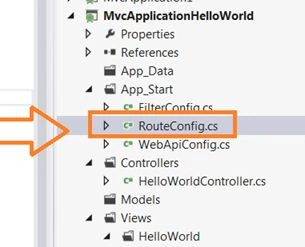
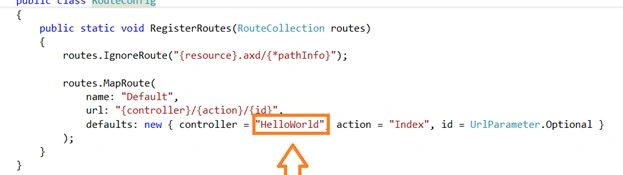
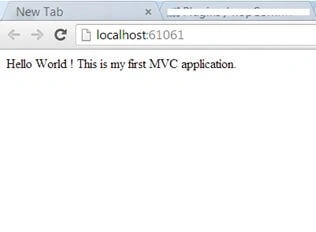
Now press F5 and run the application.
Here is the output.
Channu shahapurPosted Sep 26, 2015, 4:14 AM
A step by step guide for MVC daily a new tutorial about MVC. Please Visit http://sourceofcsharp.com/forumdisplay.php?fid=14
Ajit Kumar VermaPosted Aug 20, 2015, 11:20 PM
good work
Azim ZahirPosted Oct 14, 2014, 5:00 AM
Very Nice
Ashwani TyagiPosted Oct 1, 2013, 5:13 AM
Nice Work Sir