

In this article, we will go step by step to create Azure Mobile app using Azure portal and test with Fiddler (Web Debugging Tool). Mobile apps come under Azure App Service. Azure App Service is a fully managed Platform as a Service (PaaS) offering for professional developers that brings a rich set of capabilities to web, mobile, and integration scenarios. Mobile Apps offers a highly scalable, globally available mobile application development platform for Enterprise Developers and System Integrators that brings a rich set of capabilities to mobile developers.
Mobile App features,
- Build native and cross platform apps,
- Building native Windows, iOS, Android apps
- Cross platform Xamarin or Cordova
- Connect to your enterprise systems – With the help of this feature, you can add corporate sign on options to connect with on-premises or cloud resources. Azure Active Directory is available for identity providers for enterprise authentication along with the social providers, such as Facebook, Twitter, and Microsoft account.
- Build offline-ready apps with data sync – Develop app using this feature to save data offline as well as sync data with the cloud to get the latest data or records in the background when connectivity is available. This service allows you to easily integrate with other NoSQL and SQL data providers, including Azure Table Storage, MongoDB, DocumentDB and SaaS API providers, like Office 365 and Salesforce.com
- Push Notifications to millions in seconds - Engage your customers with instant push notifications on any device, personalized to their needs, sent when the time is right.
Prerequisites
- Microsoft Azure Subscription (MSDN subscribers or sign up for one month free trial )
- Fiddler - Web Debugging Tool. Click here for setup
You will learn,
- How to create Azure Mobile App
- How to create Database & Server
- How to insert the Data using Fiddler
Getting Started.
Step 1: Navigate to Azure Portal & Sign in with Azure Credentials.
Step 2: Click on New button -> Web + Mobile -> Mobile App
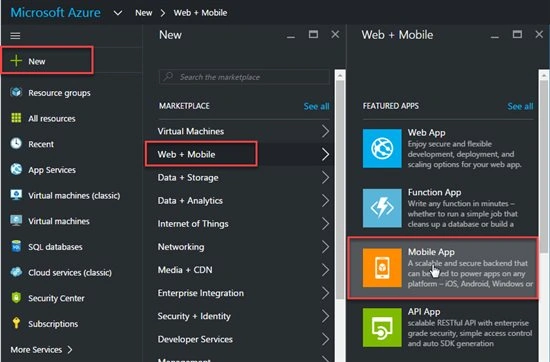
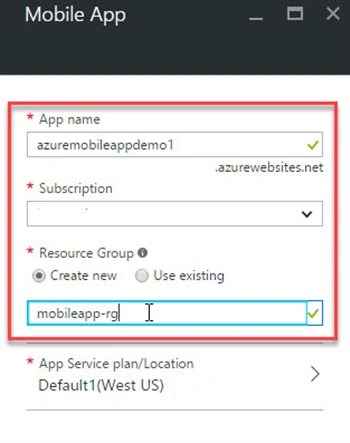
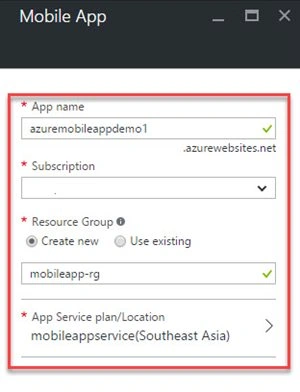
Step 3: Enter Mobile App Name, choose Azure Subscription, create New or use existing Resource Group.
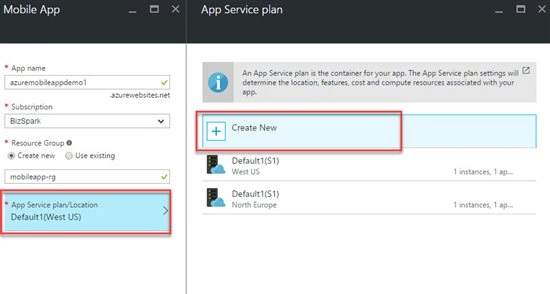
Click on App Service Plan/Location -> Create New.
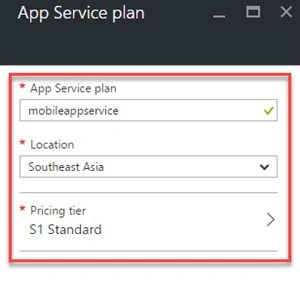
Enter App Service Plan name, Location, Pricing tier.
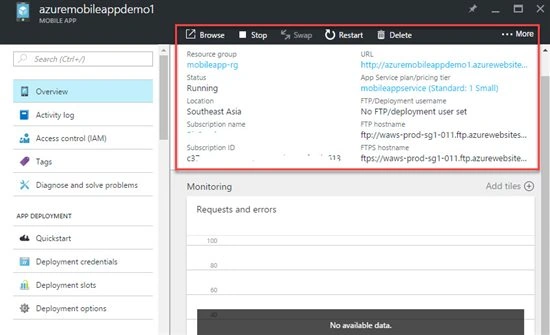
Step 4: Mobile app created successfully. Click on “Easy tables” inside Mobile section. Click on Easy Table Configuration option.
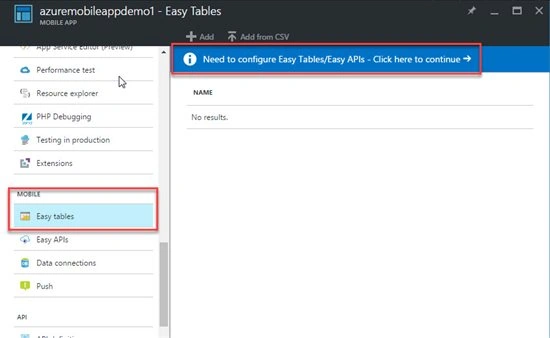
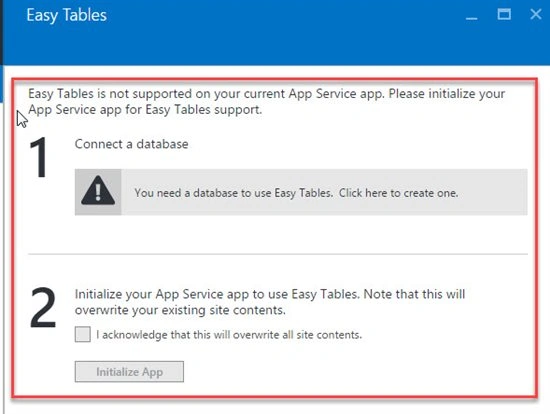
Step 5: First, select “Connect to database“ option. Add new data connection by clicking on “Add” button.
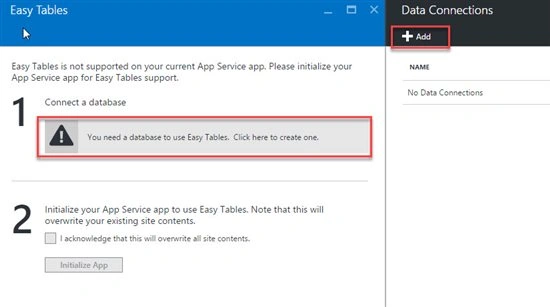
Step 6: Choose Type of Database: SQL Database or Storage. Click on SQL Database & create a new database.
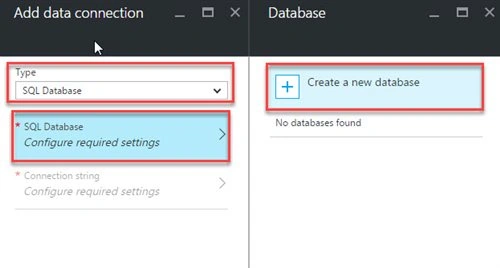
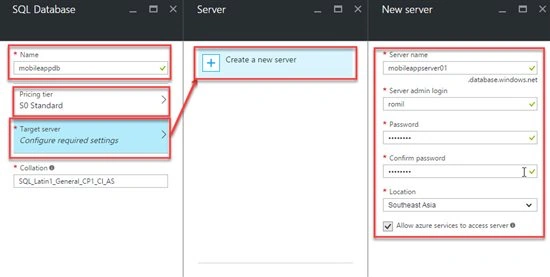
Step 7: Enter Database name, Pricing Tier, Target Server, Collation. No server is created as of now. So, please select Target server & create a new Server. Enter Server name, admin login, password, location.
Step 8: Select last option of database “Connection string” option. Just check if all the data filled is correct or not.
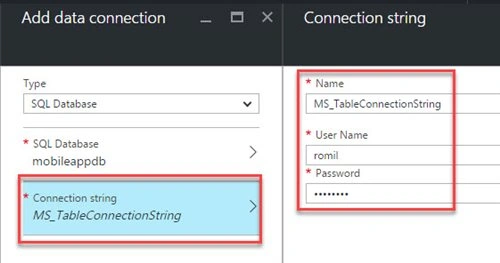
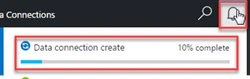
Wait for a few seconds, database & server is being created.
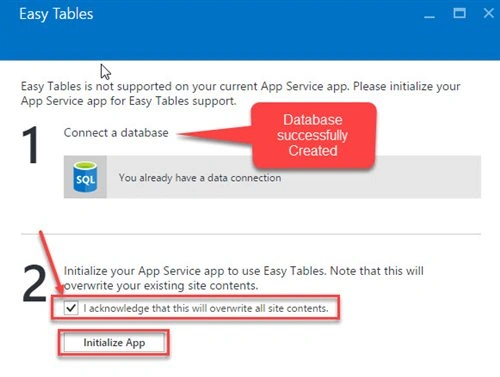
Step 9: Database & Server have been created in Easy Tables. Now, check on “I acknowledge that this will overwrite all site contents” & click on “Initialize App” button.
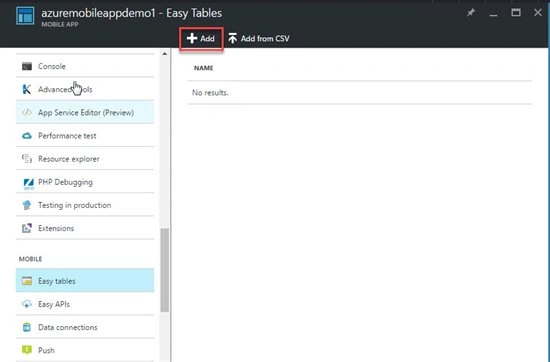
Step 10: Click on Add button to create table in database.
Step 11: Enter the table name & all permissions: Insert, Update, Delete, Read, Undelete.
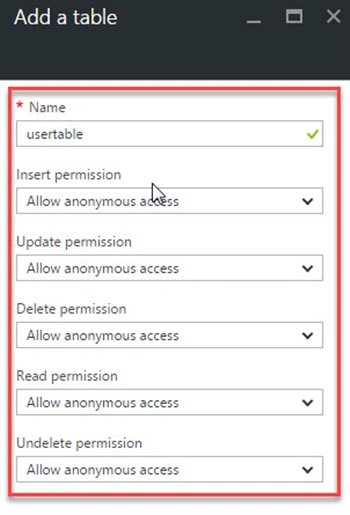
For this example, we are considering “Allow anonymous access” but for mobile app, we need to select different permission.
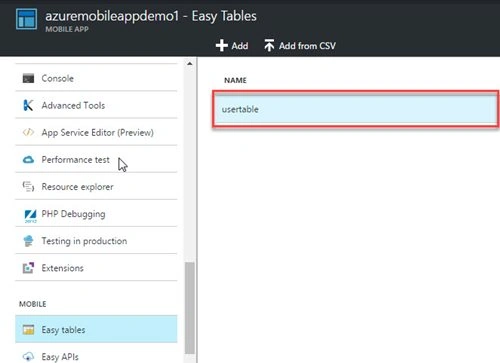
Step 12: Click on Table Name.
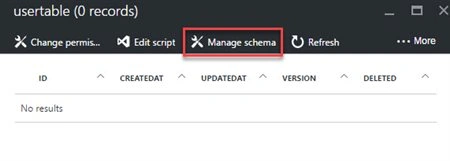
Next step is to create columns or fields in table. So, click on “Manage Schema”.
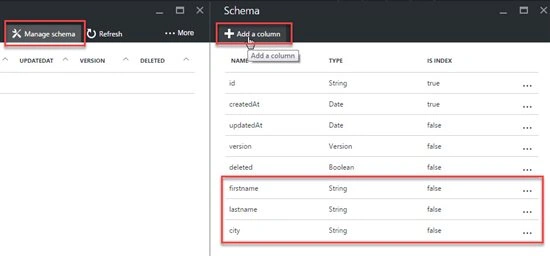
Step 13: Add columns,
- Column name : firstname , Type : String
- Column name : lastname , Type : String
- Column name : city , Type : String
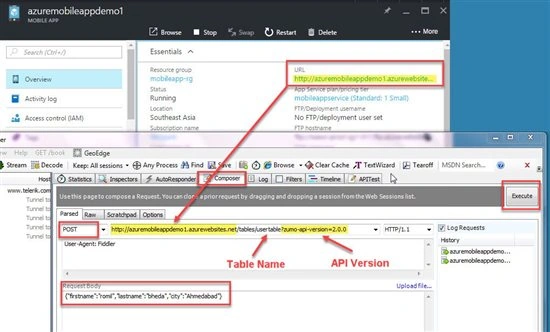
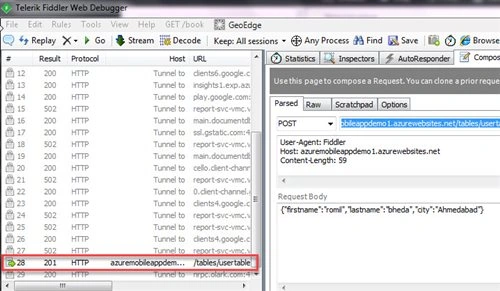
Step 14: Start Fiddler Tool for testing.
First, select “Composer”, then change request to “POST”, then enter mobile app URL with table name & with API version.
Syntax : http://mobileappname.azurewebsites.net/tables/tablename?zumo-api-version=2.0.0
Ex. http://azuremobileappdemo1.azurewebsites.net/tables/usertable?zumo-api-version=2.0.0
Note : Azure Mobile App support api version 2.0.0 so after url add ?zumo-api-version=2.0.0
In request body, enter JSON value & click on Execute button.
{“firstname”:”firstnamevalue”,”lastname”:”lastnamevalye”,”city”:”cityvalue”}
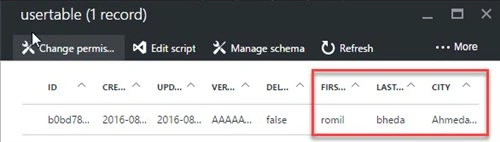
Step 15: Refresh the record in table.
Vignesh ManiPosted Aug 30, 2016, 8:41 AM
Nice one
Humayun Kabir MamunPosted Aug 29, 2016, 12:03 AM
Nice...
Delpin Susai RajPosted Aug 28, 2016, 10:37 PM
Good one
Prasanna MuraliPosted Aug 28, 2016, 9:21 PM
Nice one...