

Introduction
Before reading this article, I highly recommend reading the previous parts:
- Getting Started With ASP.Net Web API 2: Day 1
- Getting Started With ASP.Net Web API 2: Day 2
- Getting Started With ASP.Net Web API 2: Day 3
- Getting Started With ASP.Net Web API 2: Day 4
- Getting Started With ASP.Net Web API 2: Day 5
- Getting Started With ASP.Net Web API 2: Day 6
The validation behavior of ASP.NET Web API 2 is the same across multiple hosts. We try to demonstrate the validation mechanism in two ways. The first way is using DataAnnotations and the second is using a third-party library called FluentValidation. This library can be downlaoded using the NuGet package Manager.
Prerequisites
There are the following things we need to use when developing a Web API 2 application.
- Visual Studio 2013
- ASP.NET Web API 2
Getting Started
In this section we will follow some important procedures and these are:
- Create ASP.NET Web API
- Add Web API 2 Controller
- Add a class inside the model and use Validation inside the Model class
We need to use a basic procedure to do it when we use the validation in the Model class. Let's learn how to use DataAnnotation in the model class.
Step 1
Open the Visual Studio 2013 and click New Project.
Step 2
Select the ASP.NET Web Application and provide a nice name for the project.

Step 3
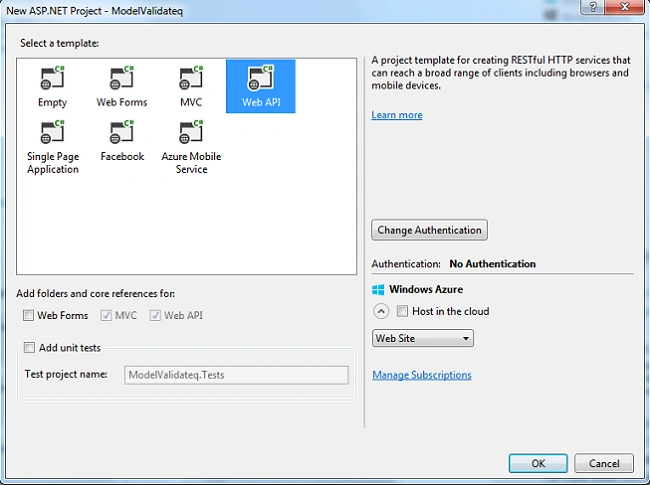
Select the Web API template and click the OK button, by default it will choose MVC along with the Web API.
Step 4
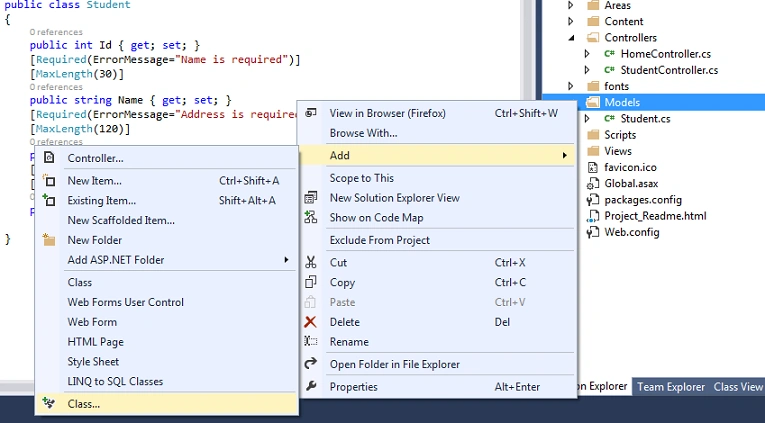
Right-click on the Model folder and add a Student class to the model where we define all the necessary fields. In the following image, I have defined some fields like Id, name, Address and Number.
- public class Student
- {
- public int Id { get; set; }
- [Required(ErrorMessage="Name is required")]
- [MaxLength(30)]
- public string Name { get; set; }
- [Required(ErrorMessage="Address is required")]
- [MaxLength(120)]
- public string Address { get; set; }
- [Required(ErrorMessage="Phone number is required")]
- [Range(0,12)]
- public string Number { get; set; }
- }
As we can see, we are free to combine the data annotations with custom logic from within the Validate method. In this specific example Required and other annotation we took for the validation.
Step 5
Right-click on the Controller folder and select the Web API 2 empty controller and provide a nice name.
- public Student Post( Student st)
- {
- if (ModelState.IsValid)
- {
- throw new HttpResponseException(Request.CreateErrorResponse( HttpStatusCode.BadRequest,ModelState));
- }
- return st;
- }
We can install this package using the NuGet command for downloading the package as:
Install-package FluentValidation
Summary
In this article we learned about the validation in the Web API 2 and the process of validation. We saw the validation using the ASP.NET MVC pattern as well as the third-party library.
Further Reading
Getting Started with ASP.NET Web API 2: Day 8
Arweb AroshanzamirPosted Feb 9, 2015, 3:45 PM
nice one.. thanks sir