

I hope you have some knowledge of WPF and XAML before starting.
MVVM pattern is called Model-View-ViewModel pattern where we have three major components named:-
- Model
- View
- View Model
It’s basically developed to provide the functionality of data binding in WPF and separate the presentation layer from data layer and logic layer like in MVC (Model View Controller).
Whereas Prism is used to create the loosely coupled components which can work independently in an easy way. There are two main authors who are actively working on Prism library named Brian Lagunas and Brian Noyes.
You can read more about Prism and download/ add from the link directly.
Now I will show you a demo to set the value in view model and show that value in the view.
Note: In this article I am using Visual Studio 2015.
Step 1: Create a project named ‘PrismMVVMTestProject’ of WPF application.
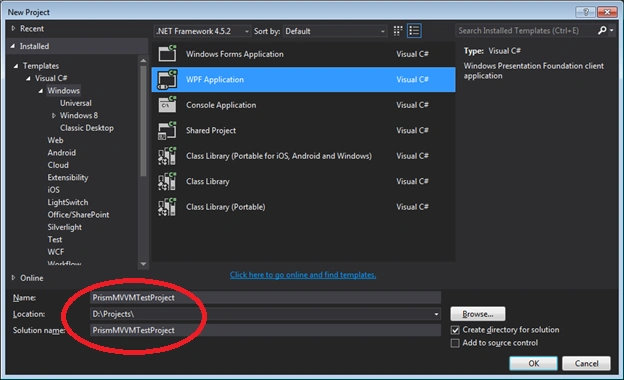
Step 2: Right Click on project and select ‘Manage NuGet Packages…’
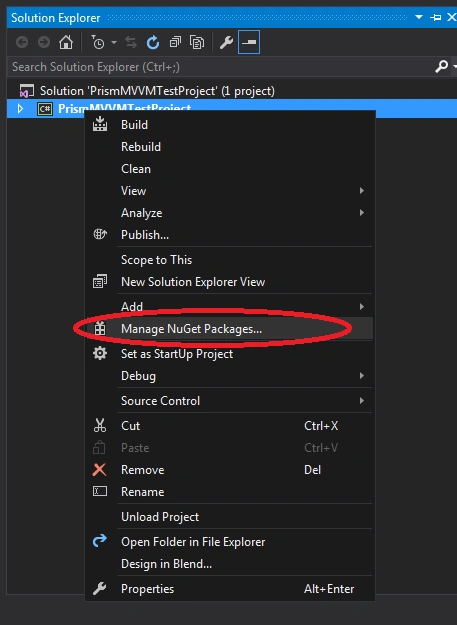
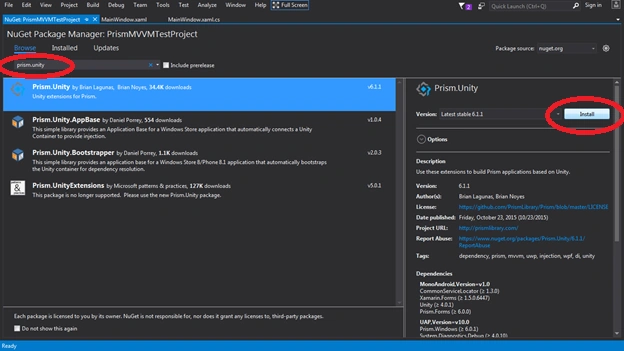
Step 3:
- Type ‘Prism.Unity‘ in browse section and select that package.
- Click on Install button
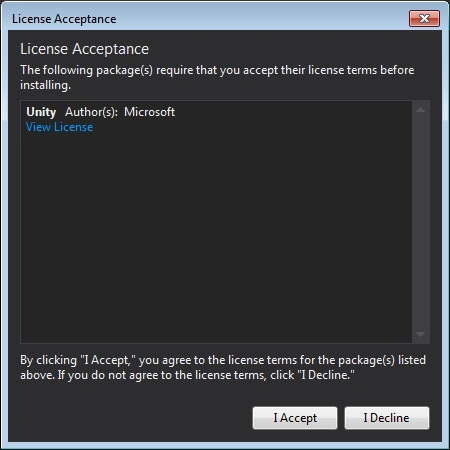
Step 4: Accept the terms and conditions,
Prism library has been installed successfully.
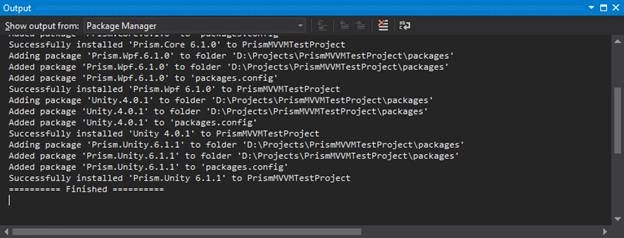
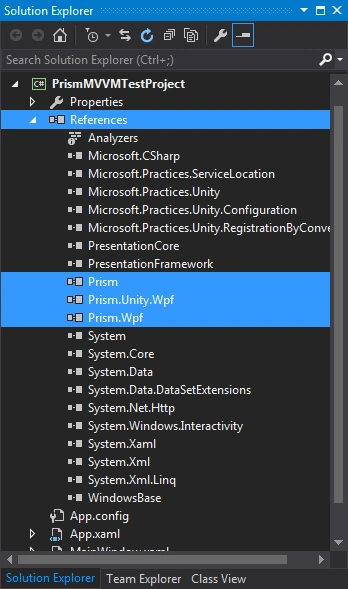
Now you can see the newly added dlls in the reference section of the project.
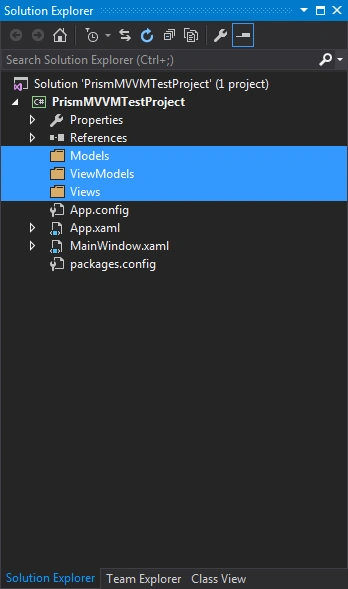
Step 5: It’s a better approach to create the 3 different folders in the project for Model, View and View model respectively.
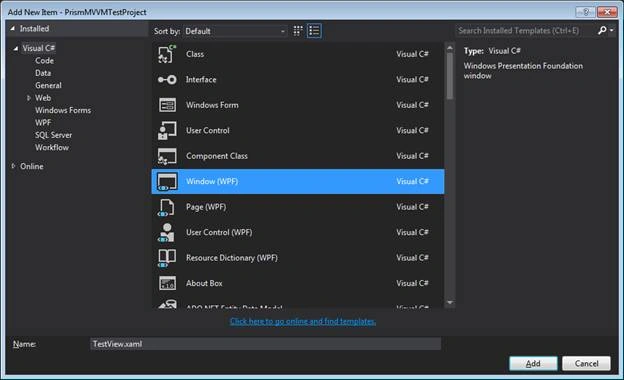
Step 7: Create pages in all folders,
- Create a View Named ‘TestView.xaml’ in theViews folder.
- Create a Model Named ‘TestModel.cs’ in the Models folder.
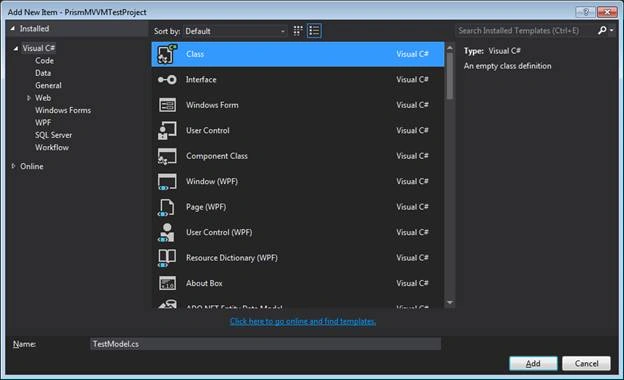
- Create a ViewModel Named ‘TestViewModel.cs’ in the ViewModels folder.
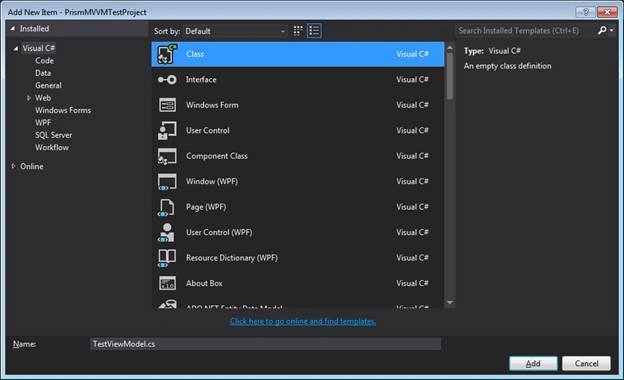
Step 8:
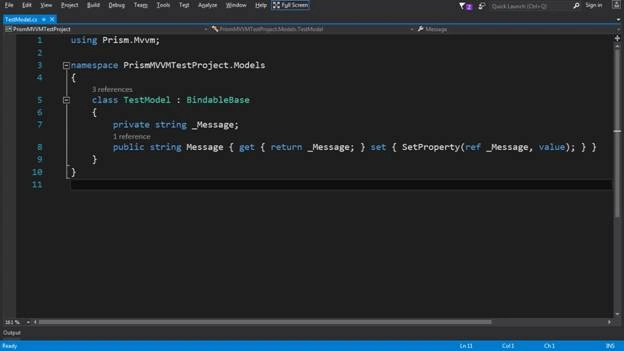
Add the namespace named ‘Prism.MVVM’ in the TestModel page to inherit the class named ‘Bindable Base’. Create a property named Message where ‘ref‘ parameter allows you to update its value,
- using Prism.Mvvm;
- namespace PrismMVVMTestProject.Models
- {
- classTestModel: BindableBase
- {
- privatestring _Message;
- publicstring Message
- {
- get
- {
- return _Message;
- }
- set
- {
- SetProperty(ref _Message, value);
- }
- }
- }
- }
Step 9:
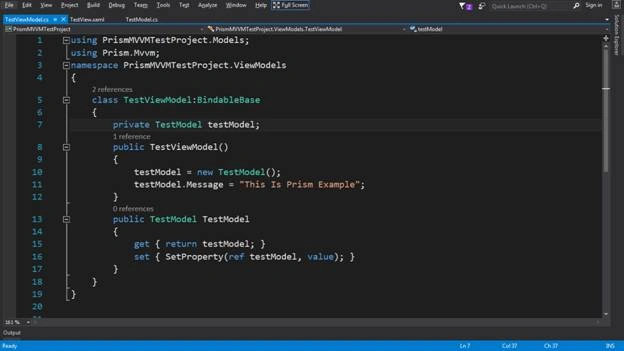
- Add the namespace named ‘Prism.MVVM’ and ‘PrismMVVMTestProject.Models’ in the TestViewModel page to inherit the class named ‘Bindable Base’ and accessing TestModel in this page.
- Create a property of TestModel class object where ‘ref‘parameter allows you to update its value.
- Set the message value "This Is Prism Example" as string.
- using PrismMVVMTestProject.Models;
- using Prism.Mvvm;
- namespace PrismMVVMTestProject.ViewModels
- {
- classTestViewModel: BindableBase
- {
- privateTestModel testModel;
- public TestViewModel()
- {
- testModel = newTestModel();
- testModel.Message = "This Is Prism Example";
- }
- publicTestModel TestModel
- {
- get
- {
- return testModel;
- }
- set
- {
- SetProperty(ref testModel, value);
- }
- }
- }
- }
Step 10:
Add a label named lblMessage in the TestView page and bind its content with the model property name with some other properties of binding like Mode and UpdateSourceTrigger,
- <Label x:Name="lblMessage" HorizontalAlignment="Left"
- Content="{Binding TestModel.Message,Mode=TwoWay,UpdateSourceTrigger=PropertyChanged}"
- VerticalAlignment="Top"/>
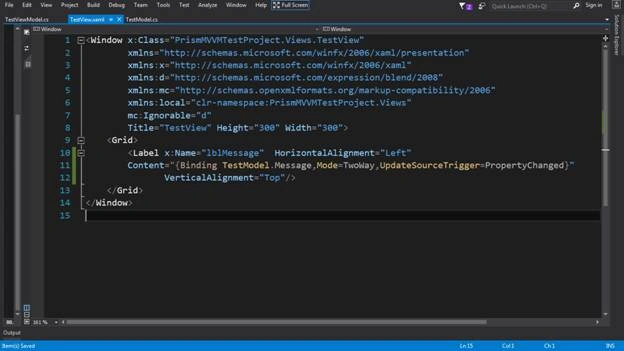
Step 11:
Add PrismMVVMTestProject.ViewModels namespace and bind DataContext of TestView Page to the ViewModel named ‘TestViewModel’.
- using System.Windows;
- using PrismMVVMTestProject.ViewModels;
- namespace PrismMVVMTestProject.Views
- {
- ///<summary>
- /// Interaction logic for TestView.xaml
- ///</summary>
- publicpartialclassTestView: Window
- {
- public TestView()
- {
- InitializeComponent();
- this.DataContext = newTestViewModel();
- }
- }
- }
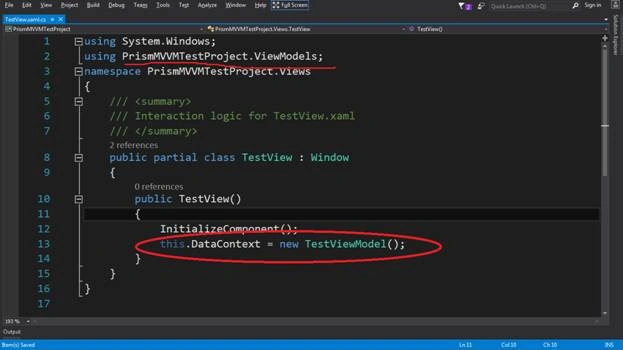
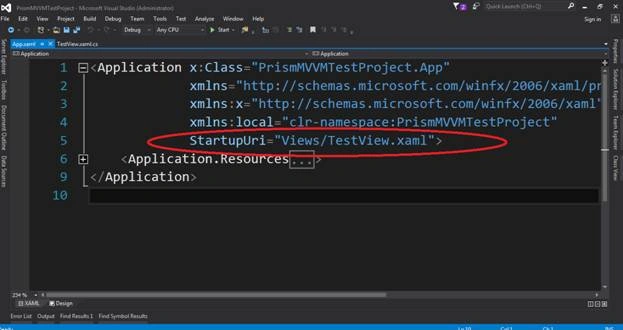
Step 12: Change the ‘StartupUri’ from default page ‘MainWindow’ to ‘TestView’ page,
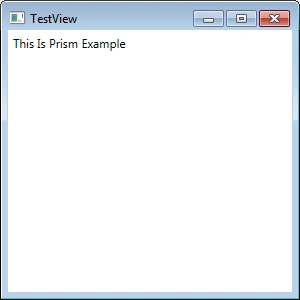
Run the page and see the output:
Read more articles on WPF:
vinoth ezhilanPosted Mar 7, 2018, 2:04 AM
Nothing related to prism
Omid NasriPosted Jul 22, 2016, 3:10 AM
Good One.
Sonu ChaudharyPosted Jun 7, 2016, 12:42 PM
good one Rahul
NitinPosted Apr 10, 2016, 1:15 AM
good show
TorpederosPosted Apr 9, 2016, 2:53 PM
Could you fix code formatting because constructions like 'publicpartialclassTestView' are completely unreadable for absolute beginners.
Debasis SahaPosted Apr 9, 2016, 2:02 AM
Good share..
Rahul Kumar SaxenaPosted Apr 8, 2016, 10:31 PM
Good one
Vignesh ManiPosted Apr 8, 2016, 5:19 PM
Nice one
Mohammed IbrahimPosted Apr 8, 2016, 2:21 PM
nice
Upendra Pratap ShahiPosted Apr 8, 2016, 9:23 AM
Nice article and nicely explain each point...
Gowtham RajamanickamPosted Apr 8, 2016, 8:44 AM
neat explanation
Gowtham RajamanickamPosted Apr 8, 2016, 8:44 AM
very good article