

This article will help you generate an automatic UI page according to your SharePoint list using Angular and jQuery. Also, you can customize your UI color by giving an input with a specified color.
To whomIt will be useful for everyone. Even a person without any coding knowledge can generate the code and create a new record to SharePoint list with the help of the UI.
ObjectiveGenerally, we take so much time to build a nice UI with its functionality for a SharePoint list as per the column properties. But using this article, we can reduce the time to some seconds. Hence, the main objective of this article is to save time and everyone can generate a UI with its functionality easily.
Overview- User-free inputs for list name and color according to the requirement
- Give the inputs and click on a button to generate UI
- You will get a UI for your list
- Fill the data in generated UI and click the submit
- You will have created a new record to your SP list through the generated UI
Create a web page for giving the inputs like list name and desired color.
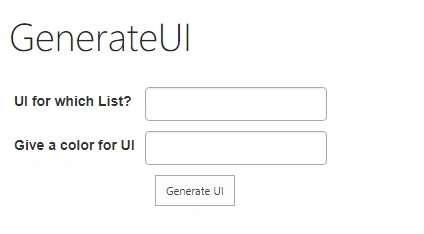
Code for the above UI
- <table id="TableForListName" class="table-condensed">
- <thead>
- </thead>
- <tbody>
- <tr>
- <td><label>UI for which List?</label></td>
- <td><input class="form-control" ng-model="NameOflist" type="text"></td>
- </tr>
- <tr>
- <td><label>Give a color for UI</label></td>
- <td><input class="form-control" ng-model="Clr" type="text"></td>
- </tr>
- <tr>
- <td></td>
- <td><input type="button" value="Generate UI" ng-click="GenerateUI()"></td>
- </tr>
- </tbody>
- </table>
Fill the inputs with your list name and color as below.
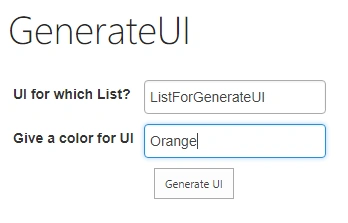
Here, “ListForGenerateUI” is my list.
Let’s see the list columns below.
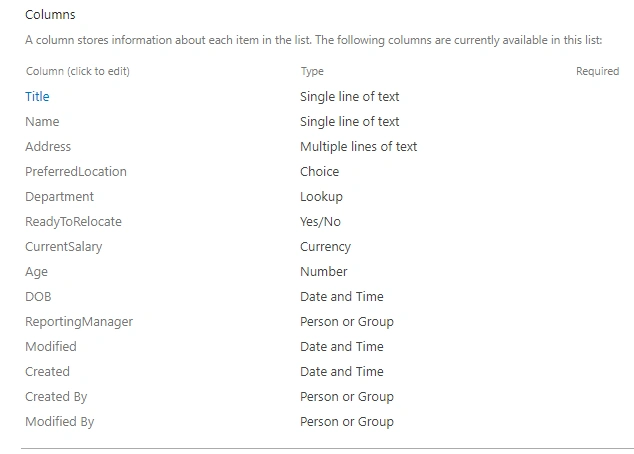
Step 3
Click on “Generate UI” button. It generates UI as per columns in the list.
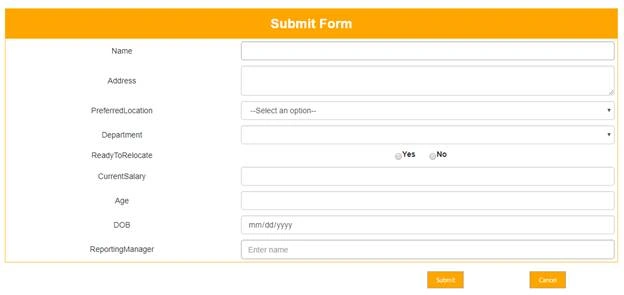
Code for the “Generate UI” button
- $scope.GenerateUI = function() {
- $("#TableForListName").hide();
- $("#UITable").show();
- PrimeColor = $scope.Clr;/*Setting color input to a global variable*/
- listName = $scope.NameOflist;/*Setting ListName input to another global variable*/
- $.ajax({
- url: _spPageContextInfo.webAbsoluteUrl + "/_api/web/lists/GetByTitle('" + listName + "')/fields?$filter= substringof('SourceID=\"{',SchemaXml)",/*URL to Get all custom fileds*/
- method: "GET",
- async: false,
- headers: {
- "Accept": "application/json;odata=verbose"
- },
- success: function(data) {
- $scope.Properties = data.d.results; ;/*Setting all column properties to a scope*/
- $(data.d.results).each(function(listName, currentRow) {/*generating HTML code as per properties*/
- var innerRow = " <
- tr >
- <
- td > " + checkForColProp(currentRow.Title,currentRow.TypeAsString)+ " < /td> <
- td > " + checkForColumnType($http,$scope,currentRow.TypeDisplayName,currentRow.Title,currentRow.Choices,currentRow.LookupList,currentRow.LookupField,currentRow.TypeAsString,currentRow.InternalName)+ " < /td> <
- /tr>
- ";
- var updatedinnerRow = $compile(innerRow)($scope);
- $(".tbldata tbody").append(updatedinnerRow);/*Binding the generated code to a table*/
- });
- var Btns = " <
- div class = \"col-lg-offset-8 col-lg-2\"><input class=\"cls-savecancel\" style=\"background-color: " + PrimeColor + ";color:white\" id=\"btnsave\" type=\"button\" ng-click=\"AddItem(databind)\" value=\"Submit\"></div> <
- div class = \"col-lg-2\"><input class=\"cls-savecancel\" style=\"background-color: " + PrimeColor + ";color:white\" type=\"reset\" value=\"Cancel\" id=\"btnCancel\" data-dismiss=\"modal\"></div>
- ";
- var UpdatedBtns = $compile(Btns)($scope);
- $("#FormBody").append(UpdatedBtns);/*Adding buttons for submit data to the list*/
- var HdrText = " <
- tr style = \"font-size:x-large\"><th class=\"TblTh\" style=\"background-color: " + PrimeColor + ";\" colspan=\"2\"><strong>Submit Form</strong></th></tr>
- ";
- var UpdatedHdrText = $compile(HdrText)($scope);
- $(".tbldata thead").append(UpdatedHdrText);
- },
- error: function(sender, args) {
- console.log(args.get_message());
- }
- });
- }
Add your data in the generated form and click on the “Submit” button. Then, a new record will be added to the SharePoint list.
See the result on the screen below.Fill in the data.
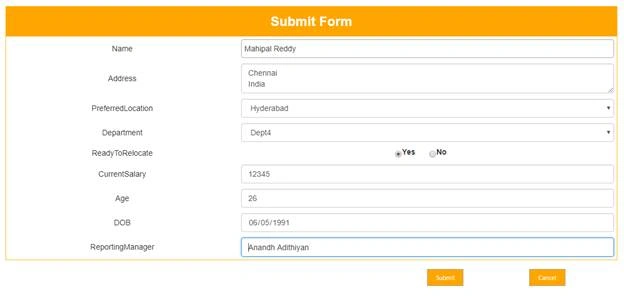
Then, click on “Submit”.
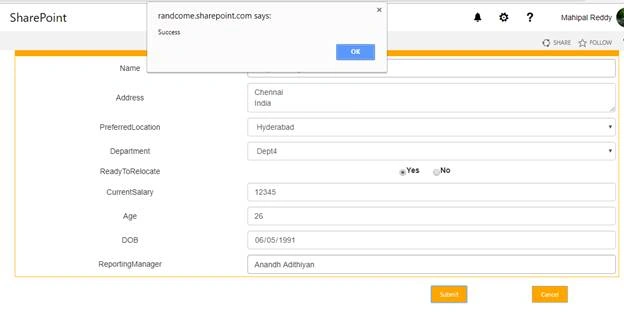
So, the new record has been added to the list.
Let’s see the result in list here.
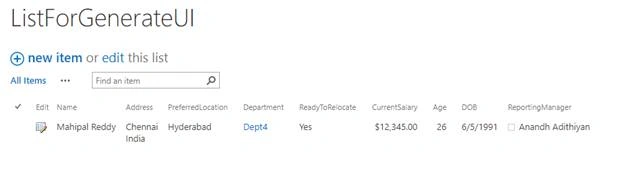
Code for “Submit”
- $scope.AddItem = function(FormData) {
- var datas = JSON.stringify(FormData);
- datas = datas.replace(/[{]/, '');
- datas = datas.slice(0,-1);
- datavalue = "{'__metadata':{'type':'SP.Data."+listName+"ListItem'},"+datas+"}";
- $.ajax
- ({
- url: _spPageContextInfo.webAbsoluteUrl + "/_api/web/lists/GetByTitle('"+listName+"')/items",
- type: "POST",
- headers:
- {
- "Accept": "application/json;odata=verbose",
- "Content-Type": "application/json;odata=verbose",
- "X-RequestDigest": $("#__REQUESTDIGEST").val(),
- "X-HTTP-Method": "POST"
- },
- data: datavalue,
- success: function(data)
- {
- console.log(data);
- alert("Success");
- },
- error: function(error)
- {
- alert(JSON.stringify(error));
- }
- });
- }
Hence, we have created a new record through the generated UI.
ConclusionThis article helps you to save time in terms of designing and automatically generating a nice UI according to the list, even when you have no coding knowledge.
Sujith maheshPosted Feb 4, 2021, 3:06 PM
I have seen Your article which are very helpful, How can i contact with you , I have lot of doubt regarding sharepoint and Angular Js
Sujith maheshPosted Feb 4, 2021, 3:02 PM
Hi Mahipal
Lakhbeer SinghPosted Oct 30, 2017, 6:26 AM
It works with Script editor web part but it applies the fomatting temporarily. not permanently , how to apply permanently on new list form. it escapes formatting while going back to List. or refresh page.
Humayun Kabir MamunPosted Oct 15, 2017, 3:39 PM
Thanks Mahipal for this nice article...