

Introduction
- Text field
- Text area
- Checkbox
- Radio buttons
- Select box
- File field
- Button
- Image button
- Submit button
Most of these form fields use the input element, but some form fields have their own elements. HTML4 can contain form elements like text fields, word fields, radio buttons, checkboxes and submit buttons.
The elements frame, frameset, and noframes are being removed from the language, as well as an acronym, applet, basefont, big, blink, center, dir, font, isindex, strike, tt and u. All of these can be handled using CSS or other methods. As we know every successor inherits from its predecessor, similarly HTML5 has it's properties similar to HTML4 and is very enhanced too.
Every HTML element for form creation has input types. We have all encountered them, right? Something like "input type". Yes, we have.
Quote
HTML 5 Input Types
- <input type="text">
- <textarea></textarea>
- <input type="checkbox">
- <input type="radio">
- id: The id attribute is usually used to point to a style in a style sheet and by JavaScript (via the DOM element) to manipulate the element with the specific id.
- class: This does the same as id but ids are used uniquely for specific elements whereas classes can be used commonly.
- name: The name attribute specifies the name of an anchor. The name attribute is used to create a bookmark inside a document.
These are some of the attributes used during data entry.
Apart from the elements provided by HTML4, HTML5 has the following additional elements:
HTML 5 Form Elements
- <datalist>: Specifies a list of pre-defined options for an <input> element.
- <keygen>: Provides a secure way to authenticate users.
- <output>: Represents the result of a calculation (like one performed by a script).
Let's see one by one how to implement that in our applications:
- <datalist id="browsers">
- <option value="Internet Explorer">
- <option value="Firefox">
- <option value="Chrome">
- <option value="Opera">
- <option value="Safari">
- Username: <input type="text" name="usr_name">
- Encryption: <keygen name="security" />
- <input type="range" id="a" value="50">100 +
- <input type="number" id="b" value="50">=
- <output name="x" for="a b">
- </output>
- name: The name of this text field. This is used when submitting the form to the server. This name can also be used when referencing the form field from JavaScript.
- value: Sets the text value to be displayed in the text field as the default text.
- size: The approximate size in characters of this text field. Note that the size will not always fit the given number of characters and is often different in different browsers.
- maxlength: The maximum number of characters that are allowed to enter into this text field. The value must be a number.
- readonly: Sets the text field in read-only mode, meaning you cannot change the text displayed in the text field. Valid values are true and false.
- disabled: Sets the text field in disabled mode, meaning you cannot change the text displayed in the text area. Furthermore, when the form is submitted, the value of the text field is not submitted. Valid values are true and false.
HTML Form Attributes
- autocomplete: As the name suggests, the autocomplete attribute specifies whether a form or input field should have autocompleted on or off. When autocomplete is on, the browser automatically completes values based on values that the user has entered before.
- nonvalidate: The novalidate attribute is a boolean attribute. When present, it specifies that the form-data (input) should not be validated when submitted.
- autocomplete
- autofocus
- form
- formmethod
- list
- height and width
- and many more...
- First name:<input type="text" name="fname" autocomplete="On">
- Last name: <input type="text" name="lname" autocomplete="On">
- <form action="demo_form.asp" novalidate>
- E-mail: <input type="email" name="user_email">
- <input type="submit">
- </form>
- Checkbox

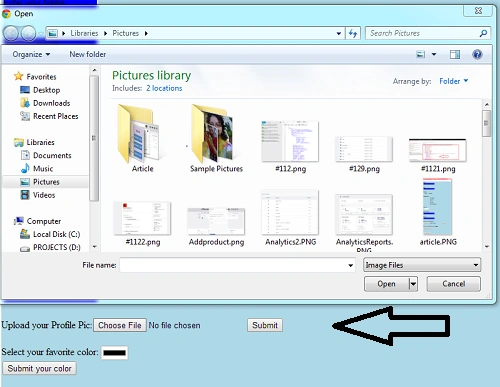
- Upload Files
- Radio Buttons

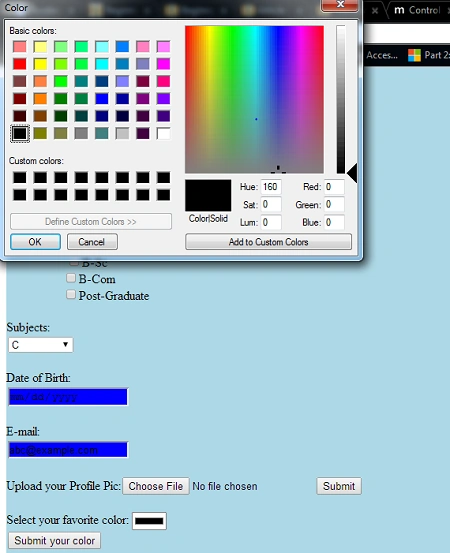
- Color Picker
Using the code
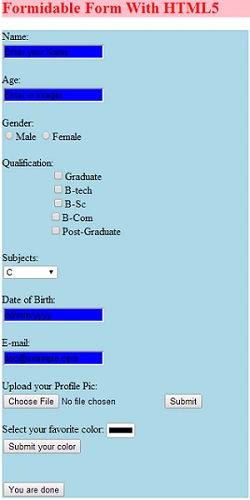
Formidable Form With HTML5 Putting Together what we discussed.
The following is what we will show:
- <form>
- Name:
- <input type="text" value="Enter your Name"style="background-color:blue" title="Enter your name"/>
- Age:
- <input type="text" value="Enter in Integer"style="background-color:blue" title="Enter your age"/>
- Gender:
- <input type="radio" value="male" title="Male"/>Male
- <input type="radio" value="female" title="Female"/>Female
- Qualification:
- <input type="checkbox" value="Student"/>Graduate
- <input type="checkbox" value="Graduate"/>B-tech
- <input type="checkbox" value="Graduate"/>B-Sc
- <input type="checkbox" value="Graduate"/>B-Com
- <input type="checkbox" value="Graduate"/>Post-Graduate
- Subjects:
- <select>
- <option>C</option>
- <option>C++</option>
- <option>Java</option>
- <option>ASP.NET</option>
- <option>Azure</option>
- </select>
- Date of Birth:
- <input type="date" value="dd/mm/yyyy"style="background-color:blue" title="Enter your DOB"/>
- E-mail:
- <input type="email" value="[email protected]"style="background-color:blue" title="Enter your E-mail"/>
- Upload your Profile Pic:<input type="file" name="pic" accept="image/*" title="Profile Pic">
- <input type="submit">
- Select your favorite color: <input type="color" name="favcolor">
- <input type="submit" value="Submit your color" title="Your color chosen">
- <input type="submit" value="You are done" title="click here"/>
- </form>
Points of Interest
Now we are done. But one more thing is that we need to render the CSS stylesheets and JavaScript scripts if used right!
- <link rel="stylesheet" type="text/css" href="form.css">
Gowtham RajamanickamPosted Mar 14, 2015, 4:50 AM
good...