
Introduction
This article demonstrates the use of FluentView in an Android application using the Android Studio. Follow the below-given steps.

Step 1
- Create a new project in Android Studio.
- Give a name to the project and click "Next".
- Select the "Phone and Tablet" and click "Next".
- Select an empty activity and click "Next".
- At last, give the activity name and click "Finish".
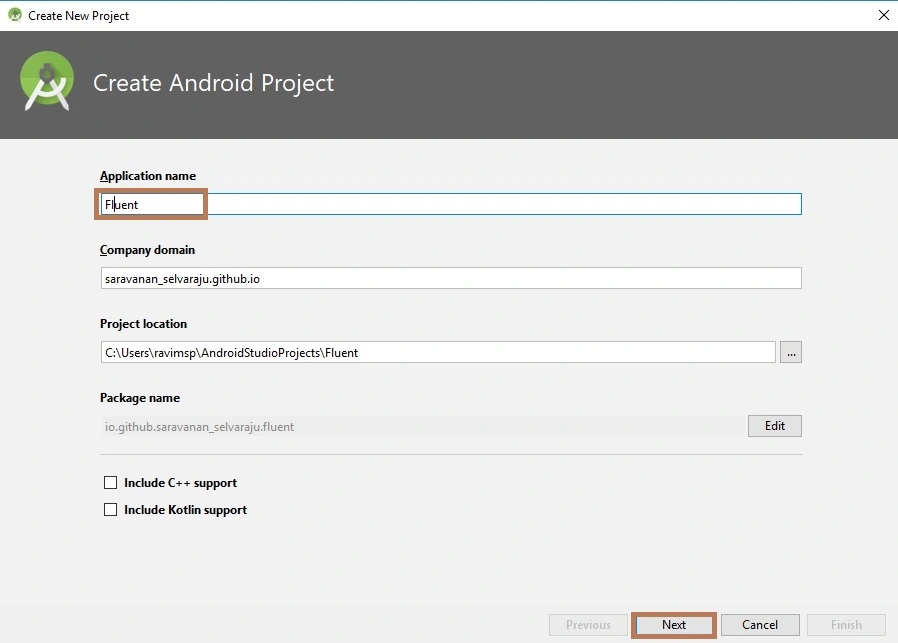
Step 2
Next, go to Gradle Scripts >> build.gradle (Module:app).
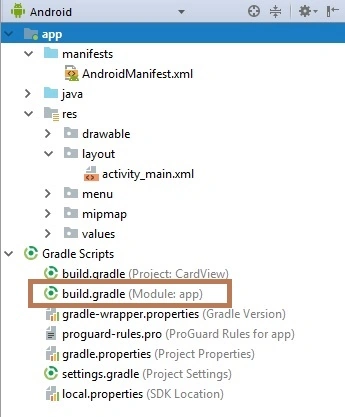
Select build.gradle (Module:app). The app Gradle compiles the code so buildTypes will appear. Just replace that with the following code.
Compile Code
- dependencies {
- implementation 'com.vlstr:fluentappbar:1.1.0'
- }
Step 3
Next, go to App >> res >> layout >> activity_main.xml. Select the activity_main.xml page. The XML code will appear. Just select and replace the following code.
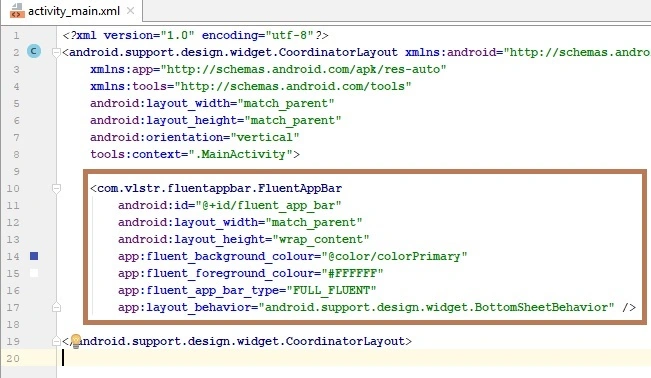
activity_main Code
- <?xml version="1.0" encoding="utf-8"?>
- <android.support.design.widget.CoordinatorLayout xmlns:android="http://schemas.android.com/apk/res/android"
- xmlns:app="http://schemas.android.com/apk/res-auto"
- xmlns:tools="http://schemas.android.com/tools"
- android:layout_width="match_parent"
- android:layout_height="match_parent"
- android:orientation="vertical"
- tools:context=".MainActivity">
- <com.vlstr.fluentappbar.FluentAppBar
- android:id="@+id/fluent_app_bar"
- android:layout_width="match_parent"
- android:layout_height="wrap_content"
- app:fluent_background_colour="@color/colorPrimary"
- app:fluent_foreground_colour="#FFFFFF"
- app:fluent_app_bar_type="FULL_FLUENT"
- app:layout_behavior="android.support.design.widget.BottomSheetBehavior" />
- </android.support.design.widget.CoordinatorLayout>
Step 4
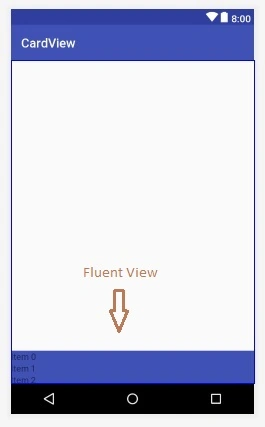
Verify the preview. After the code is applied, the preview will appear like this.
Step 5
Next, go to app >> java>>Mainactivity.java. Select the Mainactivity page. Just type the code given below.
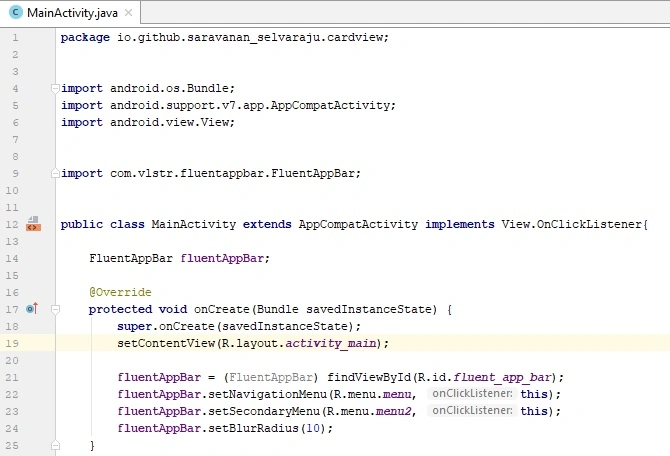
MainActivity Code
onClick(View view){}
In Android, when the onclicklistener method is called, it returns View as an argument. This View is an object of View class.
- import android.os.Bundle;
- import android.support.v7.app.AppCompatActivity;
- import android.view.View;
- import com.vlstr.fluentappbar.FluentAppBar;
- public class MainActivity extends AppCompatActivity implements View.OnClickListener{
- FluentAppBar fluentAppBar;
- @Override
- protected void onCreate(Bundle savedInstanceState) {
- super.onCreate(savedInstanceState);
- setContentView(R.layout.activity_main);
- fluentAppBar = (FluentAppBar) findViewById(R.id.fluent_app_bar);
- fluentAppBar.setNavigationMenu(R.menu.menu, this);
- fluentAppBar.setSecondaryMenu(R.menu.menu2, this);
- fluentAppBar.setBlurRadius(10);
- }
- @Override
- public void onClick(View view) {
- int resId = (int) view.getTag();
- switch (resId){
- //Navigation Menu
- case R.id.nav_all:
- fluentAppBar.collapse();
- break;
- case R.id.nav_album:
- break;
- case R.id.nav_keywords:
- break;
- // Secondary Menu
- case R.id.menu_sync:
- fluentAppBar.collapse();
- break;
- case R.id.menu_assistant:
- break;
- case R.id.menu_shared:
- break;
- }
- }
- }
Step 6
After syncing all the dependency Gradles, you have to copy some files from one directory to another before the actual build process happens. A Gradle build script can do this.
Step 7
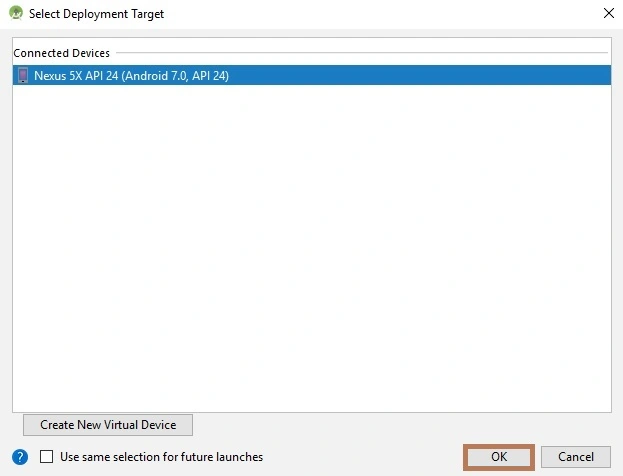
- Next, go to Android Studio and deploy the application.
- Select an Emulator or your Android mobile with USB debugging enabled.
- Give it a few seconds to make the installations and set permission.
Step 8
Run the application in your desired emulator (Shift + F10).
OUTPUT
We have successfully created an Android application that uses FluentView, using Android Studio.
Refer to my previous article Retrieve Real-Time Data In Firebase Using Android Studio - Part Two to get started with the basics of Firebase.
HariharanPosted Nov 2, 2018, 12:28 AM
Buile.gradle -(using this code) dependencies { compile 'com.github.nantaphop:fluentview:1.0.0'}
Hadshana KamalanathanPosted Jul 22, 2018, 6:23 AM
Good one...
Viknaraj ManogararajahPosted Jul 14, 2018, 11:13 PM
Nice Article, Thank you for sharing.........