

Introduction
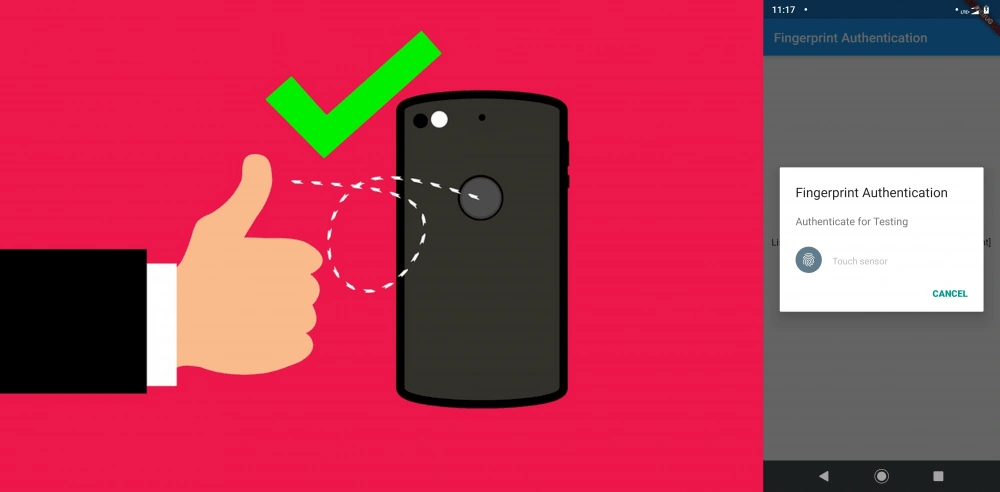
In this article, we are talking about Fingerprint Authentication. So far, we have discussed the authentications like Google, Facebook, Phone and email/password that will need authentication at the server-side. Fingerprint Authentication is a type of local authentication with which you can include other biometric authentication also, like face and voice recognition. We are only covering Fingerprint Authentication in this article. So, tie your seat belt and let’s start :)))
I have found a plugin, named "local_auth" for local authentication and we are going to use it for Fingerprint Authentication.
Prerequisites
The fingerprint sensor in the mobile device you are testing the application on.
Steps
Step 1
Create a new Flutter project. I have created a new project named “flutter_fingerprint_auth”.
Step 2
Add a dependency for the “local_auth” plugin in the “pubspec.yaml” file which is available in the project root directory.
- dependencies:
- flutter:
- sdk: flutter
- cupertino_icons: ^0.1.2
- local_auth: ^0.4.0+1
NOTE
I have tried local_auth version 0.5.2+3 but it is not working; however, version 0.4.0+1 is working perfectly fine for me with Flutter packages.
I have tried local_auth version 0.5.2+3 but it is not working; however, version 0.4.0+1 is working perfectly fine for me with Flutter packages.
Step 3
Add a permission for Android in android/app/src/main/AndroidManifest.xml.
- <manifest xmlns:android="http://schemas.android.com/apk/res/android"
- package="com.example.app">
- <uses-permission android:name="android.permission.USE_FINGERPRINT"/>
- <manifest>
Step 4
I have put some main functions for understanding the whole authentication process. Please read the comments in the code which explain you the process. I have also given my GitHub project directory link below.
- import 'package:flutter/material.dart';
- //1. imported local authentication plugin
- import 'package:local_auth/local_auth.dart';
- void main() => runApp(MyApp());
- class MyApp extends StatelessWidget {
- @override
- Widget build(BuildContext context) {
- return MaterialApp(
- theme: ThemeData(
- primarySwatch: Colors.blue,
- ),
- home: MyHomePage(title: 'Fingerprint Authentication'),
- );
- }
- }
- class MyHomePage extends StatefulWidget {
- MyHomePage({Key key, this.title}) : super(key: key);
- final String title;
- @override
- _MyHomePageState createState() => _MyHomePageState();
- }
- class _MyHomePageState extends State<MyHomePage> {
- // 2. created object of localauthentication class
- final LocalAuthentication _localAuthentication = LocalAuthentication();
- // 3. variable for track whether your device support local authentication means
- // have fingerprint or face recognization sensor or not
- bool _hasFingerPrintSupport = false;
- // 4. we will set state whether user authorized or not
- String _authorizedOrNot = "Not Authorized";
- // 5. list of avalable biometric authentication supports of your device will be saved in this array
- List<BiometricType> _availableBuimetricType = List<BiometricType>();
- Future<void> _getBiometricsSupport() async {
- // 6. this method checks whether your device has biometric support or not
- bool hasFingerPrintSupport = false;
- try {
- hasFingerPrintSupport = await _localAuthentication.canCheckBiometrics;
- } catch (e) {
- print(e);
- }
- if (!mounted) return;
- setState(() {
- _hasFingerPrintSupport = hasFingerPrintSupport;
- });
- }
- Future<void> _getAvailableSupport() async {
- // 7. this method fetches all the available biometric supports of the device
- List<BiometricType> availableBuimetricType = List<BiometricType>();
- try {
- availableBuimetricType =
- await _localAuthentication.getAvailableBiometrics();
- } catch (e) {
- print(e);
- }
- if (!mounted) return;
- setState(() {
- _availableBuimetricType = availableBuimetricType;
- });
- }
- Future<void> _authenticateMe() async {
- // 8. this method opens a dialog for fingerprint authentication.
- // we do not need to create a dialog nut it popsup from device natively.
- bool authenticated = false;
- try {
- authenticated = await _localAuthentication.authenticateWithBiometrics(
- localizedReason: "Authenticate for Testing", // message for dialog
- useErrorDialogs: true,// show error in dialog
- stickyAuth: true,// native process
- );
- } catch (e) {
- print(e);
- }
- if (!mounted) return;
- setState(() {
- _authorizedOrNot = authenticated ? "Authorized" : "Not Authorized";
- });
- }
- @override
- void initState() {
- _getBiometricsSupport();
- _getAvailableSupport();
- super.initState();
- }
- @override
- Widget build(BuildContext context) {
- return Scaffold(
- appBar: AppBar(
- title: Text(widget.title),
- ),
- body: Center(
- child: Column(
- mainAxisAlignment: MainAxisAlignment.center,
- children: <Widget>[
- Text("Has FingerPrint Support : $_hasFingerPrintSupport"),
- Text(
- "List of Biometrics Support: ${_availableBuimetricType.toString()}"),
- Text("Authorized : $_authorizedOrNot"),
- RaisedButton(
- child: Text("Authorize Now"),
- color: Colors.green,
- onPressed: _authenticateMe,
- ),
- ],
- ),
- ),
- );
- }
- }
Sometimes, there may arrive some error as stated below.
Error - import androidx.annotation.NonNull;
Solution
Put android.useAndroidX=true and android.enableJetifier=true in the android/gradle.properties file.
GitHub Repo - https://github.com/myvsparth/flutter_fingerprint_auth
Conclusion
Thus, we learned how to use Fingerprint Authentication in an Android device using local_auth plugin in Flutter. This article was all about fingerprint authentication in Android; you can also use this for iOS but for that, you need to add permission to iOS which is defined in the plugin's documentation. You can use this authentication when you need a very high level of security like making payments or confidential transactions.
Bona SrengPosted Feb 16, 2020, 9:47 PM
Thank you Parth Patel, It is working well for me.