

Introduction
react-csv is a powerful plugin written in React.js to export an array of items to Excel files. In this article i am using PnpV2 library for consuming Sharepoint operations.
Open a command prompt. Create a directory for the SPFx solution.
md spfx-ReactCSV
Navigate to the above-created directory.
cd spfx-ReactCSV
Run the Yeoman SharePoint Generator to create the solution.
yo @microsoft/sharepoint
Solution Name
Hit Enter to have the default name (spfx-ReactCSVin this case) or type in any other name for your solution.
Selected choice - Hit Enter
Target for the component
Here, we can select the target environment where we are planning to deploy the client web part; i.e., SharePoint Online or SharePoint OnPremise (SharePoint 2016 onwards).
Selected choice - SharePoint Online only (latest).
Place of files
We may choose to use the same folder or create a subfolder for our solution.
Selected choice - same folder.
Deployment option
Selecting Y will allow the app to be deployed instantly to all sites and be accessible everywhere.
Selected choice - N (install on each site explicitly).
Permissions to access web APIs
Choose if the components in the solution require permission to access web APIs that are unique and not shared with other components in the tenant.
Selected choice - N (solution contains unique permissions)
Type of client-side component to create
We can choose to create a client-side web part or an extension. Choose the web part option.
Selected choice - WebPart
Web part name
Hit Enter to select the default name or type in any other name.
Selected choice - ReactCsv
Web part description
Hit Enter to select the default description or type in any other value.
Framework to use
Select any JavaScript framework to develop the component. Available choices are - No JavaScript Framework, React, and Knockout.
Selected choice - React
The Yeoman generator will perform a scaffolding process to generate the solution. The scaffolding process will take a significant amount of time.
Once the scaffolding process is completed, lock down the version of project dependencies by running the below command,
npm shrinkwrap
In the command prompt, type the below command to open the solution in the code editor of your choice.
NPM Packages used,
- npm i react-csv //for Csv operations
- npm install @pnp/[email protected] --save //for sharepoint operations
- npm install @pnp/polyfill-ie11 --save //for iell support
Important setup
- protected onInit(): Promise<void> {
- return super.onInit().then(_ => {
- // other init code may be present
- sp.setup({
- // set ie 11 mode
- ie11: true,
- // only needed when working within SharePoint Framework
- spfxContext: this.context
- });
- });
- }
Necessary imports
- import "@pnp/polyfill-ie11";
- import { sp } from "@pnp/sp";
- import "@pnp/sp/webs";
- import "@pnp/sp/lists";
- import "@pnp/sp/items";
- import { CSVLink, CSVDownload } from "react-csv";
- <CSVLink data={csvData}>Download me</CSVLink>;
in ReactCsv.tsx
- import * as React from 'react';
- import { IReactCsvProps } from './IReactCsvProps';
- import { sp } from "@pnp/sp";
- import "@pnp/sp/webs";
- import "@pnp/sp/lists";
- import "@pnp/sp/items";
- import { CSVLink, CSVDownload } from "react-csv";
- export interface MYListProperties {
- Title: string;
- Platform :String;
- }
- interface IPnpstate {
- MyListData:MYListProperties[];
- }
- export default class ReactCsv extends React.Component<IReactCsvProps, IPnpstate> {
- constructor(props: IReactCsvProps, state: IPnpstate) {
- super(props);
- this.state = {
- MyListData: []
- };
- this.MYdata=this.MYdata.bind(this);
- }
- public componentDidMount(){
- this.MYdata().then((response: MYListProperties[]) => {
- let result: MYListProperties[] = [];
- response.forEach(element => {
- result.push({
- Title: element.Title, Platform: element.Platform
- });
- });
- this.setState({ MyListData: result });
- });
- }
- private MYdata=async ()=>{
- const items: MYListProperties[] = await sp.web.lists.getByTitle("ReactCSV").items.get();
- return items;
- console.log(items);
- }
- public render(): React.ReactElement<IReactCsvProps> {
- this.MYdata();
- return (
- <div >
- { this.state.MyListData.length>0 && <CSVLink data={this.state.MyListData} filename={"my-file.csv"}
- className="btn btn-primary" onClick={() => {
- console.log("You Downloaded the Csv"); // 👍🏻 Your click handling logic
- }}>Download me</CSVLink> }
- </div>
- );
- }
- }
Here I am using list name as ReactCsv and fields as Title,Platform both are single lines of text.
Properties
- data- array of data
- filename-name of the csv file to download
- className-class file for css properties
- onClick-clickEvent
- headers-head value of the cell
Expected output
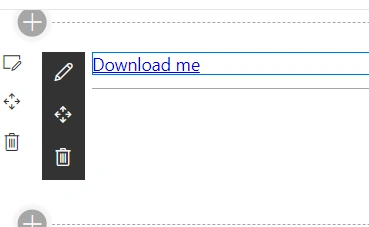
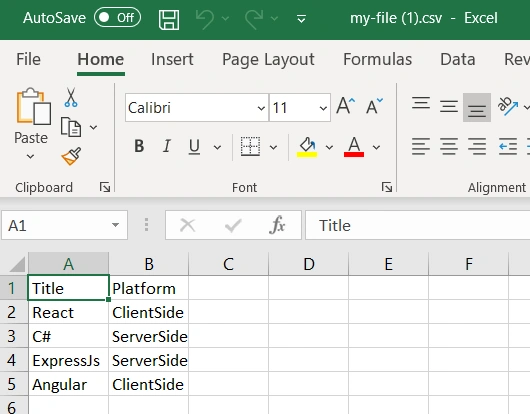
Conclusion
Hence we learned how to export Sharepoint list items to csv files using pnpjs and reactcsv. I hope this helps someone. Happy coding :)
Vinay AyinapurapuPosted Feb 3, 2025, 5:47 PM
Is it possible other way? import the excel data to SharePoint list?
vansh pathakPosted Mar 9, 2021, 12:14 PM
Solution works in workbench but not when deployed
kavya vallalaPosted Jul 14, 2020, 7:13 AM
This is not working in IE 11 for me. I installed an imported polyfill also. Help me understand what i missed.
Madhan ThuraiPosted Mar 26, 2020, 9:57 PM
Since article already in live,so this time no,in future i will avoid those
Bhargava ChPosted Mar 26, 2020, 1:34 PM
Hi Madhan, could you please change title to export to CSV