

Introduction
Many times we have requirements like having to add a CSV file to the Sharepoint list so if there are many records then manually this work becomes difficult. So in this blog, we will see how we can achieve this using Powershell.
So here I have used PnP PowerShell to achieve this solution.
Scenario
I have a CSV file and in this CSV file, I have 6 columns like FirstName, LastName, JobTitle, Location, BirthDate, and HireDate. So here we will do all the things like creating a list, fields, and list items by PowerShell. so by running a script we can do all the things.
So let's see the step by step solution.
Implementation
- Open Windows Powershell ISE
- Create a new file
- Write a script as below,
- First, we will connect the site URL with the user's credentials.
To connect the SharePoint site with PNP refer to this article.
- Then we will create a list and fields. so field types will be as a below,
FirstName,LastName,JobTitle,Location - Single line of textBirthDate, HireDate - Date and timeSo for this, we will use the Add-PnPField method.
- We will import the CSV using the Import-Csv method.
Then we will add the records to the list using the Add-PnPListItem method. So here first we will get records from CSV and it will return an array so we will iterate it and then save all items in the list.
- $Login = #userid
- $password = #password
- $secureStringPwd = $password | ConvertTo-SecureString -AsPlainText -Force
- $Creds = New-Object -Typename System.Management.Automation.PSCredential -ArgumentList $Login, $secureStringPwd
- $siteUrl = #siteUrl
- #connect to site
- Write-Host "Connection to the site..." -ForegroundColor Yellow
- Connect-PnpOnline -Url $SiteUrl -Credentials $Creds
- Write-Host "Connection successfully..." -ForegroundColor Yellow
- #create a list
- Write-Host "Creating list..." -ForegroundColor Yellow
- New-PnPList -Title "Employees" -Url "lists/Employees"
- Write-Host "List created..." -ForegroundColor Yellow
- #create fields
- Write-Host "Creating fields..." -ForegroundColor Yellow
- Add-PnPField -List "Employees" -DisplayName "First Name" -InternalName "FirstName" -Type Text -AddToDefaultView
- Add-PnPField -List "Employees" -DisplayName "Last Name" -InternalName "LastName" -Type Text -AddToDefaultView
- Add-PnPField -List "Employees" -DisplayName "Location" -InternalName "Location" -Type Text -AddToDefaultView
- Add-PnPField -List "Employees" -DisplayName "Job Title" -InternalName "JobTitle" -Type Text -AddToDefaultView
- Add-PnPField -List "Employees" -DisplayName "Hire Date" -InternalName "HireDate" -Type DateTime -AddToDefaultView
- Add-PnPField -List "Employees" -DisplayName "Birth Date" -InternalName "BirthDate" -Type DateTime -AddToDefaultView
- Write-Host "Fields created..." -ForegroundColor Yellow
- $filePath = "F:\Intranet Employee Report.csv"
- #Import CSV
- $CSVRecords = Import-Csv $FilePath
- Write-host -f Yellow "$($CSVRecords.count) Rows Found!"
- #create list items
- Write-Host "Creating list items..." -ForegroundColor Yellow
- foreach ($Record in $CSVRecords) {
- $items = Add-PnPListItem -List "Employees" -Values @{
- "Title" = $Record.'FirstName' + " " + $Record.'LastName';
- "FirstName" = $Record.'FirstName';
- "LastName" = $Record.'LastName';
- "Location" = $Record.'Location';
- "JobTitle" = $Record.'JobTitle';
- "BirthDate" = $Record.'BirthDate';
- "HireDate" = $Record.'HireDate';
- }
- }
- Write-Host "list items created..." -ForegroundColor Yellow
Now run the script with the F5 command.
Output
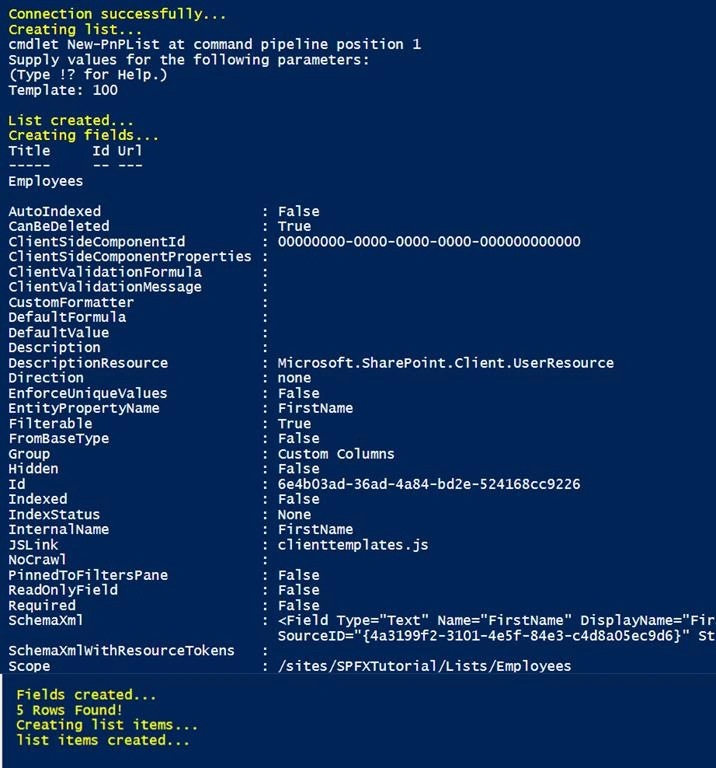
When the script runs it will ask for the list template. So after setting the lists template first it will create a list then fields and then list items as below.
Summary
In this article, we have seen how to export CSV to SharePoint list data using PNP PowerShell.
Hope you like this. If it is helpful to you then share it with others. Give your valuable feedback and suggestions in the comments section below.
Sharing is caring!!!
Join the conversation! Your thoughts help the community grow.