

Introduction
A Collection is a class that is used in dynamic memory allocation. A collection can be of two types Generic or Non-Generic. Generic collections are type safe and in non-generic we have to perform typecasting. Generic and Non-Generic both have some classes that we can use for creating collection. Generic collection comes under System.Collections.Generic namespace and Non-Generic collection come under System.Collections namespace.
What is List<T>?
List<T> is a collection of strongly typed objects. It can be accessed by index and have some methods for adding, searching, and modifying list. It is the generic version of the ArrayList that comes under System.Collections.Generic namespace.
Pre-requisites
You have to have visual studio 2019 or 2022 installed in your system with windows forms applications(.NET Framework) that we are going to use to create an application to learn how we can perform events on various methods of List<T>.
Let’s Start with Creating a Project
Step 1
Open visual studio and click on Create a new Project on the right side screen.
Step 2
Search for Windows Forms App(.NET Framework), click on it and click on “Next” button located at bottom right corner.
Step 3
Name the Project as ListCollection, leave solution name as it is and make sure the Framework is .NET Framework 4.8, after that click on “create” button.
Now you have created a project and you can see a Form1 opened on screen.
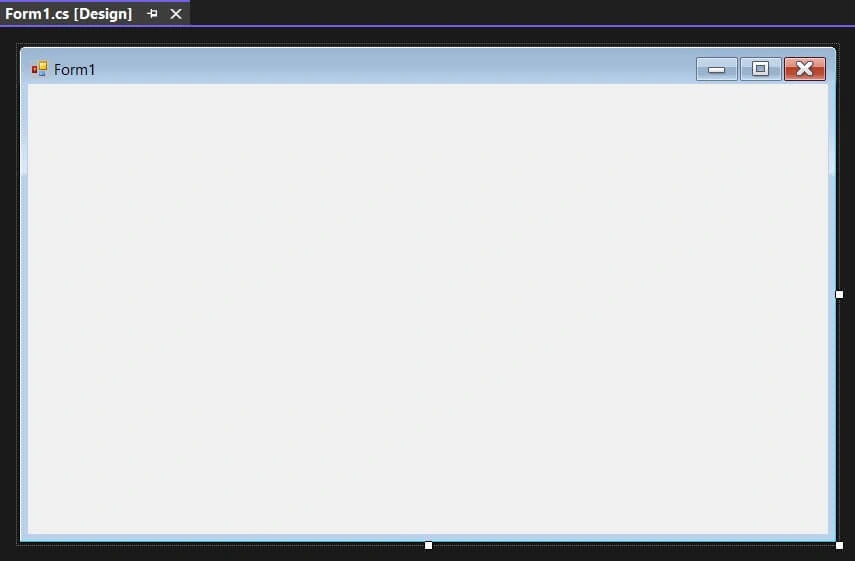
Figure 1
Now see figure 2 and follow these steps,
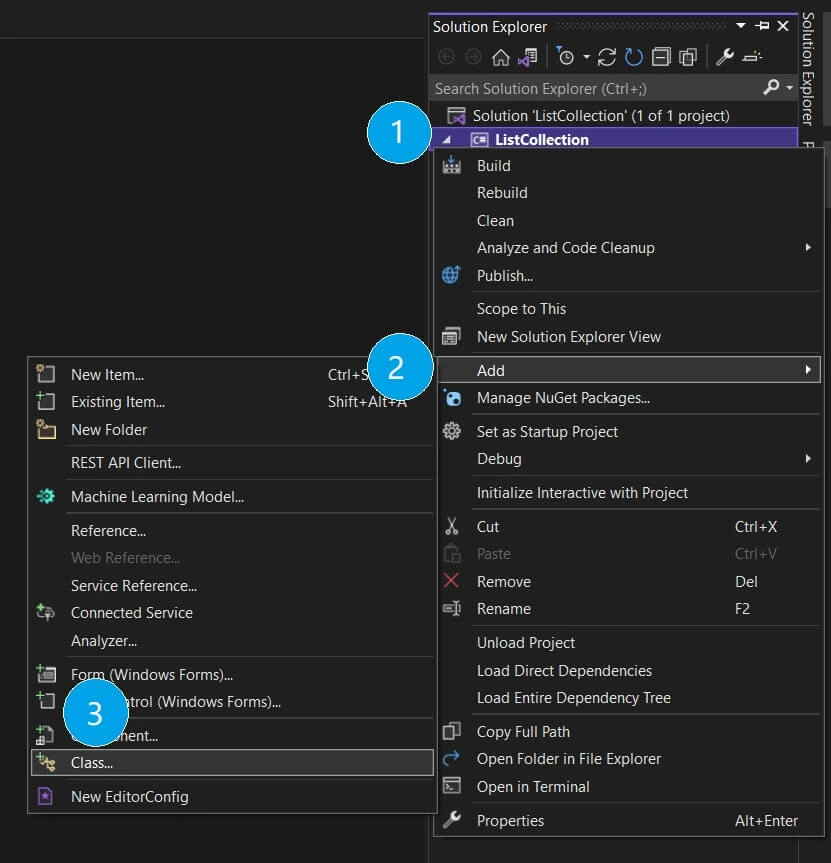
Figure 2
- Click on Solution Explorer -> Right Click on Project Name -> Goto Add -> Goto Class and click on it.
- Now name the Class as Student.cs and click on Add button.
- Student.cs will open to your screen. Add this code to the file.
Here we use properties, "Properties are used to assign and return value of the field". A student has four properties like RollNumber, Name, Age, and City.
using System;
using System.Collections.Generic;
using System.Linq;
using System.Text;
using System.Threading.Tasks;

namespace ListCollection
{
    internal class Student
    {
        //Properties of Student
        public int RollNumber { get; set; }
        public string Name { get; set; }
        public int Age { get; set; }
        public string City { get; set; }
    }
}
Now go to Form1.cs[Design] tab, We have to add some controls.
How to add Controls?
- Go to Toolbox on the left side of the screen. If you don’t find the Toolbox there, then Click on View -> Toolbox Click on it.
- See figure 3, you can find controls on Common Controls List.
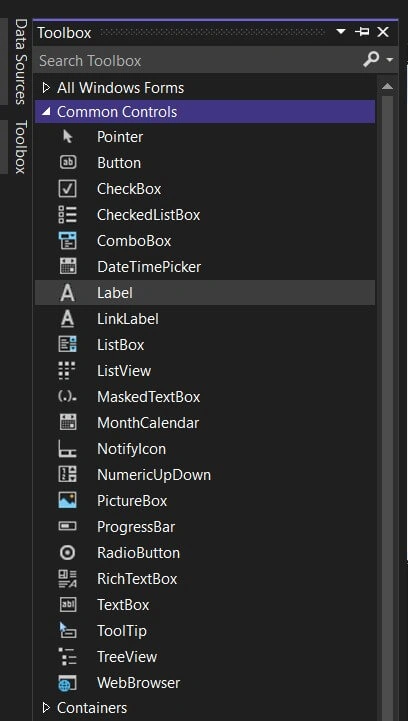
Figure 3
Create Label Control
- Click on label and drop it on Form1.
- Right click on label1 and Go to -> Properties.
- label1 Text - RollNumber.
- Now you have knowledge of how to add controls from Toolbox and how to change property of Control.
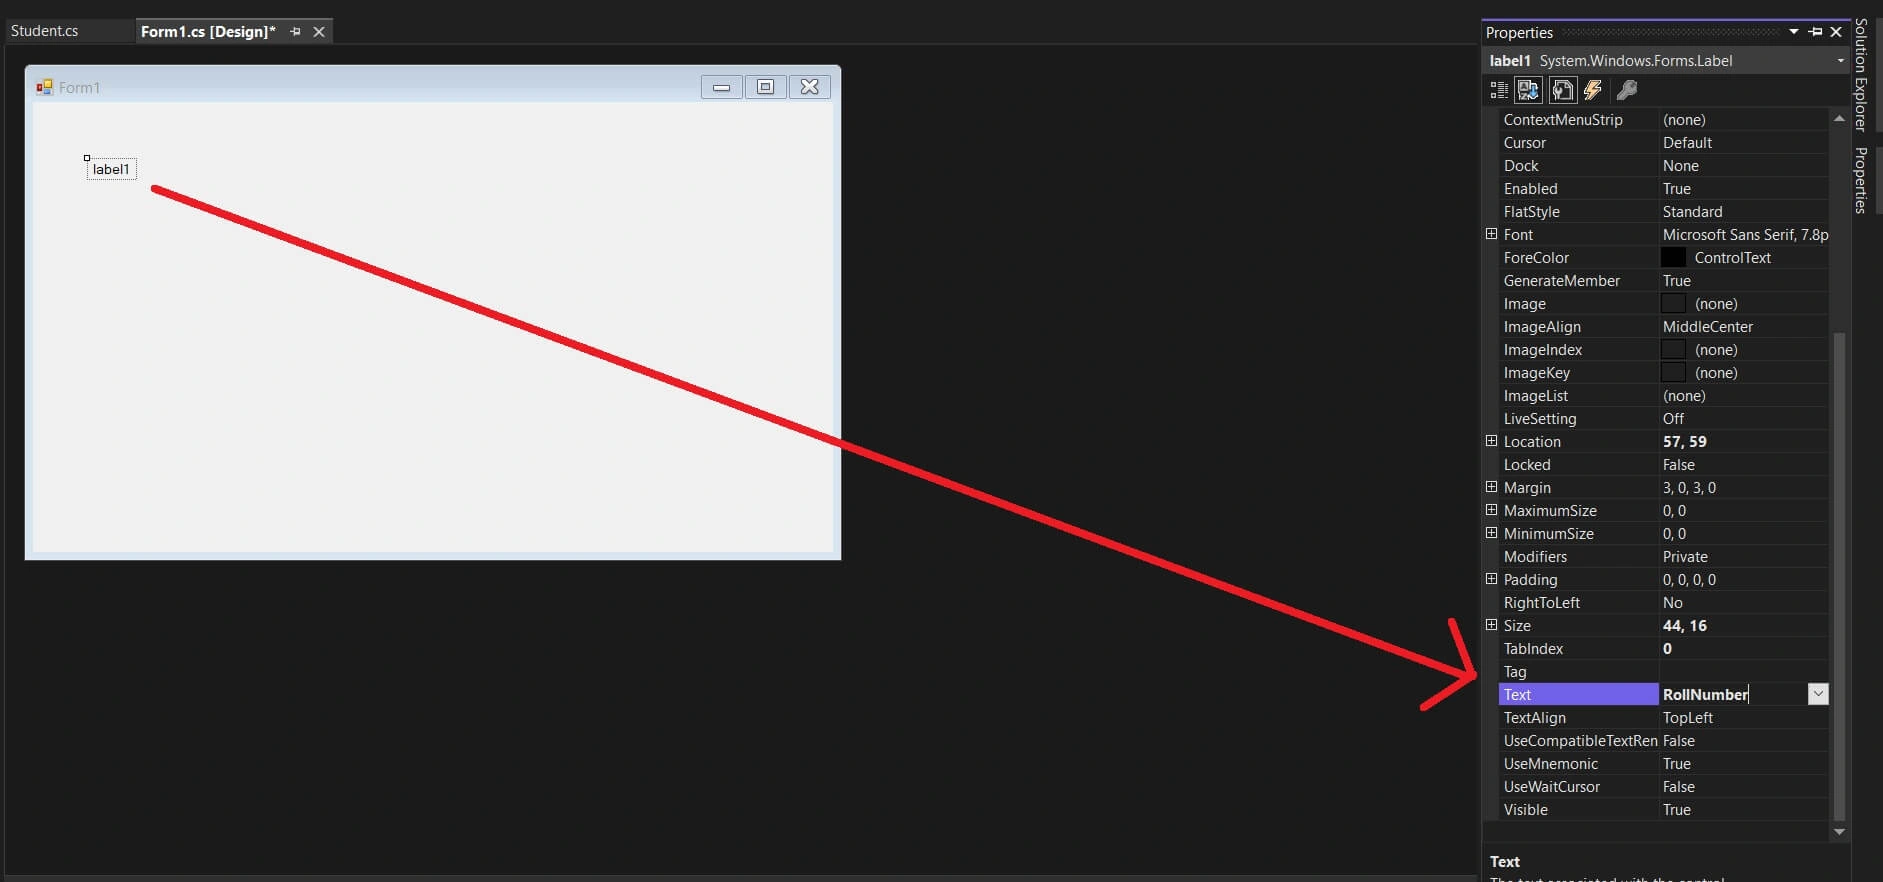
Figure 4
- Now you have to add 3 More Labels for Name, Age and City.
- Repeat the previous step and change their Text also.
- label2 Text - Name
- label3 Text - Age
- label4 Text - City
Create TextBox and Button Control
- Add 4 TextBox Controls from "Toolbox" for each Label Right Click on each -> Properties.
- textBox1 Name - txtRollNumber
- textBox2 Name - txtName
- textBox3 Name - txtAge
- textBox4 Name - txtCity,
- Add Button, Right Click -> Properties.
- button1 Text - Save
- button1 Name - btnSave.
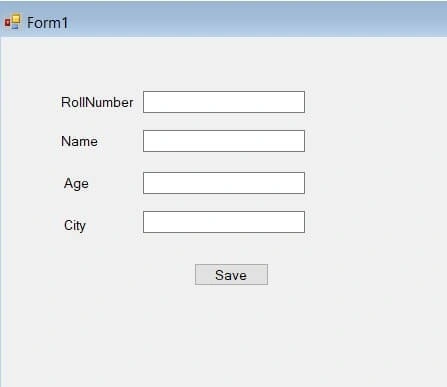
Figure 5
- Now Add one more Label, Right Click -> Properties. Set its Text as Status Message and (Name) it as lblStatusMsg.
- label5 Text - Status Message
- label5 Name - lblStatusMsg
- Change Some properties of Form1
- Text - ListCollection.
- StartPositon - Center Screen.
Now we Add Event on Save Button
- Double Click on Save Button and add this code in Form1.cs
- here we create a List collection for Students
- And Create a Method SetStatus(string Message, bool IsError){ ... } that change the color of Status Message Red if there is an error.
- btnSave_Click() is an event where we Create an object of Student Class and assign TextBox values in Properties using stu object.
- students.Add() - Add() is used to add value in the List Collection.
- We put this Code inside a try{...} block so when stu Add to the List, we pass some (message , false) to SetStatus() method.
- In Catch() we handle the exception, and pass (exception , true) to SetStatus().
//Creating a List Collection For Student Class List < Student > students = new List < Student > (); public Form1() { InitializeComponent(); } //This is a Function for Status Message public void SetStatus(string Message, bool IsError) { lblStatusMsg.Text = Message; lblStatusMsg.ForeColor = IsError ? Color.Red : Color.Green; } private void btnSave_Click(object sender, EventArgs e) { try { //Create object of Student Class Student stu = new Student(); stu.RollNumber = Convert.ToInt32(txtRollNumber.Text); stu.Name = txtName.Text; stu.Age = Convert.ToInt32(txtAge.Text); stu.City = txtCity.Text; students.Add(stu); //Now show a Staus Message if Data Saved in List SetStatus("Data Successfully Saved !!", false); } catch (Exception ex) { //This Exception Shows, if Data is not Saved SetStatus(ex.Message, true); } } - Now run the code – Click on start
- It will open Form like figure 6, when you Enter values in text Boxes and click on Save Button.
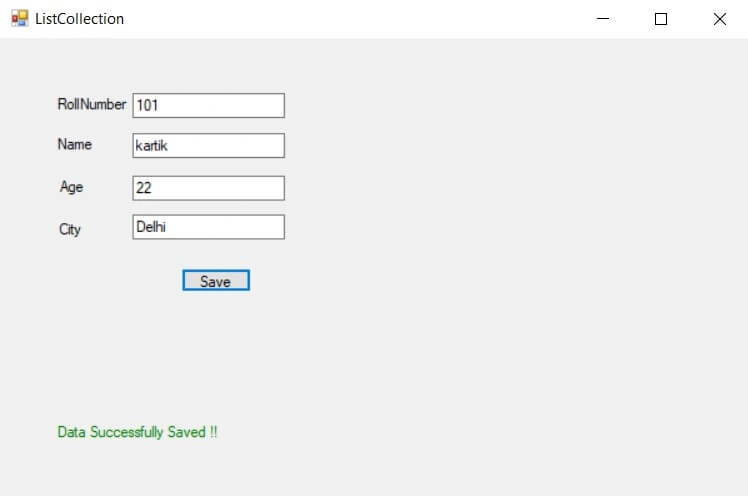
Figure 6
Create DataGridView Control
- To view the List items, Add DataGridView Control from the ToolBox.
- Add a Button Control, Right Click -> Properties.
- Text - Show In Grid and Name - btnShowInGrid.
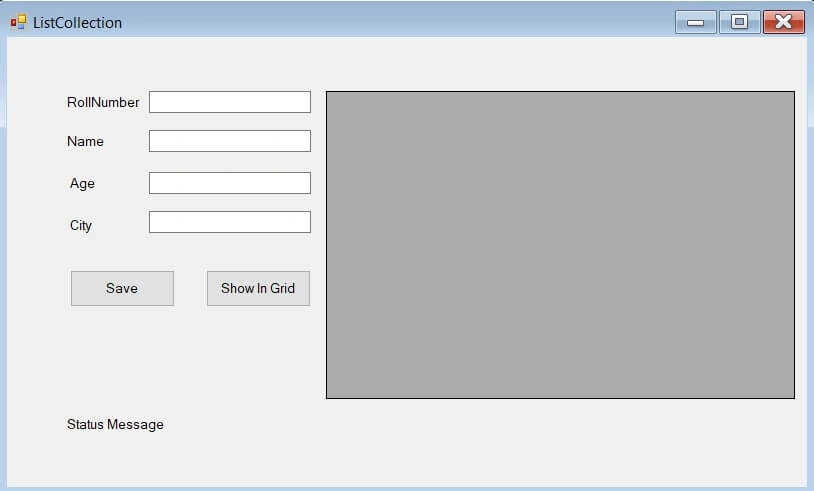
Figure 7
Now we Add Event on Show In Grid Button
- Double Click on Show In Grid Button and add this code
- btnShowInGrid_Click() is an Event for Load Data in GridView Using LoadData() Method.
- dataGridView1.DataSource is a property to get Source in DataGridView, we assign students List as DataSource.
private void btnShowInGrid_Click(object sender, EventArgs e) {
    LoadData();
}
private void LoadData() //this will load List Data in DataGridView
{
    dataGridView1.DataSource = null;
    dataGridView1.DataSource = students; //data Source is students list
}
Now run your Code, Enter Values -> Click on Save -> Click on Show In Grid. You can see your List values in Grid.
Create Button Controls for First, Last, Previous and Next
- To view Lists First, Last, Previous and Next Values Add 4 Button Controls, Right Click -> Properties on each.
- Change their Text as First, Previous, Next, Last.
- Change their Name as btnFirst, btnPrevious, btnNext, btnLast.
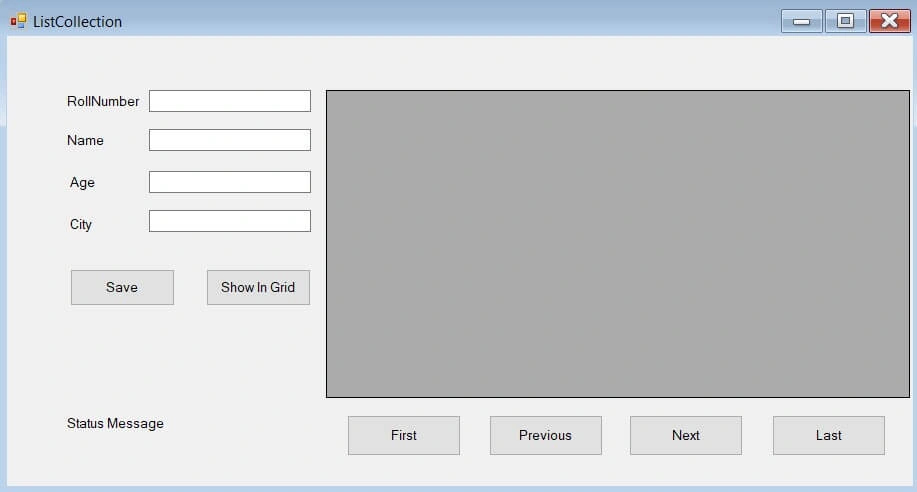
Figure 8
Now we Add Event on First, Previous, Next, Last Button
For Getting Student Index value create GetStudentAtIndex(..){...} Method, it Gets index of students List and Compare each Row of DataGridView and highlights Row where the index value is matched.
private void GetStudentAtIndex(int index)
{
    foreach (DataGridViewRow row in dataGridView1.Rows)
    {
        if (Convert.ToInt32(row.Cells[0].RowIndex) == index)
        {
            // This Code Highlights Row in Grid
            row.DefaultCellStyle.BackColor = Color.LightBlue;
        }
    }
}
Add this code before List<Students>….. Creation line to access index value for all these control.
int index = 0;    //index value for Grid View
//Creating a List Collection for Student Class
List<Student> students = new List<Student>();
Double Click on First Button and Add this code, here we pass 0 as First index of List.
private void btnFirst_Click(object sender, EventArgs e)
{
    index = 0;
    LoadData();
    GetStudentAtIndex(0);
}
Now run your Code, Enter Values -> Click on Save -> Click on Show In Grid, Click on First Button. You can see first value of Grid is Highlighted.
Double Click on Last Button and Add this code, here we pass Last index of List.
private void btnLast_Click(object sender, EventArgs e)
{
    index = students.Count - 1;
    LoadData();
    GetStudentAtIndex(students.Count - 1);
}
Now run your Code, Enter Values -> Click on Save -> Click on Show In Grid, Click on Last Button. You can see last value of Grid is Highlighted.
Double Click on Previous Button and Add this code, here we pass index after 0
private void btnPrevious_Click(object sender, EventArgs e)
{
    if (index > 0)
    {
        index -= 1;
        LoadData();
        GetStudentAtIndex(index);
    }
}
Now run your Code, Enter Values -> Click on Save -> Click on Show In Grid, Click on Previous Button. You can see Previous value of Grid is Highlighted on each click if index is less than first position.
Double click on Next Button and add this code, here we pass index before Last value of List.
private void btnNext_Click(object sender, EventArgs e)
{
    if (index < students.Count - 1)
    {
        index += 1;
        LoadData();
        GetStudentAtIndex(index);
    }
}
Now run your Code, Enter Values -> Click on Save -> Click on Show In Grid, Click on Next Button. You can see Next value of Grid is Highlighted on each click if index is less than Last position.
Create Button Control for Find
- Add a label, Right Click -> Properties Text - Find By RollNumber.
- Add a TextBox to give RollNumber to Find, Right Click -> Properties Name - txtFind.
- Add Button, Right Click -> Properties Text - Find and Name - btnFind.
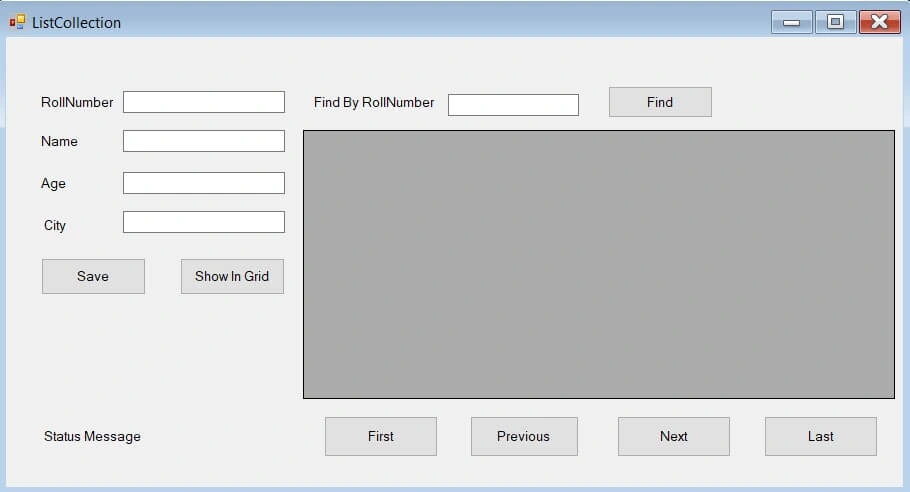
Figure 9
Now we Add Event on Find Button
Double click on Find Button and add this code.
In btnFind_Click Event here we assign rollNumber in a variable to find, and use foreach loop to compare it with all rollNumber values in List.
private void btnFind_Click(object sender, EventArgs e)
{
    LoadData();
    int rollNumber = Convert.ToInt32(txtFind.Text);

    foreach (DataGridViewRow row in dataGridView1.Rows)
    {
        if (Convert.ToInt32(row.Cells[0].Value) == rollNumber)
        {
            row.DefaultCellStyle.BackColor = Color.LightBlue;
        }
    }
}
Now run your code, Enter Some Values -> Click on Save ->Enter any of the RollNumber value in Find By RollNumber TextBox that you stored in the List, click on Find, it will navigate to the Found value in the Grid.
Create Button Control for Update
- Add a Button Control, Right Click -> Properties Text - Update and Name - btnUpdate.
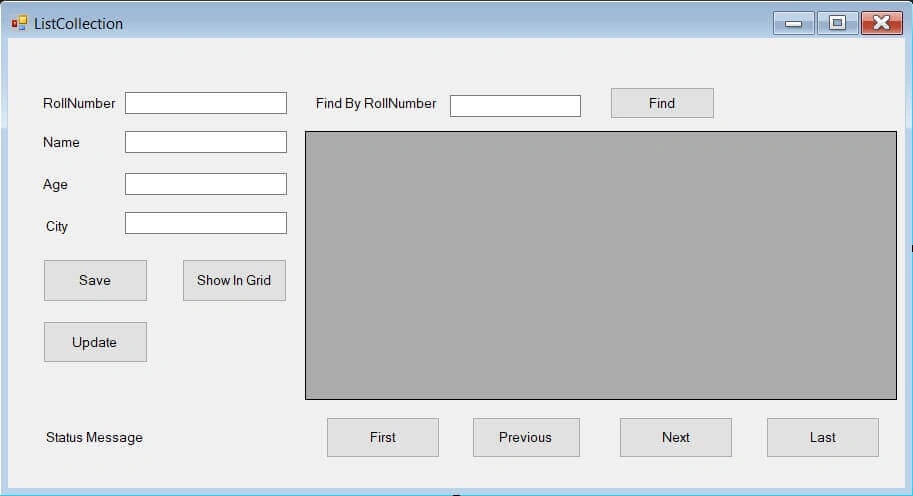
Figure 10
Now we Add Event on Update Button
- Double Click on Update Button and add this Code
- In btnUpdate_Click Event we Find the Same RollNumber value of TextBox in the students List.
If the value is found then we put values of textBoxs in Properties of that student object.
private void btnUpdate_Click(object sender, EventArgs e)
{
    int rollNumber = Convert.ToInt32(txtRollNumber.Text);
  //here we compare each rollnumbar of list with the textRollNumber value
    foreach (Student student in students)
    {
        if (student.RollNumber == rollNumber)
        {
            try
            {
                student.RollNumber = Convert.ToInt32(txtRollNumber.Text);
                student.Name = txtName.Text;
                student.Age = Convert.ToInt32(txtAge.Text);
                student.City = txtCity.Text;
                SetStatus("Data Updated Successfully !!", false);
                LoadData();
            }
            catch (Exception ex)
            {
                SetStatus(ex.Message, true);
            }
        }
    }
}
Now run your code enter some student detail Save it, show them in Grid with Show In Grid Button and enter one more detail of student but make sure to give RollNumber that you give to existing student and fill other details.
Click on Update Button this time, not on Save you can see once you click, values go change and Load in the GridView.
Create Button Control For Delete
Add a Button Control, Right Click -> Properties Text - Delete and Name - btnDelete.
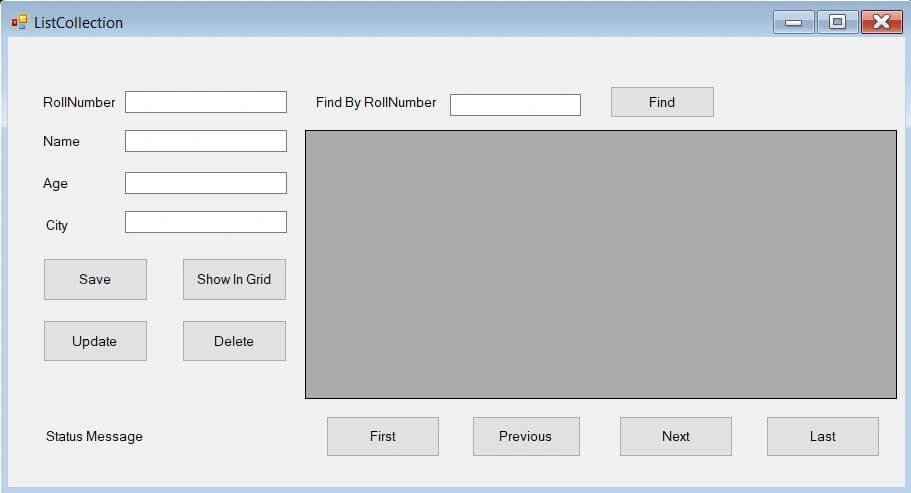
Figure 11
Now we Add Event on Delete Button
- Double Click on Delete Button and add this code
- In btnDelete_Click Event we compare RollNumber value of TeatBox with RollNumber value in the List.
If the value found then we remove that value from the List using Remove() Method.
private void btnDelete_Click(object sender, EventArgs e)
{
    int rollNumber = Convert.ToInt32(txtFind.Text);
    foreach (Student student in students)
    {
        if (student.RollNumber == rollNumber)
        {
            try
            {
                students.Remove(student);
                LoadData();
                SetStatus("Data Deleted Successfully !!", false);
            }
            catch (Exception ex)
            {
                SetStatus(ex.Message, true);
            }
            break;
        }
    }
}
Now run your application enter Some Students Details Click on Save each time -> Click on Show In Grid to view students List values in Grid.
Now enter one of existing student RollNumber in Find By RollNumber TextBox -> Click on Delete Button.
You can see value of that student is Now deleted from List students.
Application is Now completed, you learned how to add Events on Collection (List) in C#.
Summary
List is a collection used for dynamic memory allocation as you see in ListCollection Application above. You can access List values using index. In List Collection we can store, find, update, Delete and perform other functionalities. You can also show DataGridView Control to show List values at Run time even you can use other Controls also like MessageBox as per your need. In Generic type of List we can use various type of data.
Saravanakumar SekaranPosted May 19, 2022, 3:47 AM
Very nice article