

What exactly is Docker?
What is the importance of Docker for me as a developer in IT?
So how exactly do we use docker?
What's the difference between containers and dockers?
Advantages of containers
Containers and virtual machines
Docker Engine
The docker official website explains a Docker engine with the below diagram.
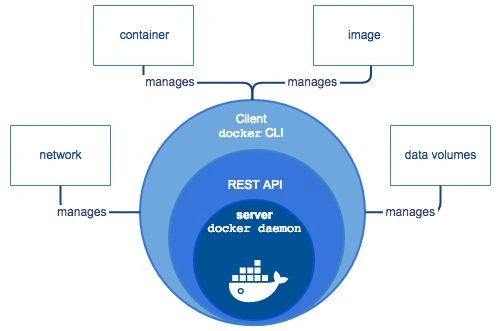
A docker engine consists of a client and a server. We users interact with the server using the docker CLI which is also the client. The client interacts with the server through the docker Rest API. The server or docker daemon is responsible for running the containers. When the user types in a command from the docker CLI, for example - the ‘docker run imagename’ command, the request is received by the docker daemon. The daemon will search for the image locally, and if found it will run it as a container. Think of an image as an executive file. If the image is not found locally, the daemon will search for it in a registry and then run it as a container.
Installing Docker
Now, let’s start exploring docker practically. You need Windows 10 Professional or Enterprise version with at least 4 GB RAM to install Docker. Since I didn’t have Windows 10 Professional, I created a virtual machine in Azure. Here are the steps:
Go to the Azure portal and click on the virtual machine.
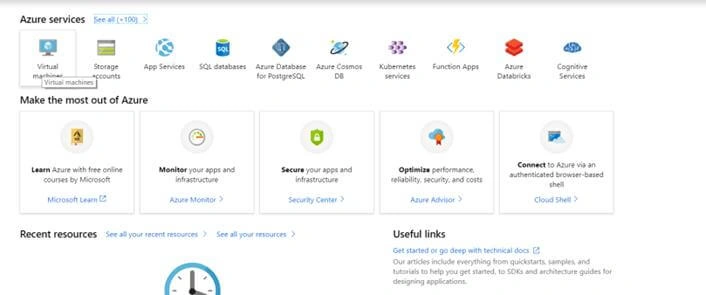
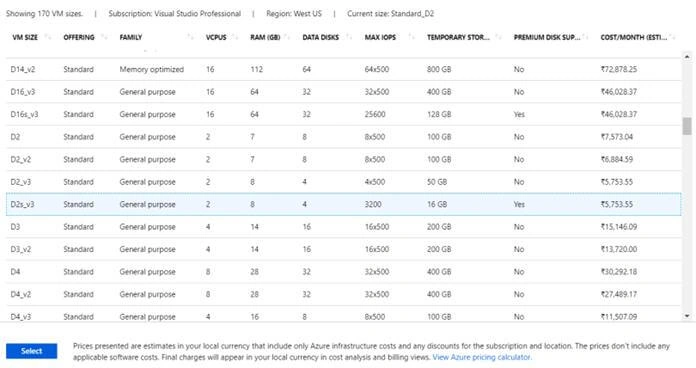
Choose a Windows 10 professional machine. Not all VMs support nested virtualization. So, I went and selected a VM of size D2s_v3. Selecting a virtual machine with a size that supports nested virtualization is important to run Docker.
Also, make sure that in inbound and outbound port rules, all connections are allowed through RDP; else, you might not be able to connect through RDP.
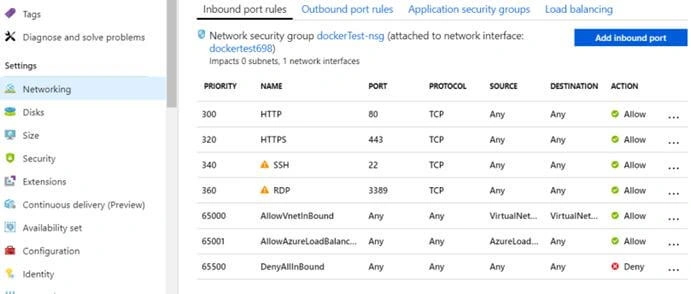
If you are trying to access Azure from your office you might run into issues. You might need to contact your system administrator to open up these ports. Once our VM is up and running we need to install Docker. Go here to install Docker for Windows.
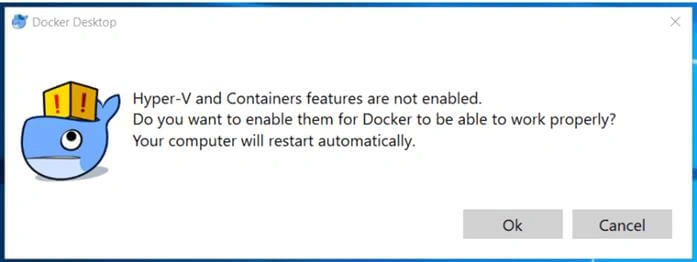
Once you have installed the above software, your system will restart and Docker will ask you to enable Hyper-V. Click "Yes, restart the system".
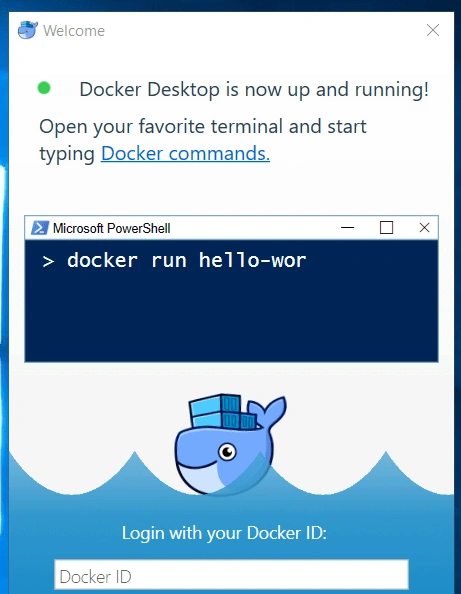
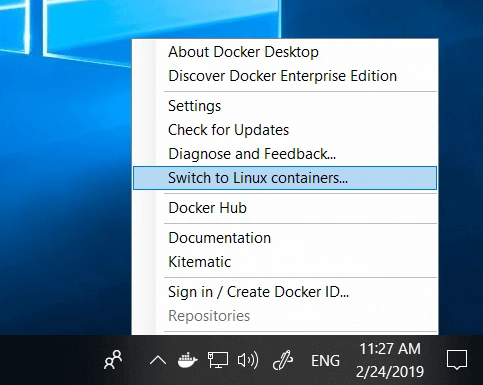
By default, Linux containers will be enabled. You can switch containers by clicking on the whale icon as below.
Go to PowerShell and type ‘docker run hello-world‘ and press Enter. You should see a message ‘Hello from Docker’ which means your docker is installed correctly.
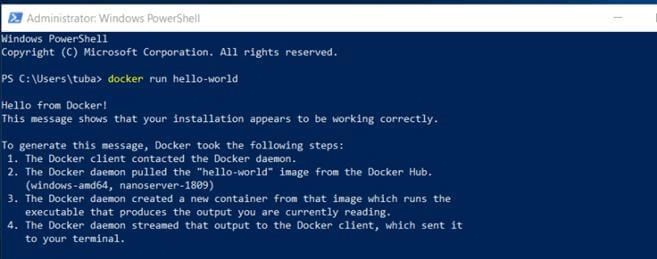
Read the steps that are mentioned in the screenshot above. This is what we had talked about earlier.
It is possible that if you are trying to run Docker from your workplace, you might face some proxy related issues. You can set your proxy by navigating to settings.
Demo: Running your asp.net application as a container
Create a new ASP.NET MVC core project in Visual Studio 2017. While creating make sure you have the ‘Enable Docker Support’ option checked.
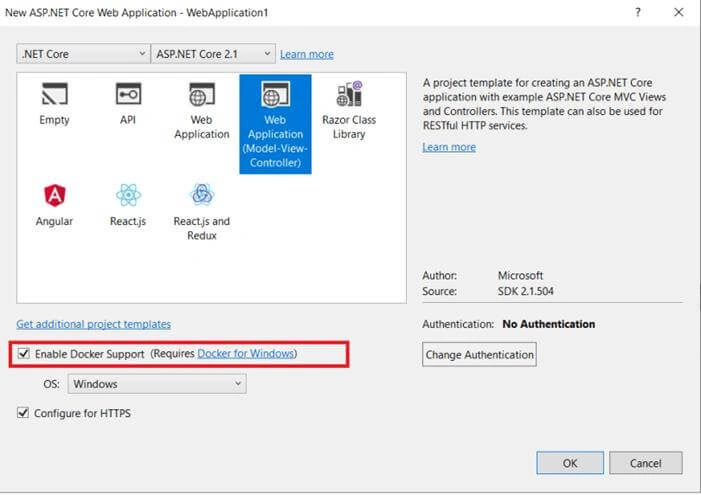
I call my app ‘aspnetapp’. Once you enable docker support, a file called dockerfile is created in the Solution Explorer.
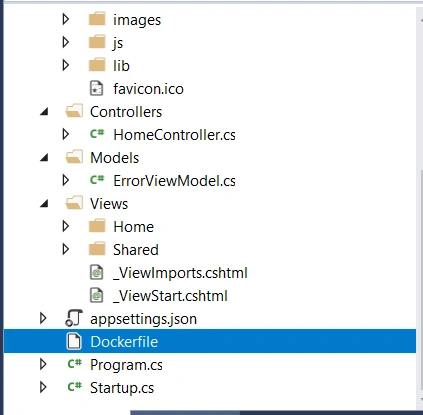
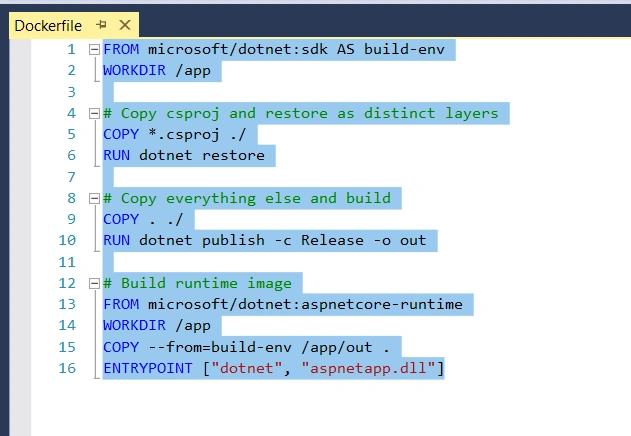
Replace the existing code in this file with the following piece of code.
- FROM microsoft/dotnet:sdk AS build-env
- WORKDIR /app
- # Copy csproj and restore as distinct layers
- COPY *.csproj ./
- RUN dotnet restore
- # Copy everything else and build
- COPY . ./
- RUN dotnet publish -c Release -o out
- # Build runtime image
- FROM microsoft/dotnet:aspnetcore-runtime
- WORKDIR /app
- COPY --from=build-env /app/out .
- ENTRYPOINT ["dotnet", "aspnetapp.dll"]
docker build -t aspnetapp .

Once the project is build run the following command:
docker run -d -p 8080:80 --name myaspnetapp aspnetapp

Once this is successful go to localhost:8080 to navigate the app,
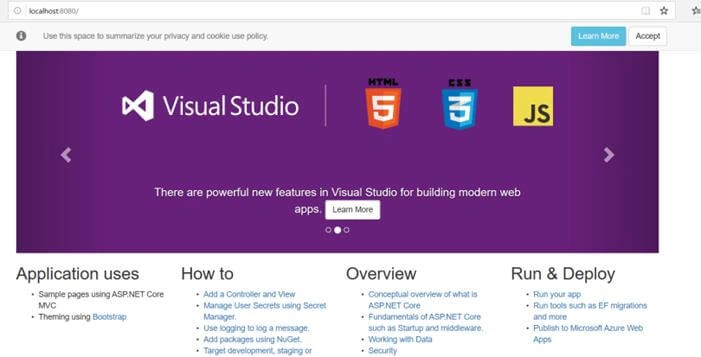
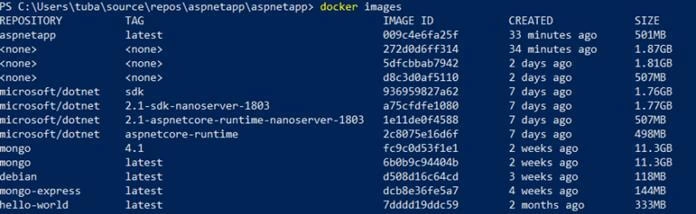
So what happened here? The dockerfile gave information which is needed for creating an image. For example, it says that the image should be created with the base image as Microsoft/dotnet:aspnetcore. An image for application is created when you run the build command. If you write the following the command in PowerShell, you see the images listed.
Docker images

For further information on this demo, refer to the official docker website here.
So, developers can create their image and upload it to a repository. This image can then be simply run on production machines when the application needs to be made live.
Now let’s check out, how we can run MongoDB as a container.
Demo: Installing MongoDB
The traditional way of installing software
Now let’s install Mongo using traditional methods. If we head over to its documentation, it will list the steps that are required for installing MongoDB including running the executive, setting it up through the installer etc. Installing MongoDB is a lengthy process.
Now let’s see how docker simplifies this process.
Running software as a container
Go to Docker Hub and search for Mongo.
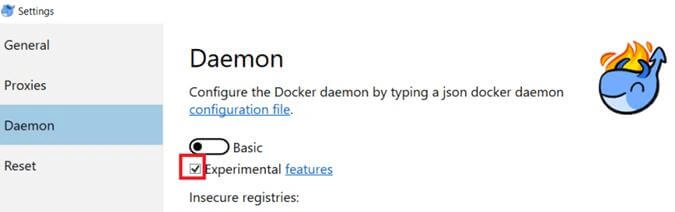
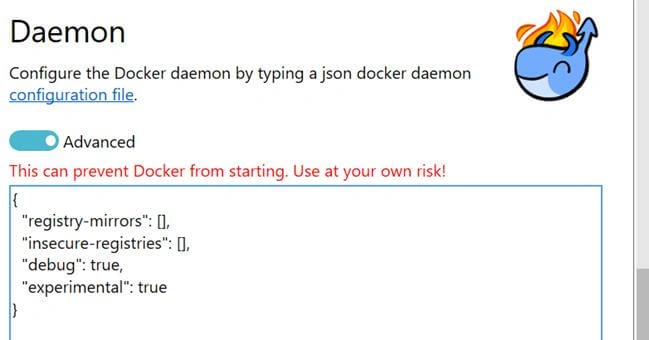
Before we run the command, click on the whale icon, go to settings -> Daemon and set the experimental flag as true.
docker run --name some-mongo -d mongo:4.1
Here the docker installs a container with the name ‘some-mongo’. You can give some other name as you please. ‘Mongo’ is the image name and ‘4.1’ is its version or tag.
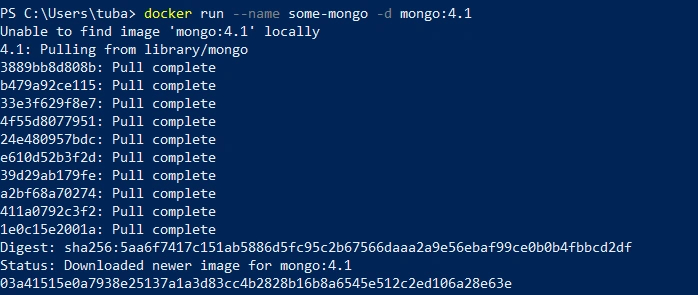
It says that a newer image has been downloaded.
Let’s use the following command to run the downloaded image,
docker run some-mongo
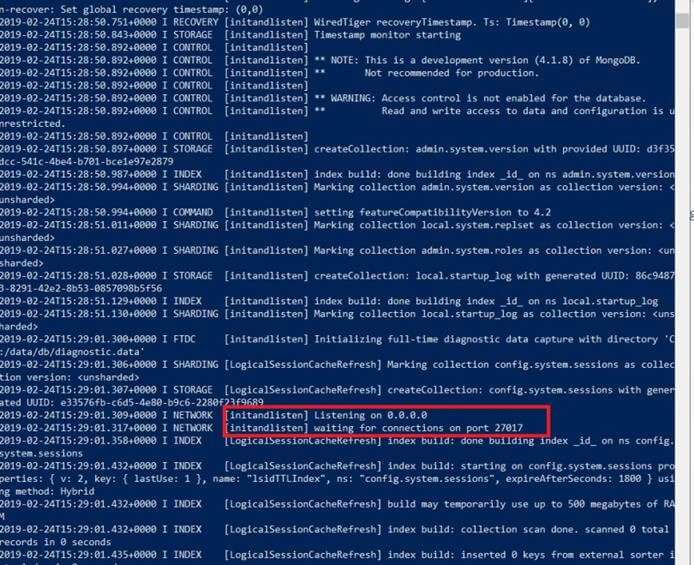
So open another instance of PowerShell and run the following command,
docker exec -it some-mongo mongo
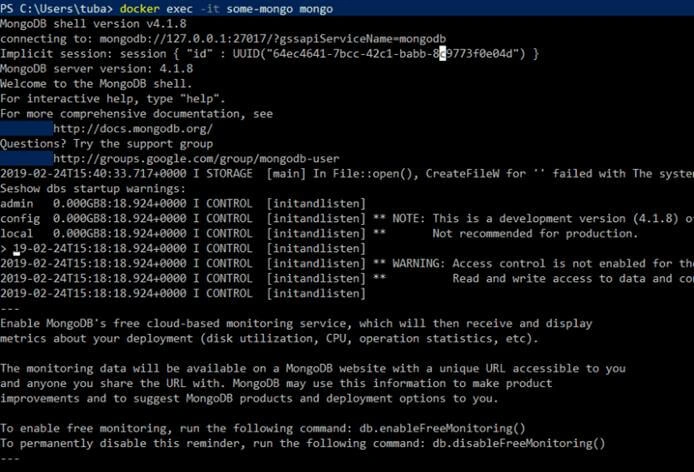
show dbs
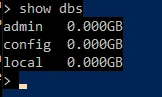
This shows that there are no databases created yet in our server. We can now proceed with other mongo db commands here.
So we see docker simplifies the process of installing the software.
What happens behind the screens?
Your operating system can be divided into two major portions: Kernel & Userspace. The kernel has control over the hardware and consists of drivers etc. Everything other than the kernel like our applications, OS apps, and libraries etc. that are required by this application fall under user space. User space accesses the hardware through the kernel.
Traditionally when we install software we simply install the application and use the drivers and the libraries already present in the user space. But now with the containerization approach, when an image is created it will contain the application plus other drivers required for it to run. Hence an application will be independent of the resources that the operating system provides.
Docker commands
docker run imagename
docker –help
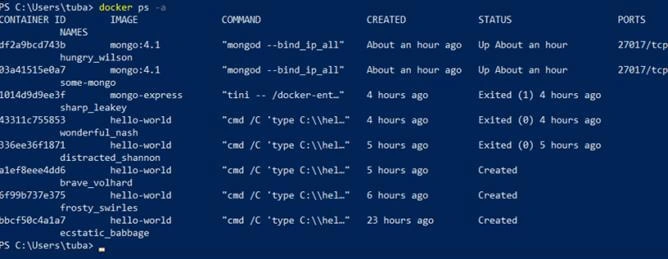
docker ps

docker ps -a
docker stop containername
docker rm containername
docker images
For more docker commands, visit here.
How to upload image to docker hub?
In the first demo above, we created an image for ASP.NET core which was stored locally. We will now have a look at how to upload images on Docker hub. First you need to create a free account on docker hub. Then create a repository.
Login from powershell as below:


In the docker tag command, aspnetapp is the image name. Then comes my username/respository:tag.
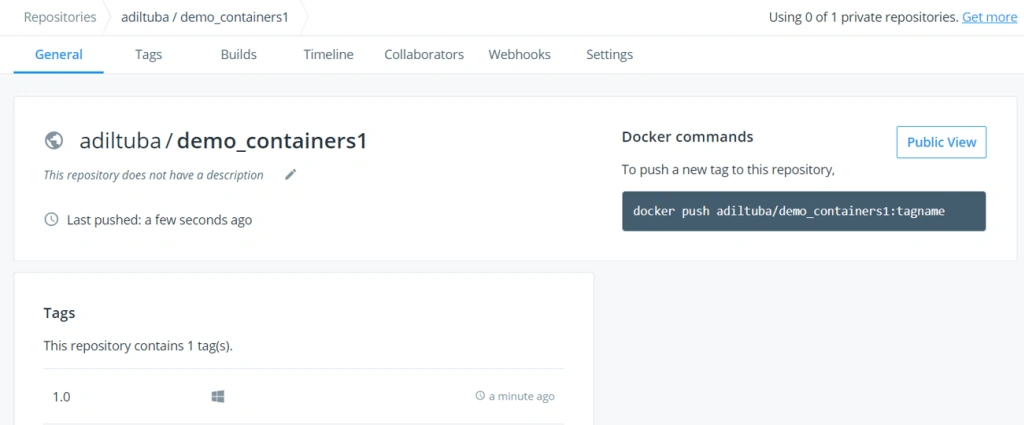
Once this image is pushed on dockerhub, you can login there and you will be able to see the image in a browser.
This article was originally published on my website.
Jadran MeštrovićPosted Mar 13, 2020, 1:36 PM
<a href="https://www.binarymaps.com/docker-basics">Docker basics</a> includes communication matrix which is UNIX socket by default.
Tushar BeniwalPosted May 26, 2019, 4:51 PM
Hi could you please what is the purpose of creating VM in Azure as after creating it is not mentioned further in article
Kiran MaramPosted Apr 18, 2019, 8:32 AM
Simple Awesome, it's very helpful for beginners
Atul SharmaPosted Mar 12, 2019, 9:52 AM
This is what we call a complete article. It has everything I needed to set up. Thanks !!!
Mahesh ChandPosted Mar 11, 2019, 1:06 PM
Thank you for sharing a detailed article on Docker. Welcome to C# Corner.
Nadaraj PrabhuPosted Mar 11, 2019, 11:36 AM
Well written article with all the necessary information.
Abhishek MishraPosted Mar 11, 2019, 1:15 AM
Awesome. I needed this.