

Introduction
In the current scenario, most people use Android smartphones. I will show you how to change GUI components in an Android, using Android Studio. Android is the kernel based operating system. It allows the user to modify GUI components and the source code.
Requirements
- Android Studio
- Little bit XML and JAVA knowledge.
- Download link (Android Studio).
Steps to be followed are given below
Carefully follow the steps given below to learn how to change GUI components in an Android and I have included the source code given below.
Step 1
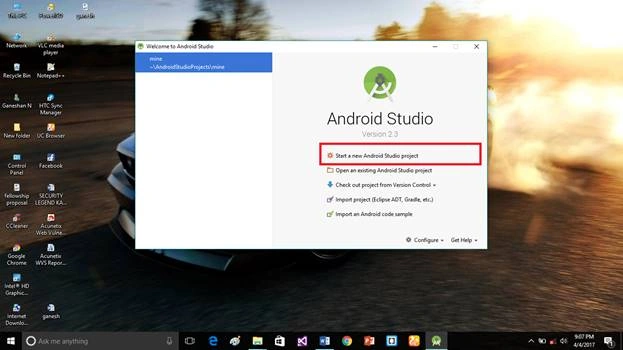
Open Android Studio. Start the new project.
Step 2
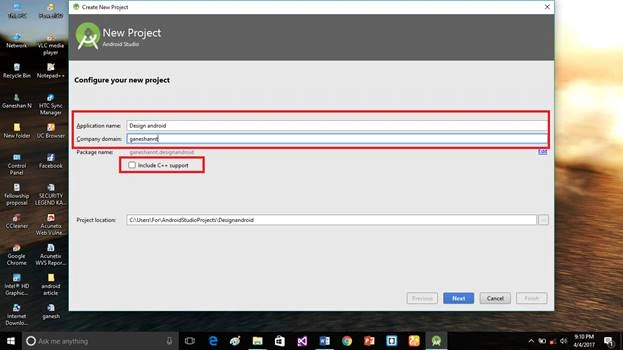
Put the Application name and company domain. If you wish to use C++ to code the project, mark the Include C++ support, followed by clicking Next.
Step 3
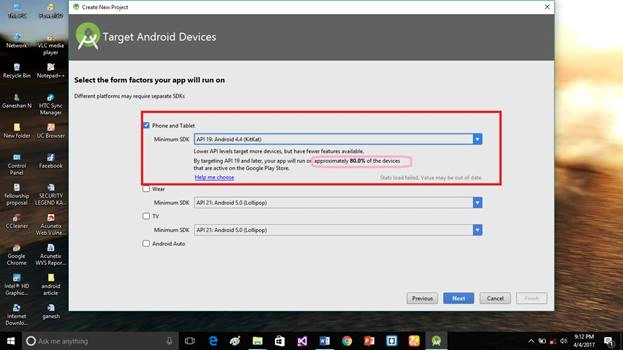
Select Android minimum SDK. Afterwards, you chose the minimum SDK and it will show the approximate percentage of people who use SDK , followed by clicking Next.
Step 4
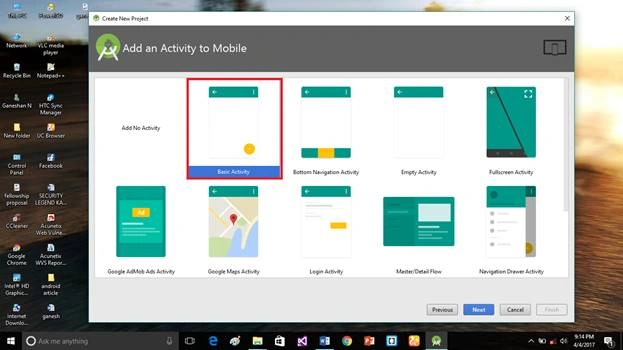
Choose the basic activity, followed by clicking Next.
Step 5
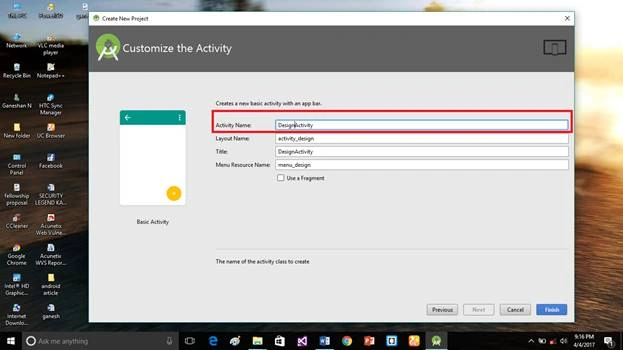
Put the activity name and layout name. Android Studio basically takes Java class name from what you provide as the activity name.
Step 6
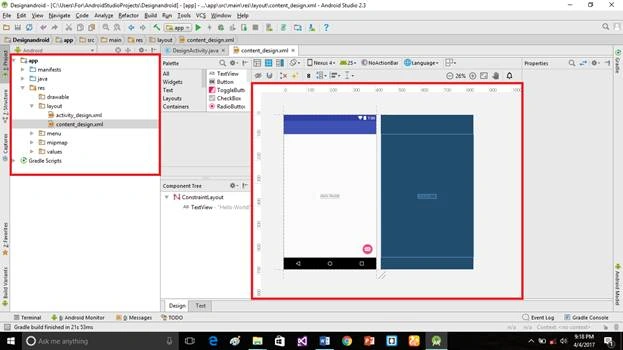
This is the default activity design for the basic activity layout.
Step 7
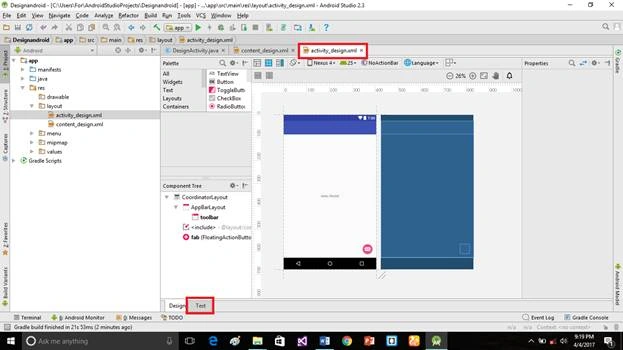
Go to activity_design.xml then click the text bottom.
Step 8
Into the activity_design.xml, copy and paste the code given below.
activity_design.xml code
- <?xml version="1.0" encoding="utf-8"?>
- <LinearLayout xmlns:android="http://schemas.android.com/apk/res/android"
- android:layout_width="fill_parent" android:layout_height="fill_parent"
- android:orientation="vertical" >
- <TextView
- android:id="@+id/textView1"
- android:layout_width="match_parent"
- android:layout_height="wrap_content"
- android:layout_margin="20sp"
- android:gravity="center"
- android:text="DESIGN ANDROID"
- android:textSize="20sp"
- android:textStyle="italic" ></TextView>
- <Button
- android:id="@+id/button1"
- android:layout_width="match_parent"
- android:layout_height="wrap_content"
- android:gravity="center"
- android:text="Change font size"
- android:textSize="20sp" />
- <Button
- android:id="@+id/button2"
- android:layout_width="match_parent"
- android:layout_height="wrap_content"
- android:gravity="center"
- android:text="Change color"
- android:textSize="20sp" />
- <Button
- android:id="@+id/button3"
- android:layout_width="match_parent"
- android:layout_height="wrap_content"
- android:gravity="center"
- android:text="Change font"
- android:textSize="20sp" />
- </LinearLayout>
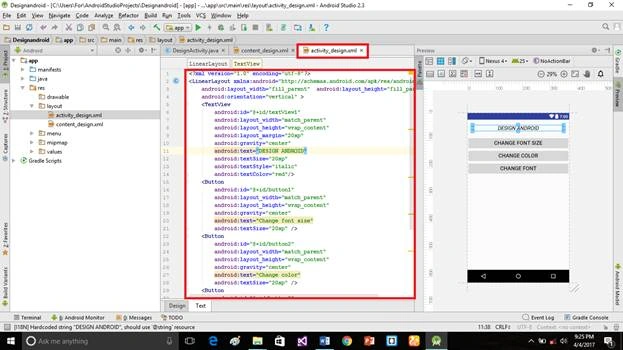
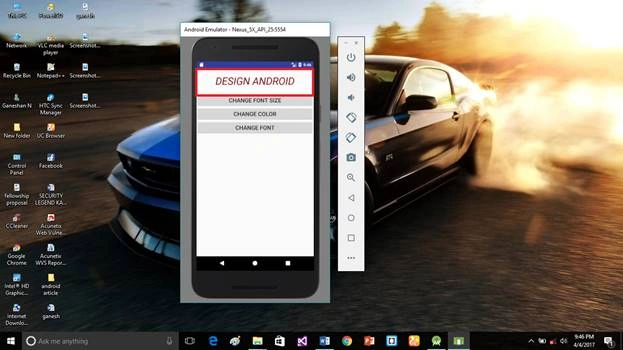
This is our user interface of the Application
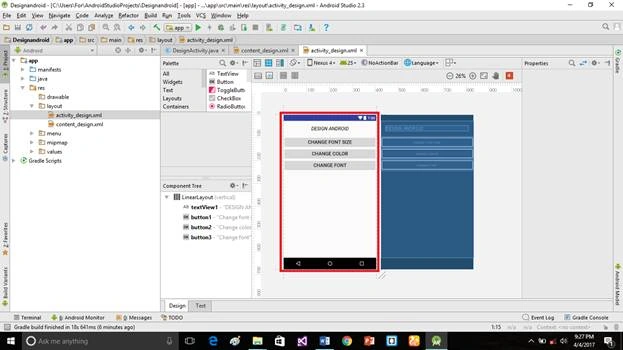
Step 10
Into the DesignActivity.java, copy and paste the code given below. Do not replace your package name.
DesignActivity.java code
- package ganeshannt.designandroid;
- //import android.R;
- import android.app.Activity;
- import android.graphics.Color;
- import android.graphics.Typeface;
- import android.os.Bundle;
- import android.view.View;
- import android.widget.Button;
- import android.widget.TextView;
- public class DesignActivity extends Activity
- {
- float font =24;
- int i=1;
- @Override
- public void onCreate(Bundle savedInstanceState)
- {
- super.onCreate(savedInstanceState);
- setContentView(R.layout.activity_design);
- final TextView t1=(TextView) findViewById(R.id.textView1);
- Button b1 = (Button) findViewById(R.id.button1);
- b1.setOnClickListener(new View.OnClickListener()
- {
- public void onClick(View view)
- {
- t1.setTextSize(font);
- font=font+4;
- if(font==40)
- font=20;
- }
- });
- Button b2 = (Button) findViewById(R.id.button2);
- b2.setOnClickListener(new View.OnClickListener()
- {
- public void onClick(View view)
- {
- switch(i)
- {
- case 1:
- t1.setTextColor(Color.parseColor("#0000FF"));
- break;
- case 2:
- t1.setTextColor(Color.parseColor("#00FF00"));
- break;
- case 3:
- t1.setTextColor(Color.parseColor("#FF0000"));
- break;
- case 4:
- t1.setTextColor(Color.parseColor("#800000"));
- break;
- }
- i++;
- if(i==5)
- i=1;
- }
- });
- }
- }
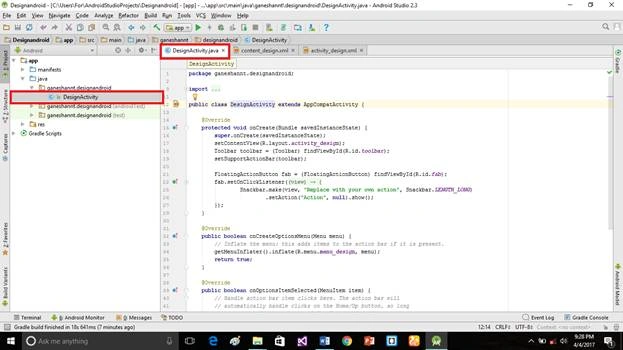
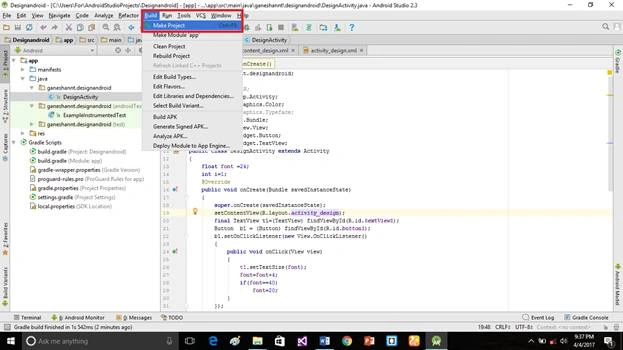
Click Build bottom and make the project. Now, your project compilation process is going on. Any error found in your project will be shown to you.
Click run botton. Your emulator will start, followed by running your Application.
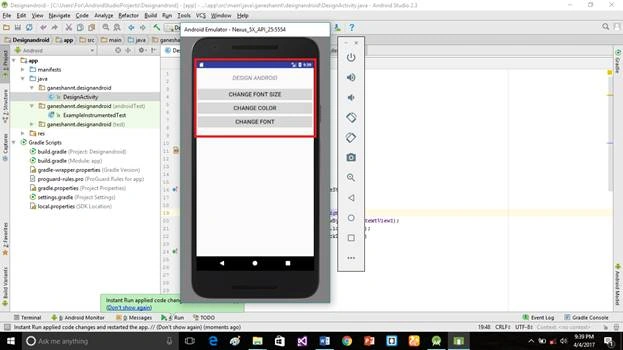
Deliverables
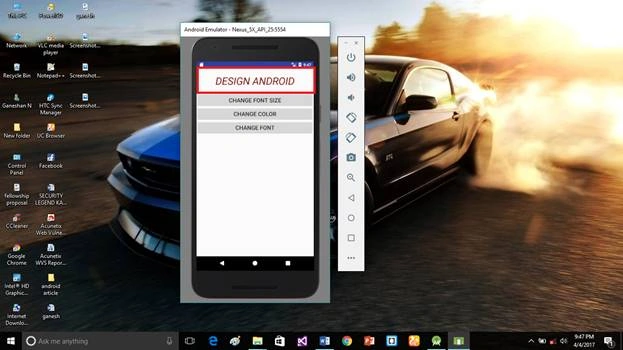
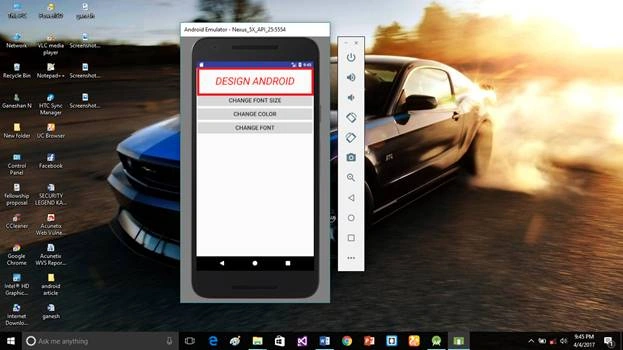
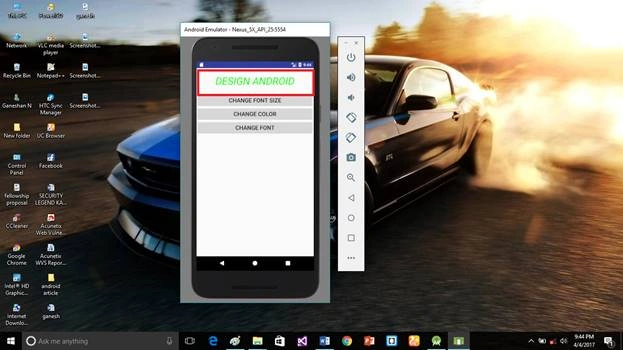
Proceed as shown.
If you have any doubts, just comment below.
Saravanakumar SekaranPosted May 5, 2017, 10:30 PM
Good one with nice explanation
Ganeshan NPosted Apr 8, 2017, 12:50 AM
yeah ...c++ supported current version Android studio. so u can use c++ code for that
Ganeshan NPosted Apr 8, 2017, 12:50 AM
yeah ...c++ supported current version Android studio. so u can use c++ code for that
Ajit SPosted Apr 8, 2017, 12:38 AM
current version of android studio is support c++ programing language.Can i use to write c++ program for this article