

Introduction
In this article we will see how to create a Windows Virtual Machine in Azure and how to deploy the web application in that VM from Visual Studio.
Content
- Creating a VM in Azure portal
- Install IIS in a VM
- Install ASP.NET 4.6
- Install Web Management Service
- Install Web Deploy 3.5
- Creating an inbound rule for VM in Azure portal
- Publish the Web APP from Visual studio
Creating a VM in Azure Portal
Step 1
Login into Azure portal (http://portal.azure.com)
Step 2
Click on Virtual Machine from the left menu bar
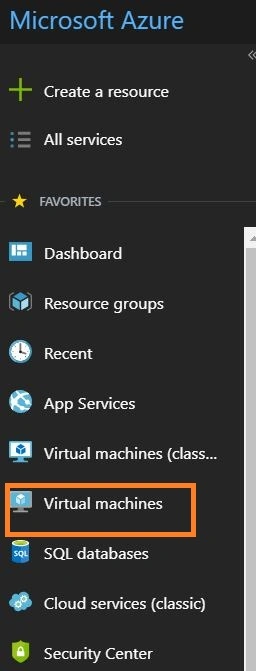
Click on Add button as show in the below figure, you will get arecommended OS from the gallery, choose window server and pick windows server 2016 datacenter
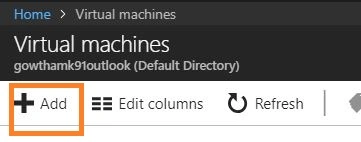
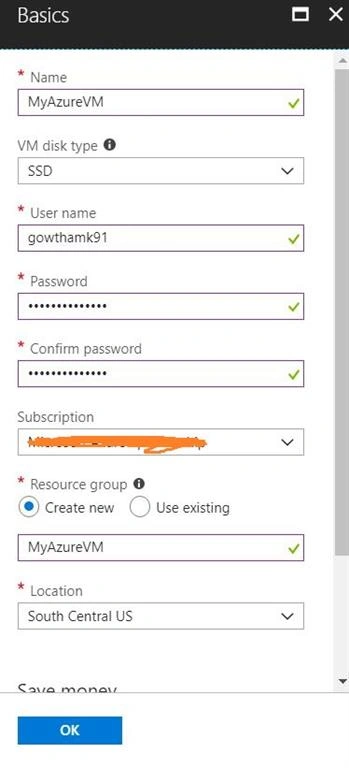
Next we need to go through basic setup to create a VM,
- Basic Account setup for VM,
- Name the VM
- Choose the disk type, make it SSD for better performance
- Give the user name and password for the account setup, as shown in the below figure
- Choose a Size, in my case I have chosen Ds4_v3, as shown in the below figure

- Network setting, just go with default setting
- Summary, click on create
Step 5
Once the VM is created you can download the RDP file by clicking on connect button in overview of VM.
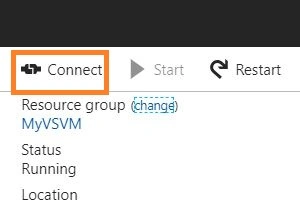
Use the RDP to connect with VM.
Once you connected with VM open the PowerShell window in admin mode from the VM and run the below command to install the IIS.
- Install-WindowsFeature -name Web-Server -IncludeManagementTools
Install ASP.NET 4.6
Run the below command in PowerShell to install ASP.NET 4.6
- Install-WindowsFeature Web-Asp-Net45
Install Web Management Service
Run the below command in PowerShell to install web management service
- Install-WindowsFeature -Name Web-Mgmt-Service
Install Web Deploy 3.5
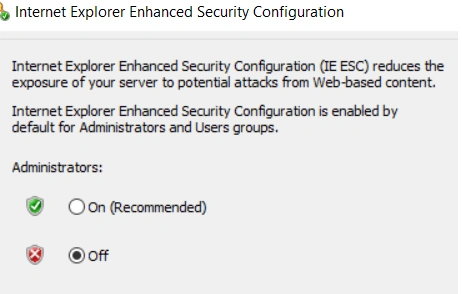
Before that make sure to turn off the Internet Enhances Security from server manager for Admin to download the web deploy package as shown in the below figure
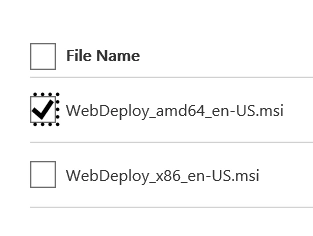
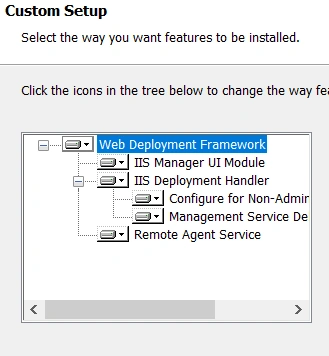
Use this link https://www.microsoft.com/en-us/download/details.aspx?id=39277 to download Web Deploy 3.5 msi file, installation is pretty simple just click next and go.
Creating an inbound rule for VM in Azure portal
Step 1: Open the Azure portal and go to the VM, click on Networking from the settings category.
Step 2: Click on Add inbound port rule
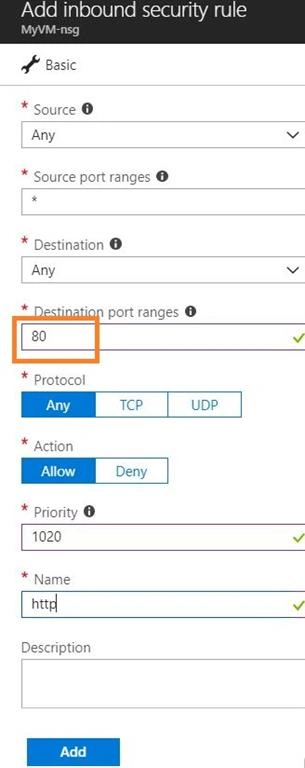
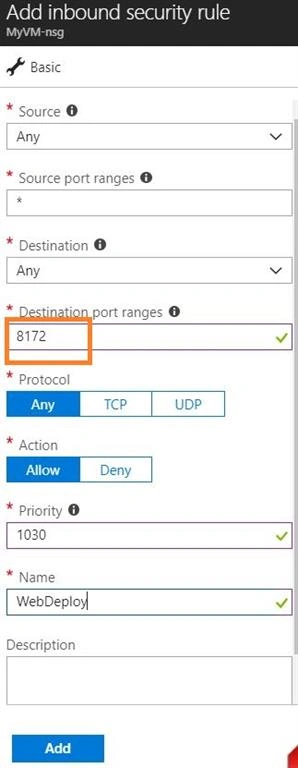
Step 3: Add the port 80 and port 8172 to enable the HTTP and Web deploy port respectively as shown in the below figure
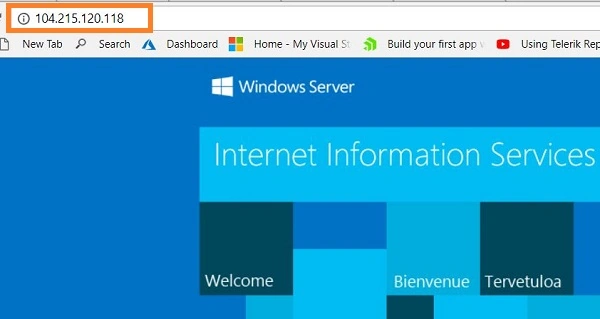
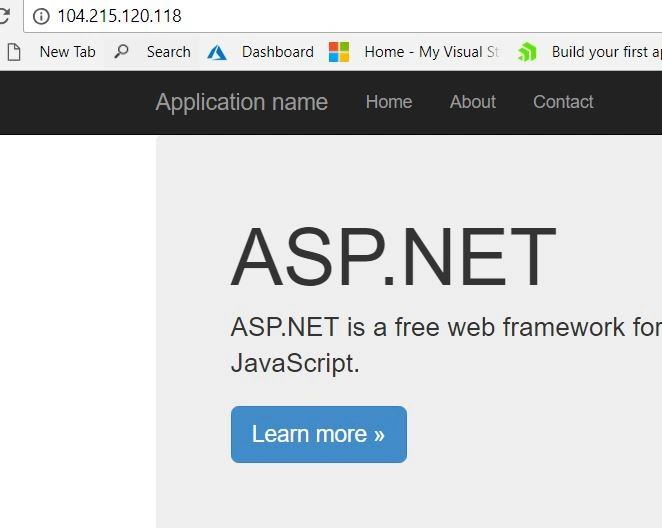
Now run the IP in browser you can notice it will load default html page from IIS, as shown in the below figure
Make the Public-Address Static
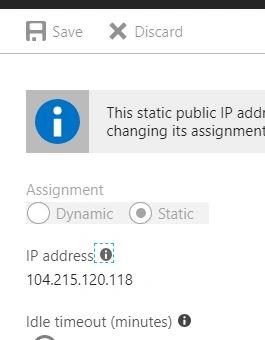
Double click on the IP in VM overview from the portal, it will open the IP configuration screen, change the public IP address from dynamic to static as shown in below figure.
Deploy Web app to VM from Visual Studio
Step 1: Open Visual Studio and create a basic ASP.NET MVC web application.
Step 2: Once the solution is loaded, right click on the project and select publish.
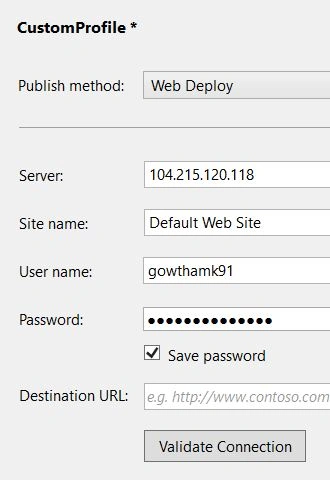
Step 3: Select publish target as IIS and create a web deploy profile by giving the VM IP and account credential, as shown in the below figure
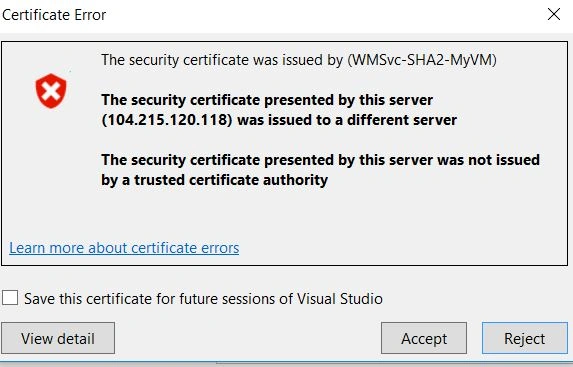
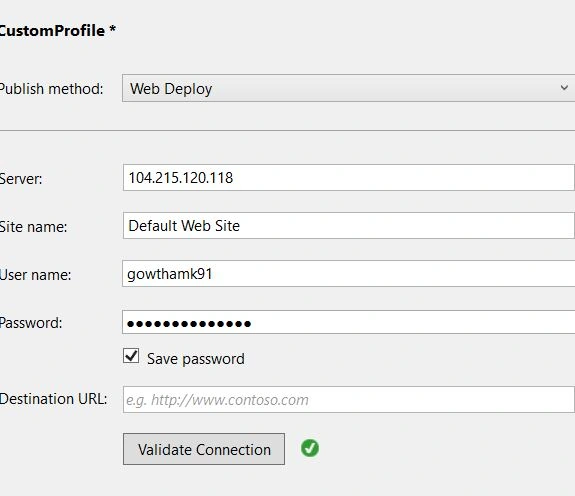
Step 4: Validate the connection, you will get a warning as shown in the below figure. Accept it.
Conclusion:
We have seen how to create a VM from Azure and how to deploy the web application in the VM using Visual Studio. I will discuss more about adding a custom domain in my next article, so instead of using the IP to run the web application we can go with some meaningful domain name.
D.K. nathPosted Oct 20, 2020, 4:21 AM
How to deploy multiple web applications in Azure VM
Viknaraj ManogararajahPosted Jul 17, 2018, 7:56 PM
nice article, thank you for sharing..
Hadshana KamalanathanPosted Jul 17, 2018, 6:25 PM
Thank you for sharing...