

When we want to develop a web-based application using AngularJs, it often requires a modal dialog box control with some extra features like height, width, title and so on. But like classic ASP.NET, a ready-made control is not always available in the AngularJs framework. If we want to create a custom modal dialog control, we can create it easily. Using this article, we will learn how to create a custom modal dialog control.
For that, we will first open Visual Studio and create a blank ASP.NET web application. We then need to install some NuGet packages such as AngularJs, Bootstrap and AngularUI.
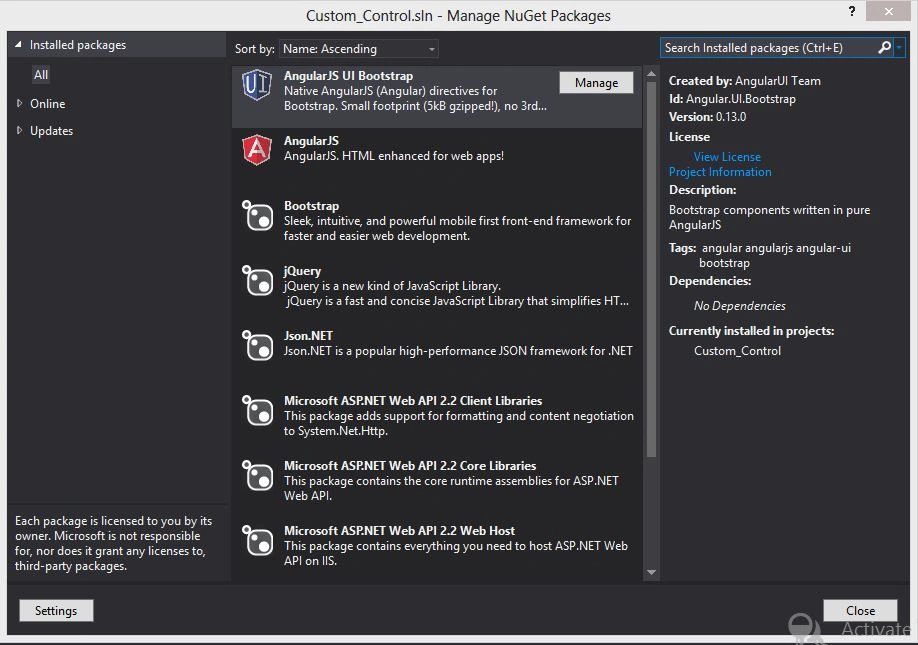
Figure 1: AngularJs UI Bootstrap
First we will create a modal directory with the attributes. For this, create an HTML file named modal.html and add the following code to that file:
- <div class="modal-dialog" ng-show="showModal">
- <div class="modal-backdrop"></div>
- <div class="modal-content" >"height:{{height}};width:{{width}};left:{{left}};top:{{top}};">
- <div class="modal-header">
- <button type="button" class="close" data-dismiss="modal" aria-hidden="true" ng-click="close();" ng-hide="HideCloseButton">×</button>
- <h4>{{ModalParam.title}}</h4>
- </div>
- <div class="modal-body" ng-transclude >"height:{{BodyHeight}};">
- </div>
- </div>
- </div>
First, we need to define the Angular app as in the following:
- var CustomCtrlApp = angular.module('CustomCtrlApp', ['ui.bootstrap']);
- CustomCtrlApp.directive('modal', function () {
- return {
- restrict: 'EA',
- scope: {
- ModalParam: '=modalSetting'
- },
- transclude: true,
- replace: true,
- templateUrl: '../HTMLTemplate/Modal.html',
- controller: function ($scope, $element, $attrs) {
- $scope.showModal = false;
- if ($scope.ModalParam == undefined) {
- $scope.ModalParam = {};
- }
- if ($scope.ModalParam.width == undefined) {
- $scope.width = '500px'
- $scope.ModalParam.width = 500;
- }
- else {
- if ($scope.ModalParam.width > 1000) {
- $scope.ModalParam.width = 1000;
- }
- $scope.width = $scope.ModalParam.width + 'px';
- }
- if ($scope.ModalParam.height == undefined) {
- $scope.height = '400px'
- $scope.ModalParam.height = 400;
- }
- else {
- if ($scope.ModalParam.height > 900) {
- $scope.ModalParam.height = 900;
- }
- $scope.height = $scope.ModalParam.height + 'px';
- }
- if ($scope.ModalParam.showCloseButton == undefined) {
- $scope.ModalParam.showCloseButton = true;
- }
- if ($scope.ModalParam.showCloseButton == true) {
- $scope.HideCloseButton = false;
- }
- else {
- $scope.HideCloseButton = true;
- }
- $scope.left = Math.round((screen.availWidth - $scope.ModalParam.width) / 2, 0) + 'px';
- $scope.top = Math.round((screen.availHeight - $scope.ModalParam.height - 20) / 2, 0) + 'px';
- $scope.BodyHeight = ($scope.ModalParam.height - 40) + 'px';
- function assignModalMethod() {
- $scope.ModalParam.method = {
- show: function () {
- $scope.show();
- },
- close: function () {
- $scope.close();
- },
- setTitle: function (args) {
- $scope.ModalParam.Title = args;
- }
- }
- }
- $scope.show = function () {
- $scope.showModal = true;
- }
- $scope.close = function () {
- $scope.showModal = false;
- }
- assignModalMethod();
- }
- };
- });
- <!DOCTYPE html>
- <html xmlns="http://www.w3.org/1999/xhtml">
- <head>
- <title>Model Demo</title>
- <script src="../RefScript/angular.min.js"></script>
- <script src="../RefScript/ui-bootstrap.min.js"></script>
- <script src="../PageScript/CustomCtrlApp.js"></script>
- <script src="../DirectiveScript/Modal.js"></script>
- <script src="../PageScript/ModalDemo.js"></script>
- <link href="../Ref/bootstrap.min.css" rel= />
- < type="text/css">
- .modal-backdrop {
- opacity: 0.6;
- }
- .modal-content {
- position: fixed;
- z-index: 1041;
- border-radius: 0;
- }
- .modal-header {
- padding: 0px 10px;
- }
- .modal-body {
- overflow-y: auto;
- overflow-x: hidden;
- }
- </>
- </head>
- <body ng-app="CustomCtrlApp">
- <div ng-controller="ModalDemo">
- <h1>Modal example</h1>
- <button class="btn btn-default" ng-click="toggleModal()">Open modal</button>
- <div>
- <modal modal-setting="ModalArgs">
- <table>
- <tr>
- <td>Welcome to Login Form</td>
- </tr>
- </table>
- <p>hello</p>
- </modal>
- </div>
- </div>
- </body>
- </html>
- CustomCtrlApp.controller("ModalDemo", ['$scope', '$http',
- function ($scope, $http) {
- $scope.ModalArgs = {
- title: 'Modal Window',
- width: 750,
- height: 550,
- showCloseButton: true
- };
- $scope.toggleModal = function () {
- $scope.ModalArgs.method.show();
- };
- }]);
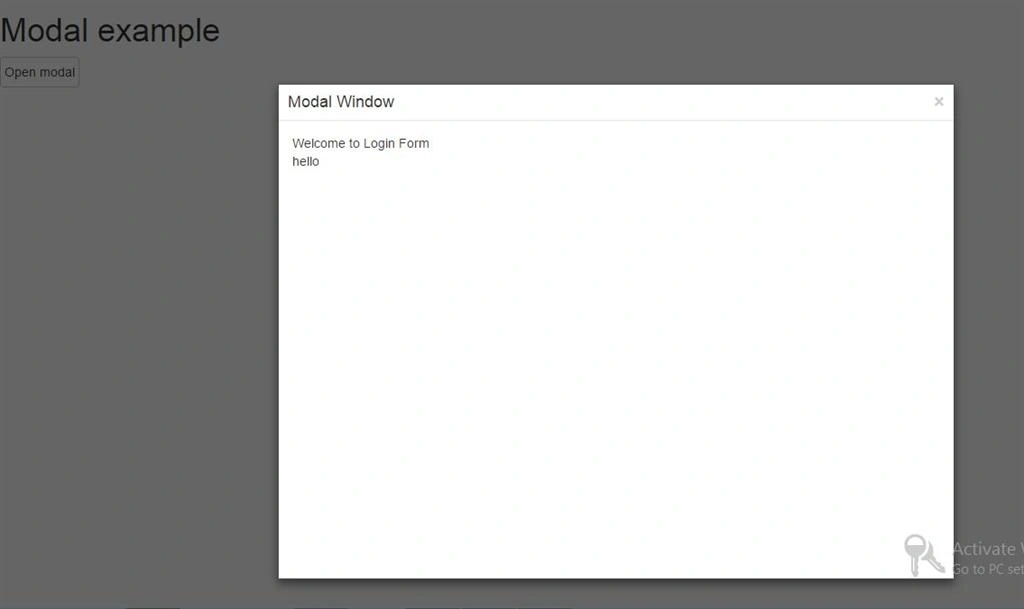
Figure 2: Output Window
muhsin kilicPosted May 28, 2016, 2:16 PM
activate your windows :)
Sr KarthigaPosted Apr 19, 2016, 11:01 PM
Nice explanation
SANGRAMJIT BHATTACHARJEEPosted Jul 28, 2015, 1:27 AM
Good Article
Santhakumar MunuswamyPosted Jul 23, 2015, 3:09 PM
Thanks for nice article:)
Gopi ChandPosted Jul 20, 2015, 1:01 PM
Well done
Sibeesh VenuPosted Jul 20, 2015, 9:08 AM
Good one :)
Gowtham RajamanickamPosted Jul 20, 2015, 6:52 AM
good one
SharadPosted Jul 20, 2015, 6:40 AM
Good one..
Nilesh JadavPosted Jul 20, 2015, 5:17 AM
Nice one sir