

Introduction
In this article, I will explore how to create a custom left navigation using Out-of-Box, without custom development.
As we know that there are a lot of ways of creating left navigation, here you will see a new approach for creating a custom left navigation in SharePoint 2013.
Scenario
There may be a requirement where we have to create multiple Views of the same list and the names of the Views are given on the left-hand side, like the left navigation. And when we click the links on the left navigation, we get directed to their respective pages on the site.
Solution
Step 1 Creation of lists
- Here, I have created a custom list (Information List) and the following three Views on the list: Personal Information, Project Information, Accounts Information.
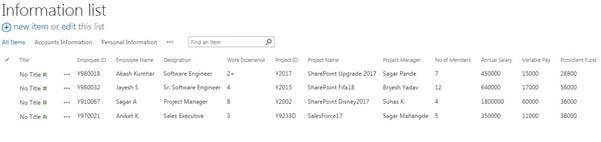
Step 2 Creation of pages
- Click on the gear at the top right of your site and add a page. We are creating pages in the Pages library and not Site Pages.
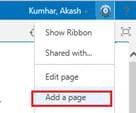
- Give the name of the page (I would recommend that the name of the page should be similar to the name of View you created in the Information List) and "Create".
- Create the pages for all the Views in the list, whose link you need in the left navigation.
- Once the page is created, you will see a blank page. Now, we need to add a layout “TwoColumnLeft” to the page.
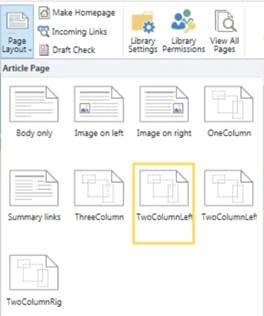
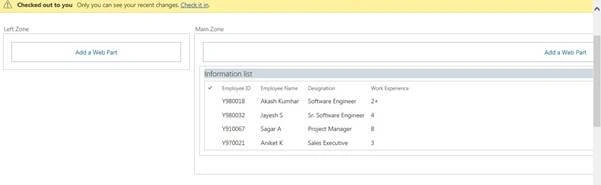
- After adding the Layout, you will see two zones - Main Zone and a Left Zone.

Step 3 Adding Custom List on created pages as webparts
- Add Information List as a webpart in the Main Zone. Click "Add Webpart" and select the List under Apps.
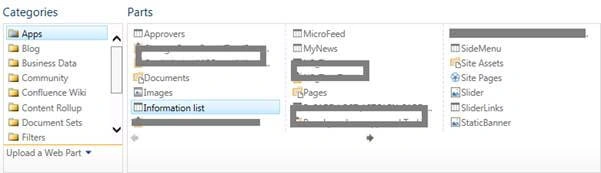
- Once the Information List is added, edit the List Webpart and select a default View for the page.
For example: If you are on a Personal Information page, select the Personal Information View on the webpart.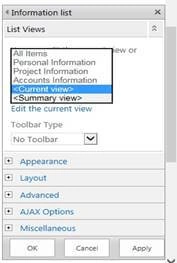
- In the Toolbar drop-down, select No toolbar to give a nice look at just information. As you please, apply the changes and check-in the changes made on the page.
Step 4 Creation of Links List
- Go to add an app and select the Links
 template.
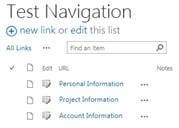
 - Create a Links list (Test Navigation) and add a link (item) to the list. In URL field, put the complete URL of the created Page while in Descriptio, goes the Title of the Left Navigation link.
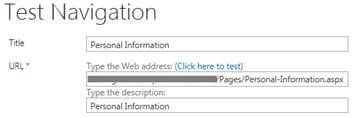
- Do this for all the links you want to show in the left navigation and complete creation of the Navigation Links.
Step 5 Adding Links List on created pages as webparts
- Just like we added Information list on the Main Zone of the pages, add Test Navigation to the Left Zone of all the pages.
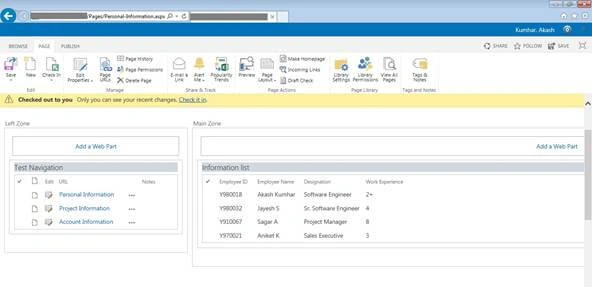
- After adding Test Navigation in the Left Zone and checking in the changes on the page, the page will look like this.
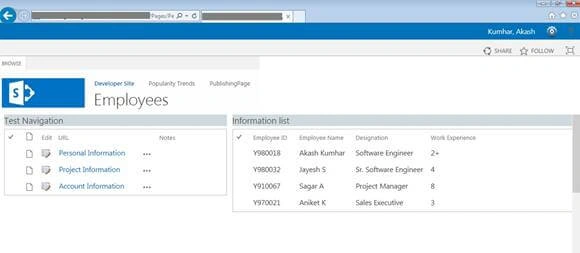
Step 6 Giving References of .js and .css files
- The Left Navigation is ready. Now, we have a .js file and a .css file whose reference is needed to be given on the Test Navigation Webpart to make it appear like a left navigation.
- Go to Test Navigation webpart and edit Webpart.
- Add the JS reference in the JS link section of the window and the CSS is referred from within the JS file.
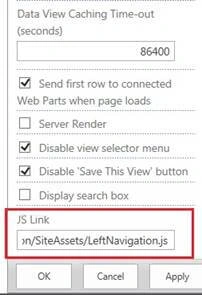
- Add the following JS link in the JS Link section “~sitecollection/SiteAssets/LeftNavigation.js”.
- Make sure the hierarchy of the site collection and web is correct in the JS reference.
- Apply the changes to your Test Navigation links.
- Follow the same steps for the remaining pages you created and you will see the Information List’s Views as follow.
- Note the .aspx page in the address bar.
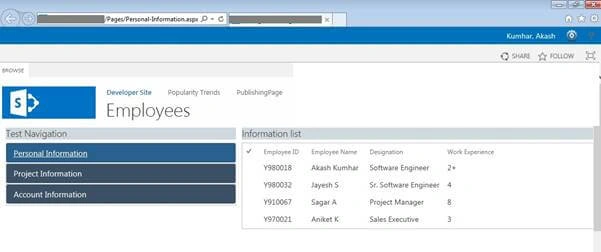
This creates your Custom Left Navigation.
Kiran Kumar TalikotiPosted Sep 9, 2017, 3:17 AM
great article.. helpful for me
Sagar PardeshiPosted Sep 4, 2017, 4:29 AM
Good article Akash...Move on..