

Introduction
In this article, we are going to see how to create custom buttons with different attributes such as different colors, shapes, sizes, etc. Here we can assign different tasks to each button and each button will perform the assigned task.
Step 1
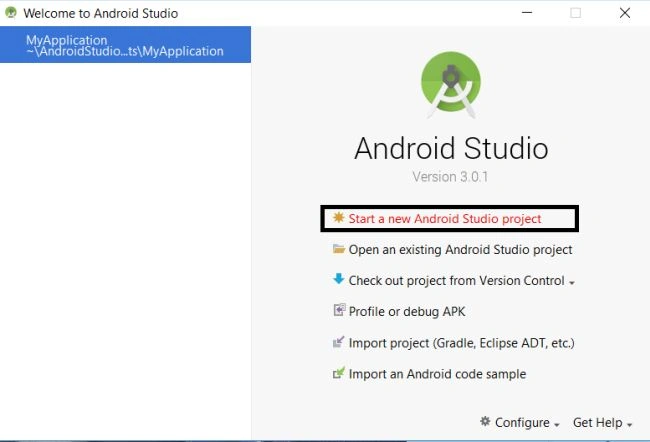
Create a new project in Android Studio.
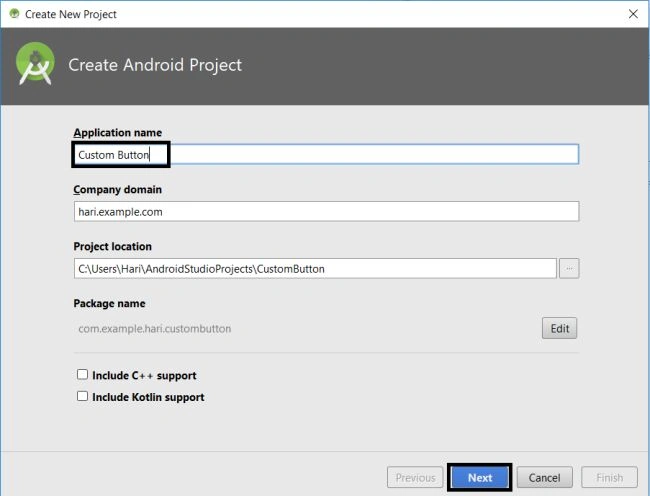
Give a name to the project and click "Next".
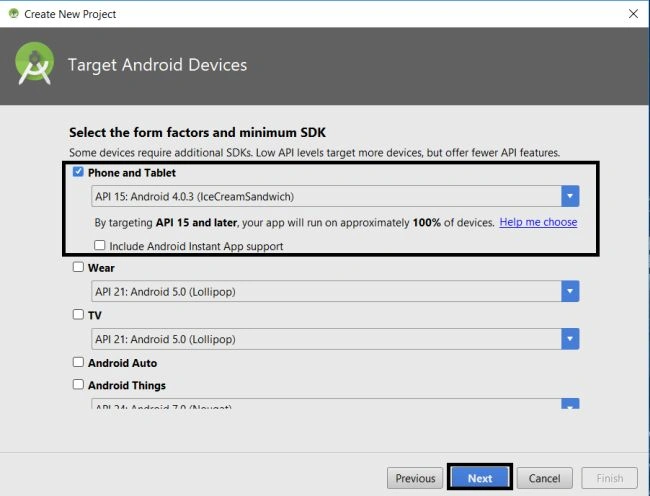
Select the "Phone and Tablet" and click "Next".
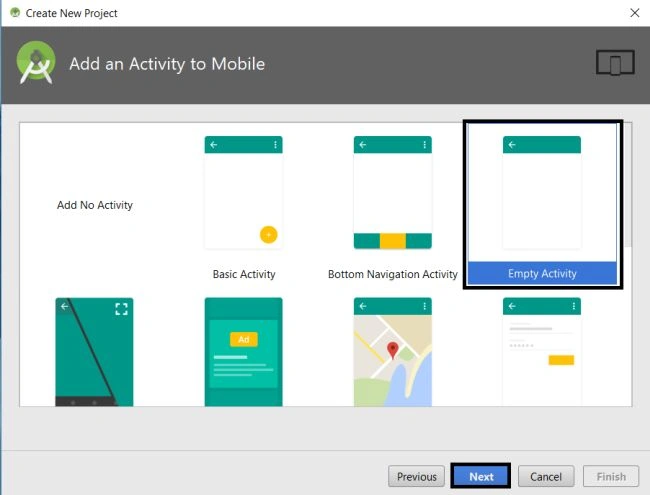
Select an empty activity and click "Next".
At last, give the activity name and click on "Finish".
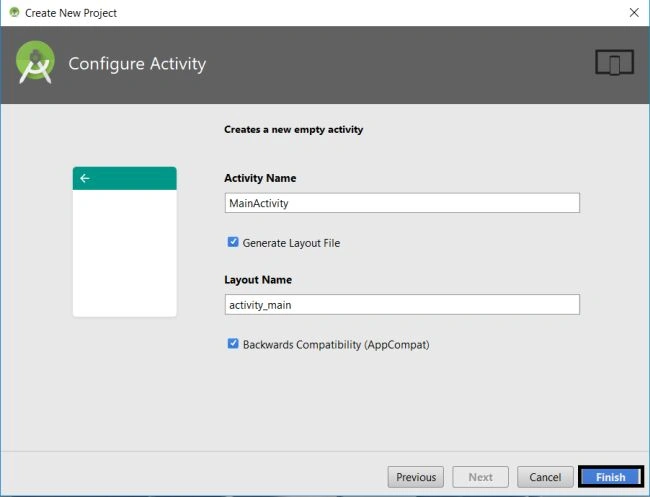
Step 2
Go to app>>res>>drawable and create a new item as follows,
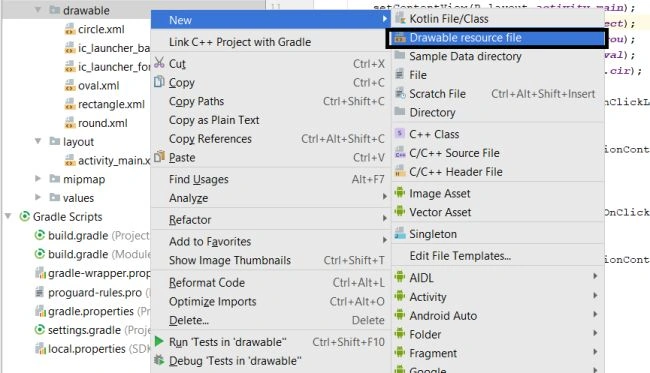
Name the item in the circle and click ok.
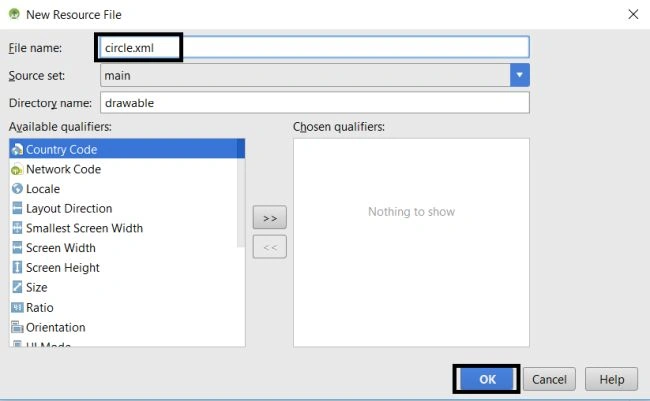
Repeat the same step to create another 3 items named oval, rectangle, and round
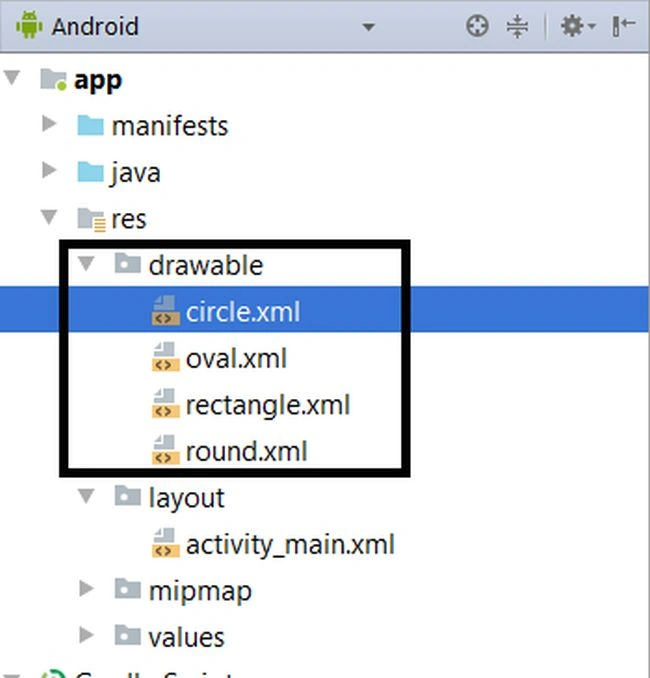
Step 3
Go to circle.xml in a drawable folder and type the code as follows,
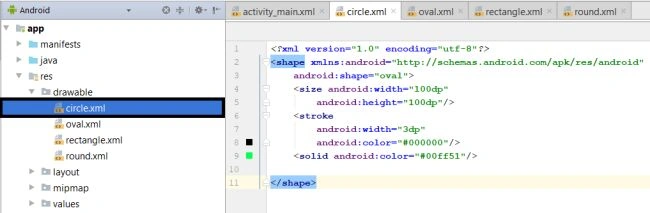
Source code is here,
- <?xml version="1.0" encoding="UTF-8"?> -
- <shape android:shape="oval" xmlns:android="http://schemas.android.com/apk/res/android">
- <size android:height="100dp" android:width="100dp" />
- <stroke android:width="3dp" android:color="#000000" />
- <solid android:color="#00ff51" />
- </shape>
Step 4
Go to oval.xml in a drawable folder and type the code as follows,
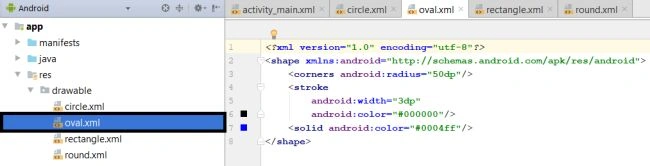
Source code is here,
- <?xml version="1.0" encoding="UTF-8"?> -
- <shape xmlns:android="http://schemas.android.com/apk/res/android">
- <corners android:radius="50dp" />
- <stroke android:color="#000000" android:width="3dp" />
- <solid android:color="#0004ff" />
- </shape>
Step 5
Go to rectangle.xml in a drawable folder and type the code as follows,
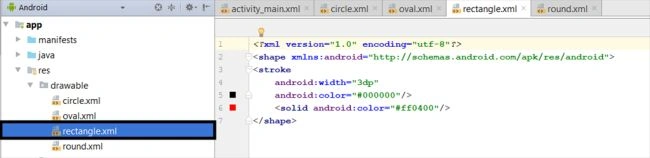
Source code is here,
- <?xml version="1.0" encoding="UTF-8"?> -
- <shape xmlns:android="http://schemas.android.com/apk/res/android">
- <stroke android:color="#000000" android:width="3dp" />
- <solid android:color="#ff0400" />
- </shape>
Step 6
Go to round.xml in a drawable folder and type the code as follow,
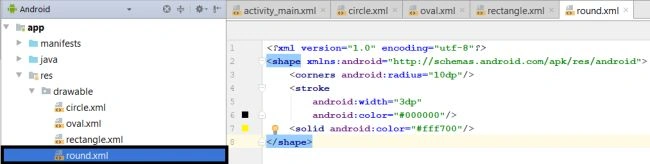
Source code is here,
- <?xml version="1.0" encoding="UTF-8"?> -
- <shape xmlns:android="http://schemas.android.com/apk/res/android">
- <corners android:radius="10dp" />
- <stroke android:color="#000000" android:width="3dp" />
- <solid android:color="#fff700" />
- </shape>
Step 7
Next, go to app >> res >> layout >> activity_main.xml. Select activity page,
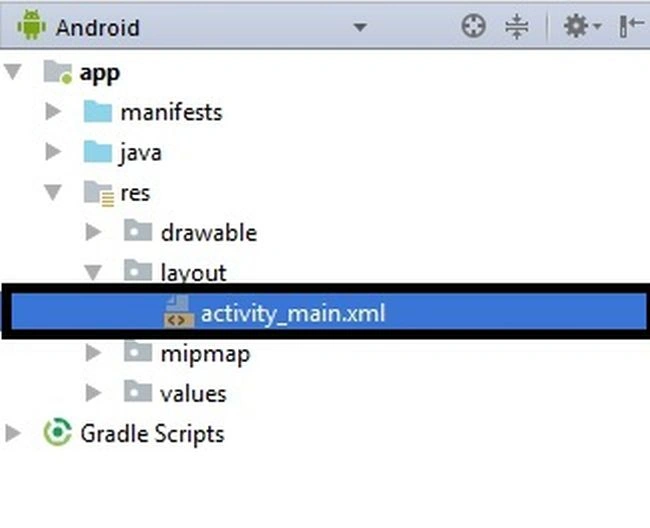
And just type the code as follows.
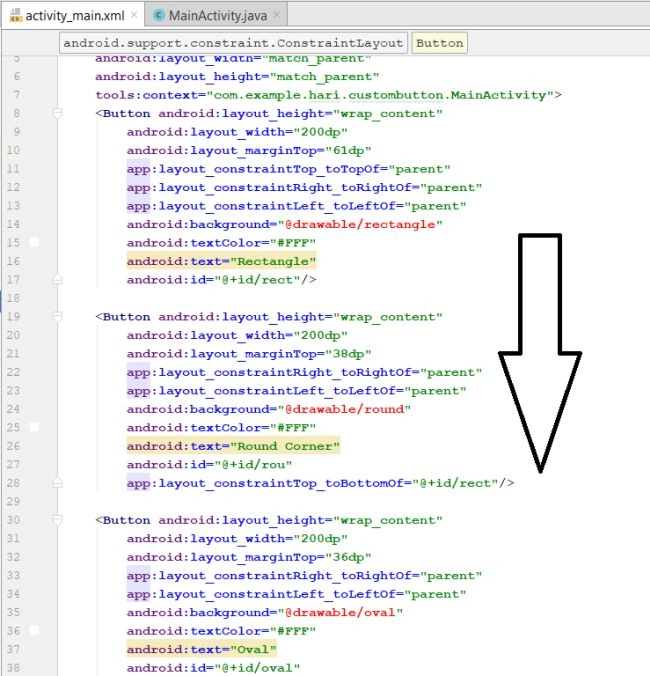
- <?xml version="1.0" encoding="UTF-8"?>
- -
- <android.support.constraint.ConstraintLayout tools:context="com.moqueet.abdul.custombutton.MainActivity"
- android:layout_height="match_parent"
- android:layout_width="match_parent"
- xmlns:app="http://schemas.android.com/apk/res-auto"
- xmlns:tools="http://schemas.android.com/tools"
- xmlns:android="http://schemas.android.com/apk/res/android">
- <Button android:layout_height="wrap_content"
- android:layout_width="200dp"
- android:layout_marginTop="61dp"
- app:layout_constraintTop_toTopOf="parent"
- app:layout_constraintRight_toRightOf="parent"
- app:layout_constraintLeft_toLeftOf="parent"
- android:background="@drawable/rectangle"
- android:textColor="#FFF"
- android:text="Rectangle"
- android:id="@+id/rect"/>
- <Button android:layout_height="wrap_content"
- android:layout_width="200dp"
- android:layout_marginTop="38dp"
- app:layout_constraintRight_toRightOf="parent"
- app:layout_constraintLeft_toLeftOf="parent"
- android:background="@drawable/round"
- android:textColor="#FFF"
- android:text="Round Corner"
- android:id="@+id/rou"
- app:layout_constraintTop_toBottomOf="@+id/rect"/>
- <Button android:layout_height="wrap_content"
- android:layout_width="200dp"
- android:layout_marginTop="36dp"
- app:layout_constraintRight_toRightOf="parent"
- app:layout_constraintLeft_toLeftOf="parent"
- android:background="@drawable/oval"
- android:textColor="#FFF"
- android:text="Oval"
- android:id="@+id/oval"
- app:layout_constraintTop_toBottomOf="@+id/rou"/>
- <Button android:layout_height="wrap_content"
- android:layout_width="wrap_content"
- android:layout_marginTop="49dp"
- app:layout_constraintRight_toRightOf="parent"
- app:layout_constraintLeft_toLeftOf="parent"
- package com.moqueet.abdul.custombutton;
- import android.support.v7.app.AppCompatActivity;
- import android.os.Bundle;
- import android.view.View;
- import android.widget.Button;
- import android.widget.Toast;
- public class MainActivity extends AppCompatActivity
- {
- Button rect, round, oval, circle;
- @Override
- protected void onCreate(Bundle savedInstanceState) {
- super.onCreate(savedInstanceState);
- setContentView(R.layout.activity_main);
- rect = (Button)findViewById(R.id.rect);
- round = (Button)findViewById(R.id.rou);
- oval = (Button)findViewById(R.id.oval);
- circle = (Button)findViewById(R.id.cir);
- rect.setOnClickListener(new View.OnClickListener() {
- @Override
- public void onClick(View v) {
- Toast.makeText(getApplicationContext(),"Rectangle Button clicked!",Toast.LENGTH_SHORT).show();
- }
- });
- round.setOnClickListener(new View.OnClickListener() {
- @Override
- public void onClick(View v) {
- Toast.makeText(getApplicationContext(),"Round Button clicked!",Toast.LENGTH_SHORT).show();
- }
- });
- }
- }
- android:background="@drawable/circle"
- android:textColor="#FFF"
- android:text="Circle"
- android:id="@+id/cir"
- app:layout_constraintTop_toBottomOf="@+id/oval"/>
- </android.support.constraint.ConstraintLayout>
Step 8
Next, go to app >> java>>Mainactivity.java. Select Mainactivity page,
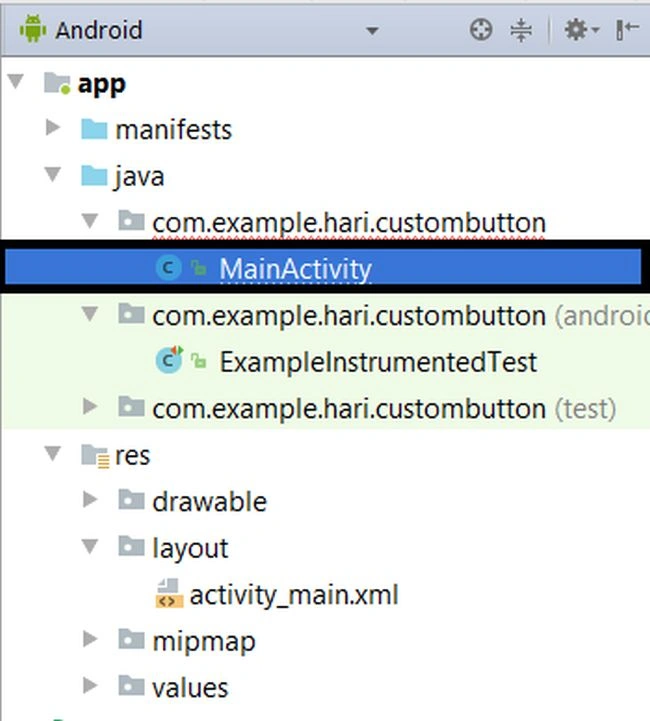
And just type the code as follows:
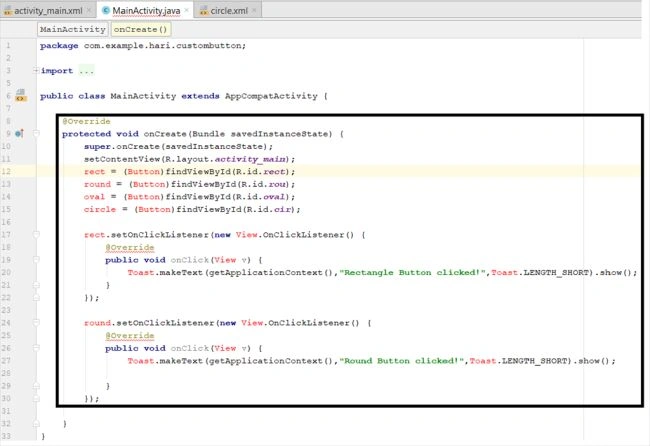
- package com.moqueet.abdul.custombutton;
- import android.support.v7.app.AppCompatActivity;
- import android.os.Bundle;
- import android.view.View;
- import android.widget.Button;
- import android.widget.Toast;
- public class MainActivity extends AppCompatActivity {
- Button rect, round, oval, circle;
- @Override
- protected void onCreate(Bundle savedInstanceState) {
- super.onCreate(savedInstanceState);
- setContentView(R.layout.activity_main);
- rect = (Button) findViewById(R.id.rect);
- round = (Button) findViewById(R.id.rou);
- oval = (Button) findViewById(R.id.oval);
- circle = (Button) findViewById(R.id.cir);
- rect.setOnClickListener(new View.OnClickListener() {
- @Override
- public void onClick(View v) {
- Toast.makeText(getApplicationContext(), "Rectangle Button clicked!", Toast.LENGTH_SHORT).show();
- }
- });
- round.setOnClickListener(new View.OnClickListener() {
- @Override
- public void onClick(View v) {
- Toast.makeText(getApplicationContext(), "Round Button clicked!", Toast.LENGTH_SHORT).show();
- }
- });
- }
- }
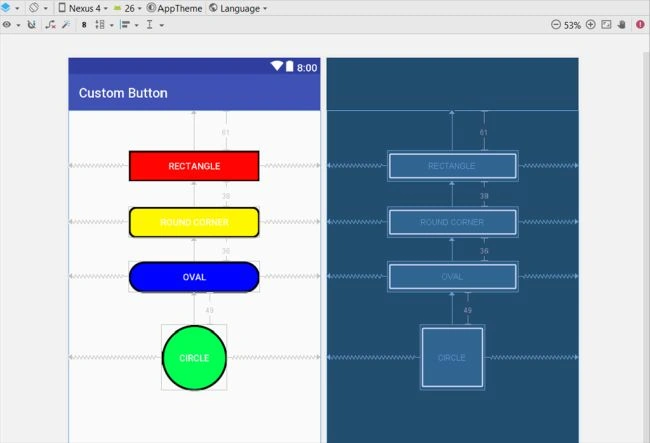
Verify the preview.
->After the code is applied, the preview will appear like this.
Step 10
Next, go to Android Studio and deploy the application. Select an Emulator or your Android mobile with USB debugging enabled. Give it a few seconds to make installations and set permissions.
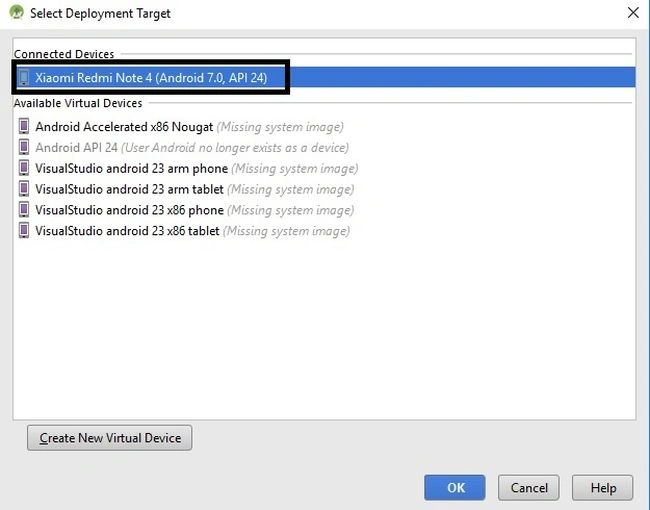
Run the application in your desired emulator (Shift + F10).
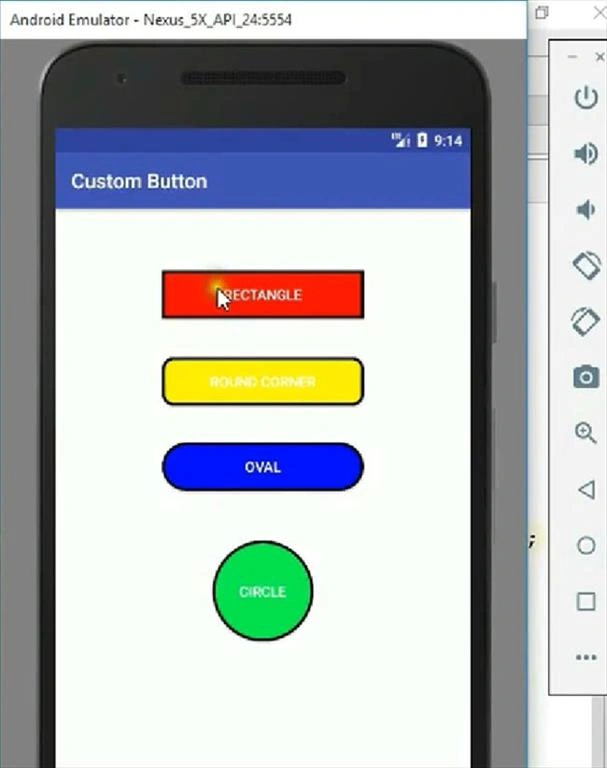
Finally, we have successfully created custom buttons.
Explanation of source code
The source code used in this app will create the button and set up the attributes to that button such as size shape and color.
Summary
Here, we created a new project named custom button and added few buttons to our app with the custom shape, size, and color. Finally, we have deployed that app for the final output.
*Support and share. Thank you!*
Ravishankar VelladuraiPosted Mar 23, 2018, 11:52 AM
Nice article and neet explanation keep doing......! hari