

MongoDB Atlas is an online NoSQL database that allows you to run a MongoDB database as a service. Running MongoDB as a service means that you no longer need to host your own servers or manage upgrades. MongoDB Atlas is a PaaS (Platform as a Service) offering that can be hosted on Amazon AWS, Google Cloud Platform, or Microsoft Azure. In this article, I will be demonstrating the steps needed to create your first MongoDB Atlas cluster using the Microsoft Azure service, and add JSON documents manually using the Atlas portal.
There are a few key steps necessary to create a MongoDB Atlas database - sign up and create a cluster with an admin user, create a database and a database user with an initial collection, and create JSON documents. In this article, we will not access the cluster programmatically, although I will point you to the documentation that provides additional information on this topic.
Note - If you are a relational database developer, a collection is similar to a table in MongoDB speak.
Sign Up and Create a Collection
The first thing we need to do is to sign up for the service itself. Let’s do that by making sure we select the free service tier so we can try it out.
- Go here.
- Sign up for a free account, and choose "Create your first Cluster".
- Select a cloud provider to host your free cluster (I selected Microsoft Azure)
- Select a region where a free cluster is available (I selected EastUS2)
Within a few minutes, your browser should display your cluster. We now need to create a user.
- Once the cluster is created, create a database user.
- Go to the Security tab in your cluster and click on "Add New User".
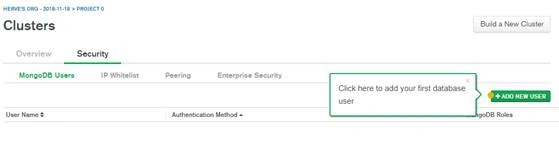
- Go to the Security tab in your cluster and click on "Add New User".
- Enter your database user credentials .
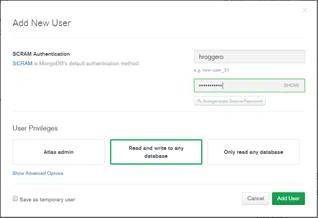
- Click on "Read and Write to any database".
- You can elect to generate a strong password; make sure you save that password for later if you do!
- Next, let’s whitelist your IP Address to limit access to the database from your machine (this is optional; if no IP is added, any machine will be able to connect); click on the IP Whitelist tab and click on "Add IP Address".
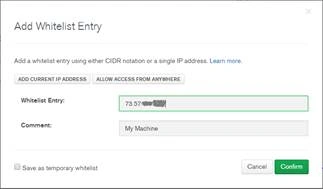
- If you don’t know what your current IP Address is, simply search on Google like this.
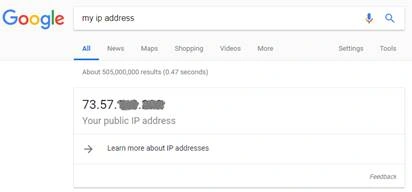
- If you don’t know what your current IP Address is, simply search on Google like this.
At this point, you have created your cluster, a database user, and allowed your IP Address to connect. Super simple! However, keep in mind that you still don’t have a database or a collection. Let’s do that now.
Create a Database & Collection
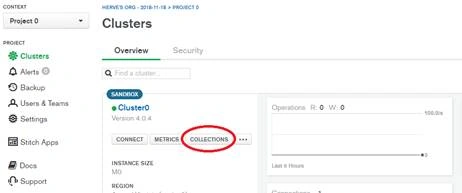
Let’s create a MongoDB database with a collection in the Atlas Cluster we created previously (a collection is required when you first create a database). From the main Clusters page, click on the COLLECTIONS button.
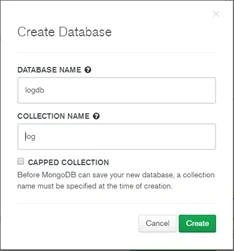
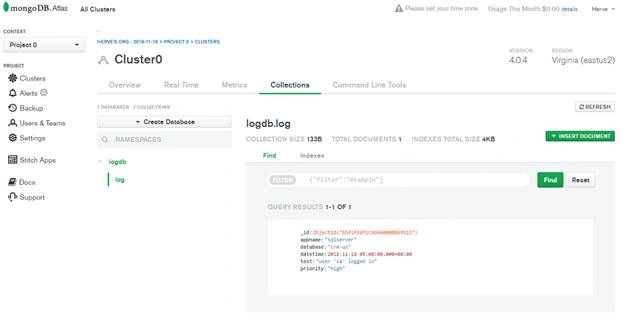
From the Collections page, click on Create a Database; enter a database name (logdb) and a collection name (log). We will store the application log data into this collection.
Add a JSON Document
Finally, let’s add a JSON document to our database to test it. On the Collection page, click on the INSERT DOCUMENT button.
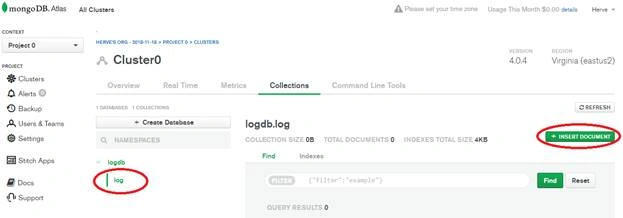
An _id property is automatically added to every document; this value serves as a unique identifier and is a key aspect of NoSQL databases; you use this identifier to retrieve documents quickly. Note as well that properties are strongly typed.
The screenshot below shows a JSON document that will be created, emulating information about a database event.
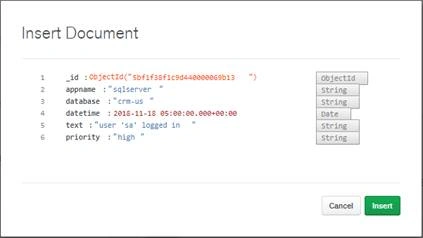
Click "Insert" to add this document to MongoDB Atlas. You can now see the document created in your collection.
Last but not least, you should know that MongoDB Atlas provides tools to access and import/export your existing data into/from a collection. You can use a utility called Compass (provided by MongoDB) to access your collection, view and update your documents. To learn more about Compass, visit here. Other utilities are also available, such as the mongo shell, mongorestore, mongoimport, mongoexport, and here.
Summary
As you can see in the above steps, creating a new collection and manually adding JSON documents to it is a trivial task. The management portal offers many options, including security settings, monitoring capabilities and much more. While this article doesn’t cover programmatic access, you can easily code against MongoDB Atlas using a variety of languages; however, a driver will be required. To learn more about available drivers (including C#, Python, and Node.js) visit here.
Mahesh ChandPosted Nov 20, 2018, 10:48 AM
Thank you, Herve. Welcome to C# Corner. Best