

Introduction
This article will explain how to create and consume basic WCF service using Visual Studio 2012. At the end of the article you will able to create your first WCF Service.
What is WCF Service?
Windows Communication Foundation is a SDK for developing, configuring and deploying the services in windows.
What is ABC?
ABC is the three building blocks of WCF and they are known as,
- A - Address (Where): Address tells us where to find the services, like url.
- B - Bindings (How): Bindings tells us how to find the services or using which protocols finds the services (SOAP, HTTP, TCT etc.),
- C - Contacts (What): Contracts are an agreement between the consumer and the service providers that explains what parameters the service expects and what return values it gives.
Steps to create WCF Service
In this example I am going to create sample WCF service called RKFirstWCFService, this service has a function called FindCaller to find the caller name for given phone number.
Add another Windows application to consume this WCF Service.
Step: 1
Open Visual Studio as an Administrator.
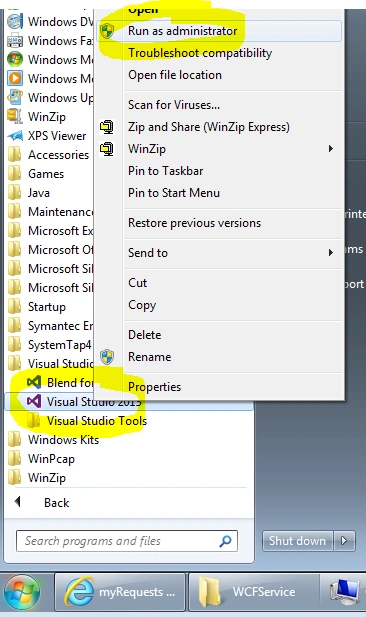
Step: 2
Create WCF Service Application,
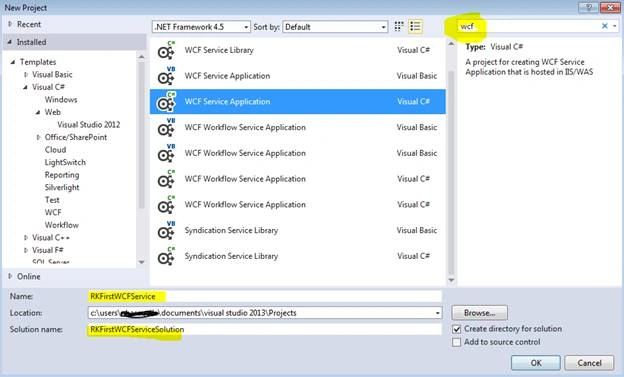
Stop: 3
Remove the existing Service contracts and Data contracts and add below ones.
- using System;
- using System.Collections.Generic;
- using System.Linq;
- using System.Runtime.Serialization;
- using System.ServiceModel;
- using System.ServiceModel.Web;
- using System.Text;
- namespace RKFirstWCFService
- {
- [ServiceContract]
- publicinterfaceIService1
- {
- [OperationContract]
- string FindCaller(myDataContract myDataCont);
- }
- [DataContract]
- publicclassmyDataContract
- {
- double phNo;
- [DataMember]
- publicdouble PhoneNumber
- {
- get {
- return phNo;
- }
- set {
- phNo = value;
- }
- }
- }
- }
Implement IService1 methods in Service. Write your own code to display caller name based on the phone number.
- using System;
- using System.Collections.Generic;
- using System.Linq;
- using System.Runtime.Serialization;
- using System.ServiceModel;
- using System.ServiceModel.Web;
- using System.Text;
- namespace RKFirstWCFService
- {
- publicclassService1: IService1
- {
- publicstring FindCaller(myDataContract myDataCont)
- {
- // You can write your own logic here to find the caller
- if (myDataCont.PhoneNumber == 9848098480) {
- return "Ramakrishna Basagalla";
- } else {
- return "Record Not Found";
- }
- }
- }
- }
Edit the Web.Config and add Service and serviceBehaviors(copy and paste the below code)
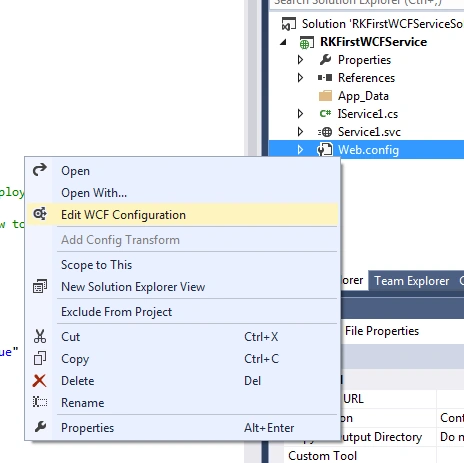
Configuration code:
- <?xmlversion="1.0"?>
- <configuration>
- <appSettings>
- <addkey="aspnet:UseTaskFriendlySynchronizationContext" value="true" />
- </appSettings>
- <system.web>
- <compilationdebug="true" targetFramework="4.5" />
- <httpRuntimetargetFramework="4.5" />
- </system.web>
- <system.serviceModel>
- <services>
- <servicebehaviorConfiguration="NewBehavior0" name="RKFirstWCFService.Service1">
- <endpointaddress="RKEndpoint" binding="basicHttpBinding" bindingConfiguration="" contract="RKFirstWCFService.IService1" />
- </service>
- </services>
- <behaviors>
- <serviceBehaviors>
- <behaviorname="">
- <serviceMetadatahttpGetEnabled="true" httpsGetEnabled="true" />
- <serviceDebugincludeExceptionDetailInFaults="false" />
- </behavior>
- <behaviorname="NewBehavior0">
- <serviceMetadatahttpGetEnabled="true" />
- </behavior>
- </serviceBehaviors>
- </behaviors>
- <protocolMapping>
- <addbinding="basicHttpsBinding" scheme="https" />
- </protocolMapping>
- <serviceHostingEnvironmentaspNetCompatibilityEnabled="true" multipleSiteBindingsEnabled="true" />
- </system.serviceModel>
- <system.webServer>
- <modulesrunAllManagedModulesForAllRequests="true" />
- <!--
- To browse web app root directory during debugging, set the value below to true.
- Set to false before deployment to avoid disclosing web app folder information.
- -->
- <directoryBrowseenabled="true" />
- </system.webServer>
- </configuration>
Add Windows application to consume the WCF Service.
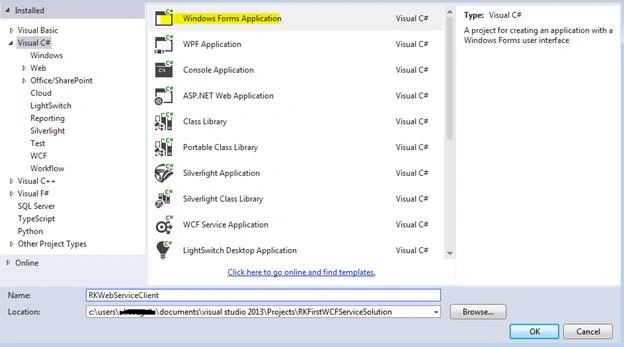
Step: 7
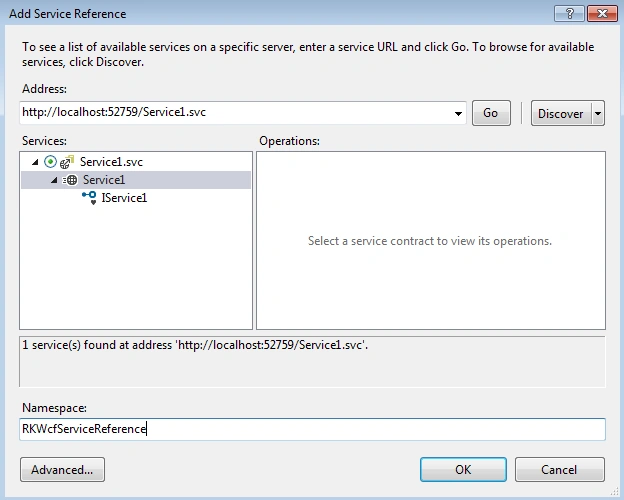
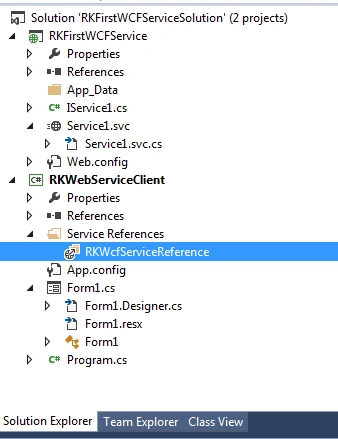
Add service reference and select WCF by discovering the WCF Service.
Note: To add the WCF service, the service must be in running.
Step: 8
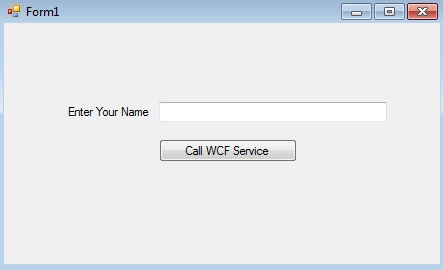
Design the page (Add controls to page)
Code to access the WCF Service:
- using System;
- using System.Collections.Generic;
- using System.ComponentModel;
- using System.Data;
- using System.Drawing;
- using System.Linq;
- using System.Text;
- using System.Threading.Tasks;
- using System.Windows.Forms;
- namespace RKWebServiceClient
- {
- publicpartialclassForm1: Form
- {
- public Form1() {
- InitializeComponent();
- }
- privatevoid button1_Click(object sender, EventArgs e)
- {
- // Create Proxy to consume the WCF Service
- RKWcfServiceReference.Service1Client rKProxy = new RKWcfServiceReference.Service1Client();
- // Create object for Data Contract to access the data members
- RKWcfServiceReference.myDataContract dcObj = new RKWcfServiceReference.myDataContract();
- dcObj.PhoneNumber = Convert.ToDouble(textBox1.Text);
- // Call the Wcf service
- MessageBox.Show(rKProxy.FindCaller(dcObj));
- }
- }
- }
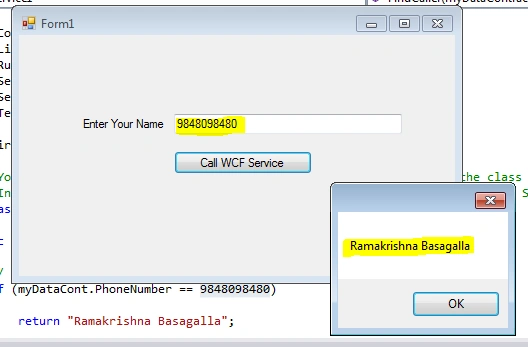
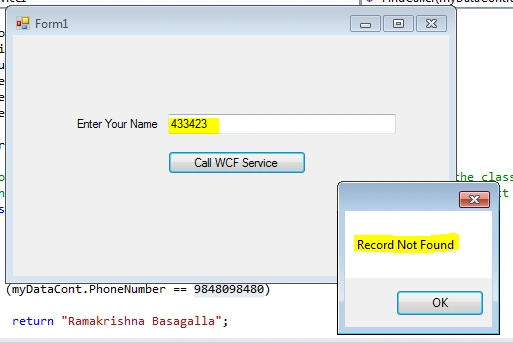
Run and test the WCF Service.
Output:
Read more articles on WCF:
Raju SinghPosted Jun 21, 2018, 6:48 AM
Hey RamaKrishna can we call the wcf Service using html page in visual studio..???
Ramakrishna BasagallaPosted Apr 28, 2016, 10:57 PM
Thanks Sonu
Sonu ChaudharyPosted Apr 26, 2016, 4:05 AM
good one
Ramakrishna BasagallaPosted Apr 25, 2016, 11:54 AM
Thank you very much for all your comments
Humayun Kabir MamunPosted Apr 17, 2016, 2:20 AM
Nice...
Debasis SahaPosted Apr 15, 2016, 12:33 AM
Nice article..
Kuppurasu NagarajPosted Apr 14, 2016, 9:17 AM
Nice Sharing..
Vignesh ManiPosted Apr 14, 2016, 8:08 AM
Good one
Rahul Kumar SaxenaPosted Apr 14, 2016, 6:22 AM
Clear Explanation..
Gowtham RajamanickamPosted Apr 14, 2016, 6:05 AM
nice article..
Jaipal ReddyPosted Apr 14, 2016, 4:41 AM
Nice one sir. .