

Introduction
Azure is a cloud service provider developed by Microsoft and many companies are now using an Azure cloud for deploying VM's (Virtual Machines), databases, web apps, dev-ops, cognitive services, logic apps etc.
This cloud computing company provides many services to software developers. These developers create software and other services to many clients. In this scenario, developers can face some difficulty identifying, maintaining, billing, monitoring and troubleshooting specific clients.
By reading this article, you will learn about how to create a “Resource Group” in Azure cloud platform.
About Azure Resource Groups
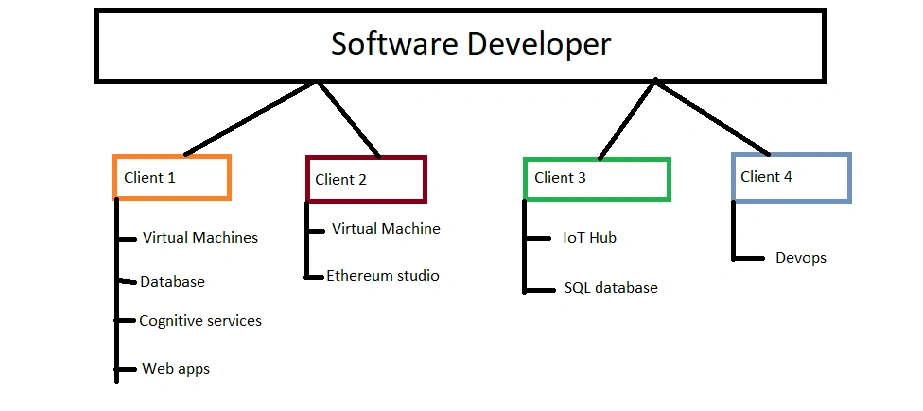
Azure resource group is used to easily organize all the created services like virtual machines, databases, networks, and billing for individual clients. Refer to the below figure.
Perquisites for creating Resource Groups
Software Requirements
- Azure cloud account
- Edge (or) other browsers
- Stable internet connection
Step 1
Login to Azure portal.
Step 2
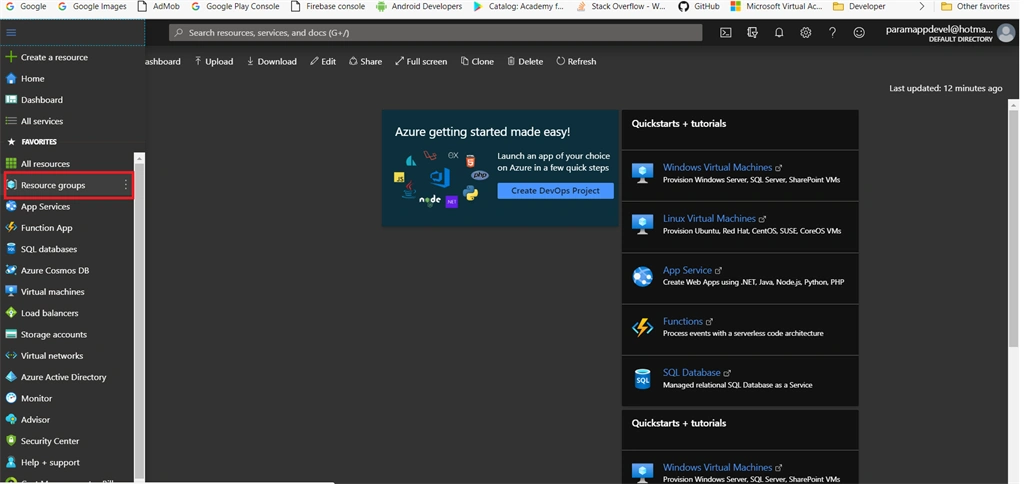
In left side panel, select “Resource groups.”
Step 3
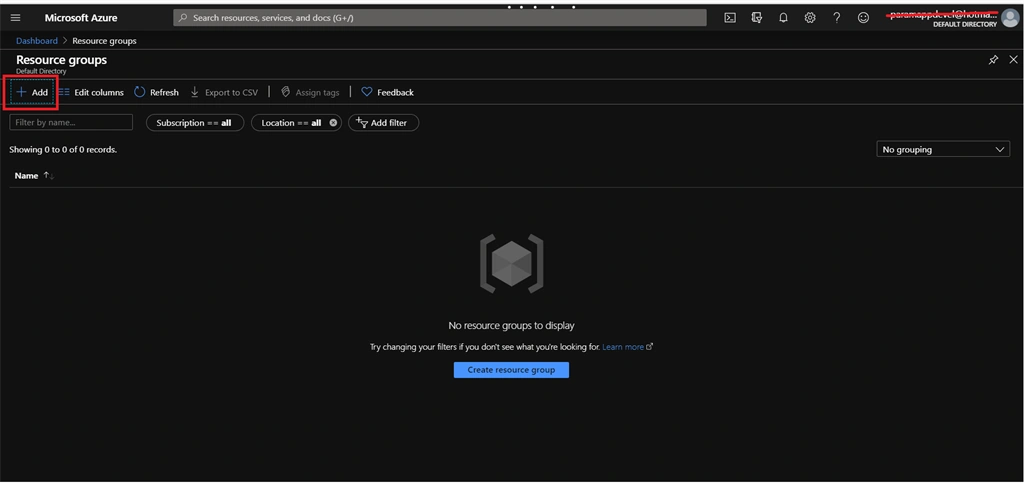
Now you can enter the resource group page and then click “Add” at the top of the page.
Step 4
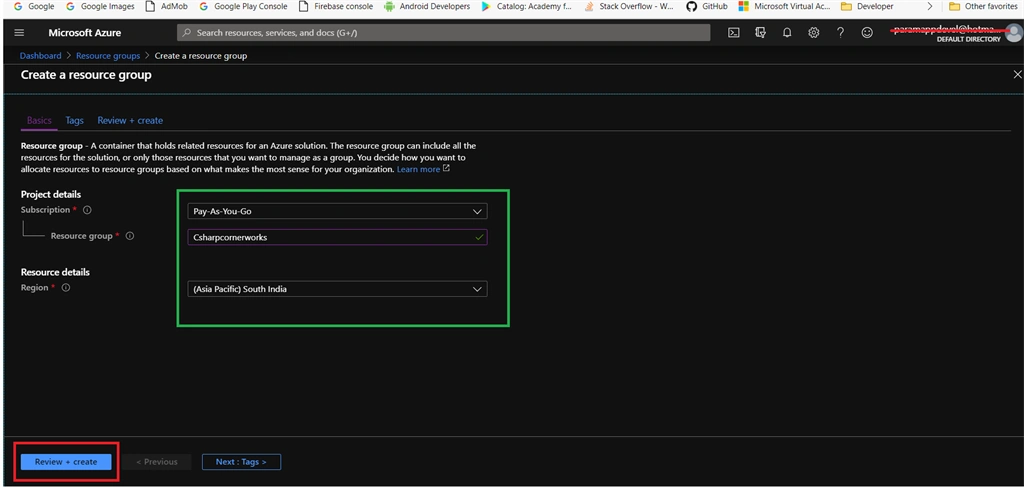
In creating a new resource group page, you can fill in all the details in fields by following the below figures and then clicking the “Review + Create” button.
Step 5
After your “Validation is Passed”, then click the “Create” Button. You resource group is created within 2 minutes.
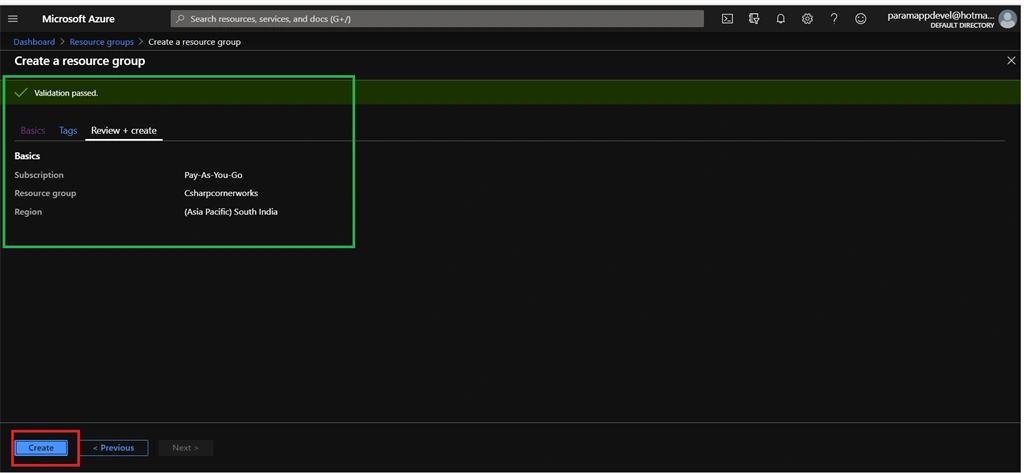
Step 6
After your “Resource Group is created”, a message will notify you on top of the notification bell icon. By clicking the notification icon, you will verify your resource group is created.
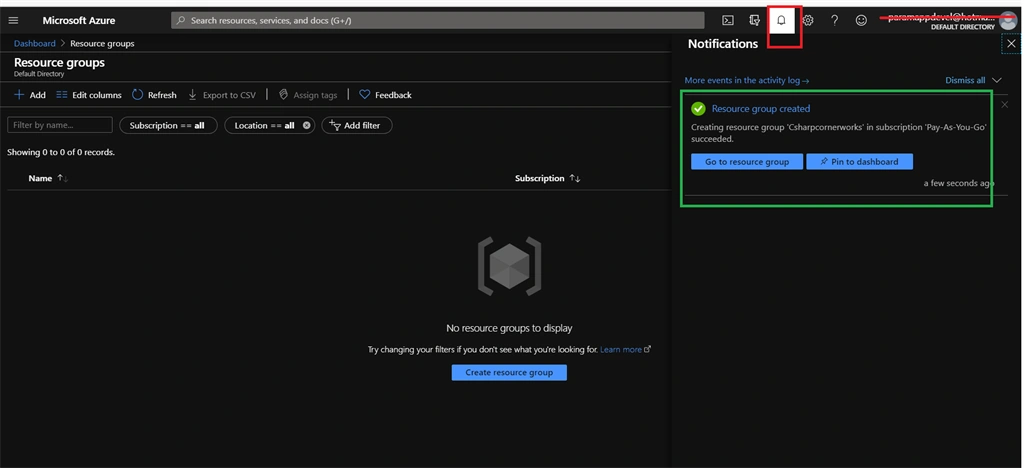
Summary
Finally, we successfully created a “Resource Group” in the Azure cloud.
Join the conversation! Your thoughts help the community grow.