

First, let me tell you why you should require Chat Bots; is it really helpful; and who are building bots etc.
Anyone who has ever tried to contact a company through customer care center might know how slow and frustrating process it is. You remember that audio tape “press 1 for this, press 2 for this, press * to go back to the menu, and blah blah blah….“?
However, there is a great solution to this kind of problem, which is faster than the customer care center - the Chat Bots. Nowadays, Chat Bots can be made using AI also, so it doesn’t limit them.
"A chatbot is a service, powered by rules and sometimes artificial intelligence that you interact with via a chat interface."
According to some people, Bots will completely kill the web and mobile apps. The main reasons for that are -
- Bots are faster than the website and mobile apps, they replied instantly.
- Mobile apps need to download and it occupies some memory of your phone whereas the bot doesn’t need to download it lives within your messenger only.
- It is easier to use Bots and many more.
Messaging is the new browser and bots are the new apps.
Prerequisites
- JavaScript
- Angular-CLI
- Dialogflow account (previously API.AI)
- Visual Studio Code (optional)
Setting Up Dialogflow
- Navigate to Dialogflow and log in to your account.
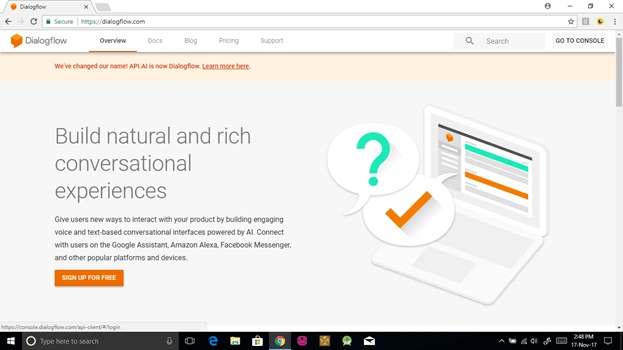
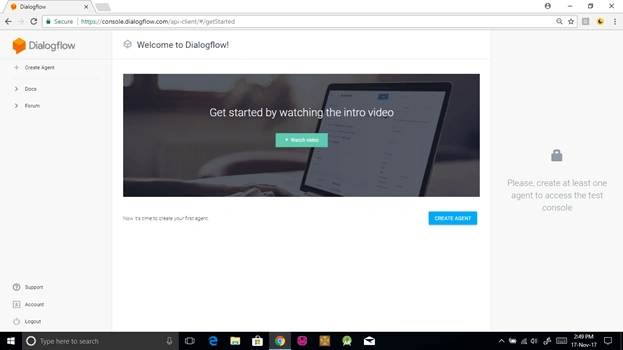
- Then, press "Create Agent" to create your first agent.
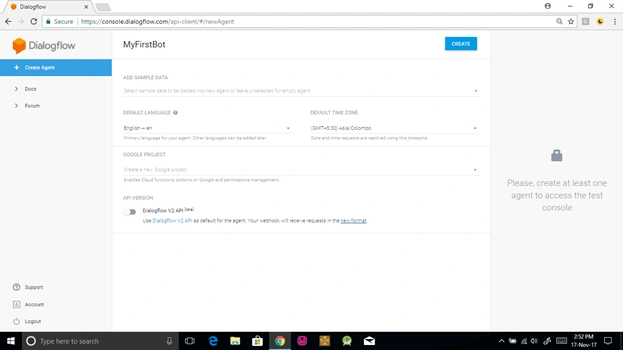
- After filling the required details, press "Create".
- Then, press the "Create Intent" button to create your first intent. Intents are usually user’s intention of asking questions. Dialogflow extracts the user intention from text using Natural Language Processing.
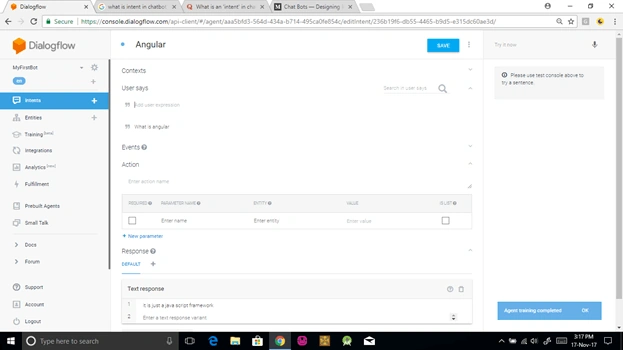
- Add you intent/question in “user says” field, as shown below.
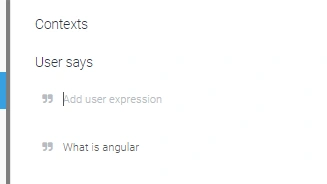
- And, the answer should be in response field, as shown below.
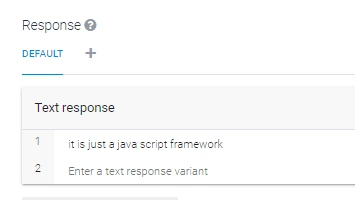
- The entire page will look like the following.
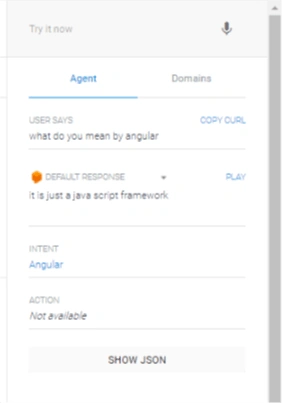
- Now, you can also test your sentence in the console.
So far, we have created our Dialogflow Agent and Intent. Now, it’s time to create an Angular application to create a user interface and integrate our Dialogflow Agent to Angular.
Angular Application
- You can create an Angular project using Angular-CLI.
- ng new ngbotdemo
- Integrate Dialogflow JavaScript SDK in our Angular project using the following command.
- npm install api-ai-javascript - - save-dev
- Store the Client access token from Dialogflow to your app inside environment.ts file, as shown below.
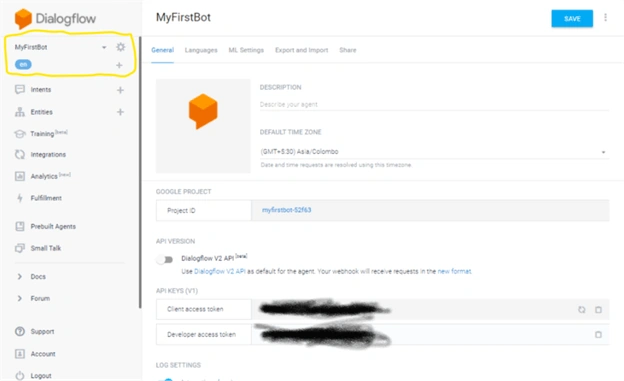
Now, store the client access token in environment.ts file.
- export const environment = {
- production: false,
- dialogflow: {
- angularBot: 'your-key'
- }
- ;
Now, let us create the service using the following command.
- ng g s chat
Inside the chat service, we will first import the following packages.
- import { environment } from '../../environments/environment';
- import { ApiAiClient } from 'api-ai-javascript';
- import { Observable } from 'rxjs/Observable';
- import { BehaviorSubject } from 'rxjs/BehaviorSubject';
Then, we will create one message class inside the service, which has two members - msg (which will be used to store the content or message send by the user or bot) and from (which will be used to store the info of who sent that message, i.e., either ‘user’ or ‘Bot’).
- export class Message {
- constructor(public msg: string, public from: string) { }
- }
- Now, let us create the instance of API.AI client – the JavaScript SDK for Dialogflow, and then, pass the client access token to that instance of API.AI client.
- readonly token = environment.dialogflow.angularBot;
- readonly _client = new ApiAiClient({ accessToken: this.token });
Now, it’s time to create a method that will interact with our bot, i.e., send and receive messages, as shown below.
- talk(msg: string) {
- const userMessage = new Message(msg, 'user');
- this.update(userMessage);
- return this._client.textRequest(msg)
- .then(res => {
- const speech = res.result.fulfillment.speech;
- const botMessage = new Message(speech, 'bot');
- this.update(botMessage);
- });
- }
The full chat.service.ts will look like below.
- import { Injectable } from '@angular/core';
- import { environment } from '../../environments/environment';
- import { ApiAiClient } from 'api-ai-javascript';
- import { Observable } from 'rxjs/Observable';
- import { BehaviorSubject } from 'rxjs/BehaviorSubject';
- export class Message {
- constructor(public msg: string, public from: string) { }
- }
- @Injectable()
- export class ChatService {
- readonly token = environment.dialogflow.angularBot;
- readonly _client = new ApiAiClient({ accessToken: this.token });
- conversation = new BehaviorSubject<Message[]>([]);
- constructor() { }
- // Sends and receives messages via DialogFlow
- talk(msg: string) {
- const userMessage = new Message(msg, 'user');
- this.update(userMessage);
- return this._client.textRequest(msg)
- .then(res => {
- const speech = res.result.fulfillment.speech;
- const botMessage = new Message(speech, 'bot');
- this.update(botMessage);
- });
- }
- // Adds message to source
- update(msg: Message) {
- this.conversation.next([msg]);
- }
- }
Now, finally, it’s time to create our user interface, i.e., chat-component and call talk method from chat.service.
Use this command to create a new component.
- ng g c chatcompoent
Your chat.component.ts file look like following.
- import { Component, OnInit, ViewEncapsulation } from '@angular/core';
- import { ChatService, Message } from '../chat.service';
- import { Observable } from 'rxjs/Observable';
- import 'rxjs/add/operator/scan';
- @Component({
- selector: 'chat-component',
- templateUrl: './ 'chat-component.component.html',
- styleUrls: ['./ 'chat-component.component.css'],
- encapsulation: ViewEncapsulation.None
- })
- export class Chat-ComponentComponent implements OnInit {
- messages: Observable<Message[]>;
- strMsg: string;
- constructor(private chat: ChatService) { }
- ngOnInit() {
- this.messages = this.chat.conversation.asObservable()
- .scan((acc, val) => acc.concat(val));
- }
- sendMessage() {
- this.chat.talk(this.strMsg);
- this.strMsg = '';
- }
- }
Here, I am injecting the chat-service inside the constructor. And calling my talk method when a user presses the Enter key or the Send button. I have used two-way binding to get the input from the input-box. For that, I have created the variable strMSg.
My chat-component.html will look like this.
- <h1>My First ChatBot using Angular and Dialogflow</h1>
- <ng-container *ngFor="let m of messages | async">
- <div class="message" [ngClass]="{ 'from': m.from === 'bot',
- 'to': m.from === 'user' }">
- {{ m.msg }}
- </div>
- </ng-container>
- <label for="nameField">Your Message</label>
- <input [(ngModel)]="strMsg" (keyup.enter)="sendMessage()" type="text">
- <br>
- <button (click)="sendMessage()">Send</button>
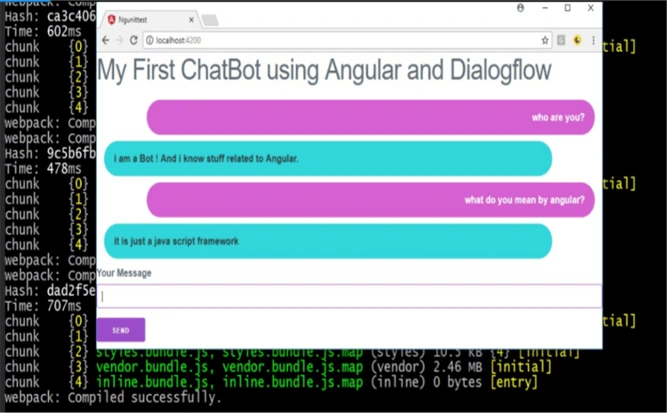
Output
Ganapati PanapanaPosted Apr 11, 2018, 2:32 AM
Nice article !!! good to know !!1
Anil SharmaPosted Mar 12, 2018, 8:25 AM
ERROR in ./node_modules/api-ai-javascript/index.tsModule build failed: Error: E:\Project Practice\Botchat\angular\ngbotdemo\node_modules\api-ai-javascript\index.ts is missing from the TypeScript compilation. Please make sure it is in your tsconfig via the 'files' or 'include' property. The missing file seems to be part of a third party library. TS files in published libraries are often a sign of a badly packaged library. Please open an issue in the library repository to alert its author and ask them to package the library using the Angular Package Format (https://goo.gl/jB3GVv). at AngularCompilerPlugin.getCompiledFile (E:\Project Practice\Botchat\angular\ngbotdemo\node_modules\@ngtools\webpack\src\angular_compiler_plugin.js:674:23) at plugin.done.then (E:\Project Practice\Botchat\angular\ngbotdemo\node_modules\@ngtools\webpack\src\loader.js:467:39) at <anonymous> at process._tickCallback (internal/process/next_tick.js:188:7) webpack: Failed to compile.
Anil SharmaPosted Feb 28, 2018, 3:54 AM
How we can use fetch questions from Mongodb database without using dailogflow api
hariharan venkatPosted Dec 21, 2017, 7:31 AM
Shall we convert this application into .apk or .ipa or appx
Tridip BhattacharjeePosted Nov 23, 2017, 3:44 AM
What is data flow? what it does ? please tell me some basic about data flow usage. thanks
Sharad GuptaPosted Nov 20, 2017, 4:41 AM
Nice article, thanks. good to know about it