

Note
- Python language support starts from Bot Framework SDK V4 and is in the preview stage.
- Currently, the predefined template is not available for Visual Studio 2019. We are using Flask template to create the Bot Application.
This article focuses on how to write the “Hello World” application in Bot Framework using Python language. It has been divided into two sections. The first section focuses on the Project template changes and the next section focuses on the code changes.
- Project template changes
- Code file changes
First, I will start Project template changes,
Project template changes
Prerequisites
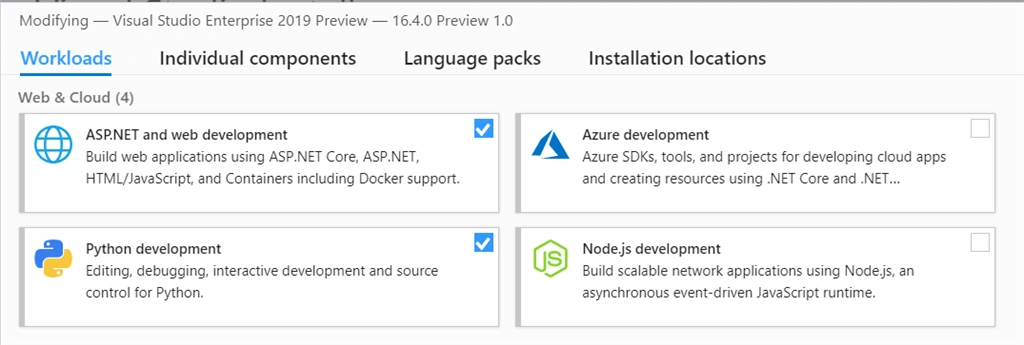
Visual Studio 2019 Preview (Version 16.4.0) and make sure Python development is installed.
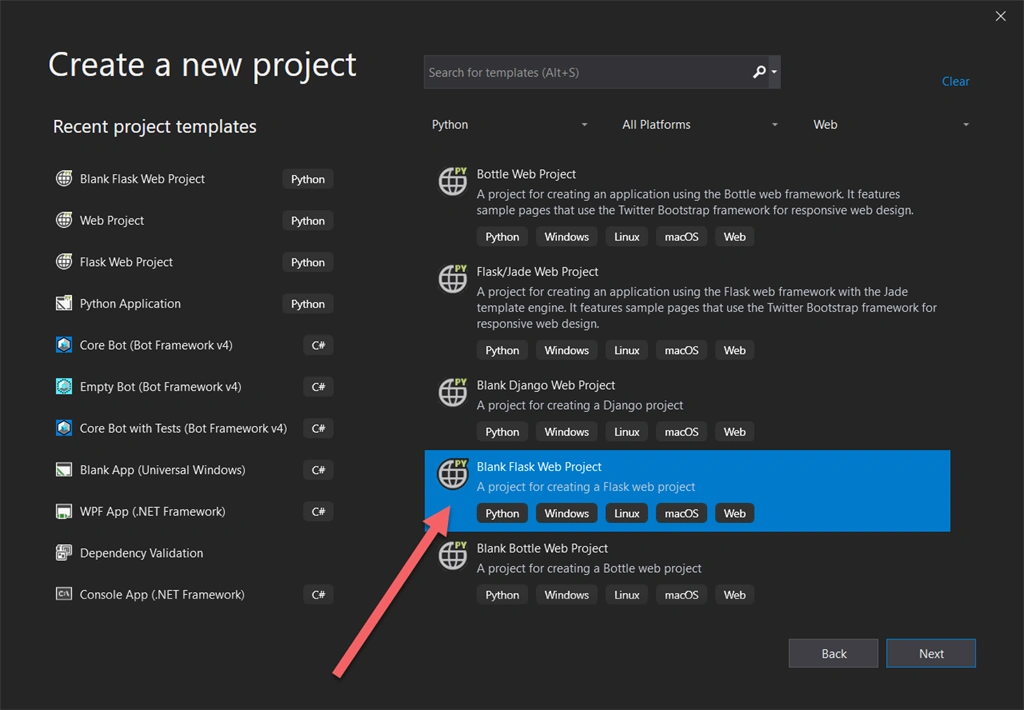
Create a Project
The project type: “Blank Flask Web Project”.
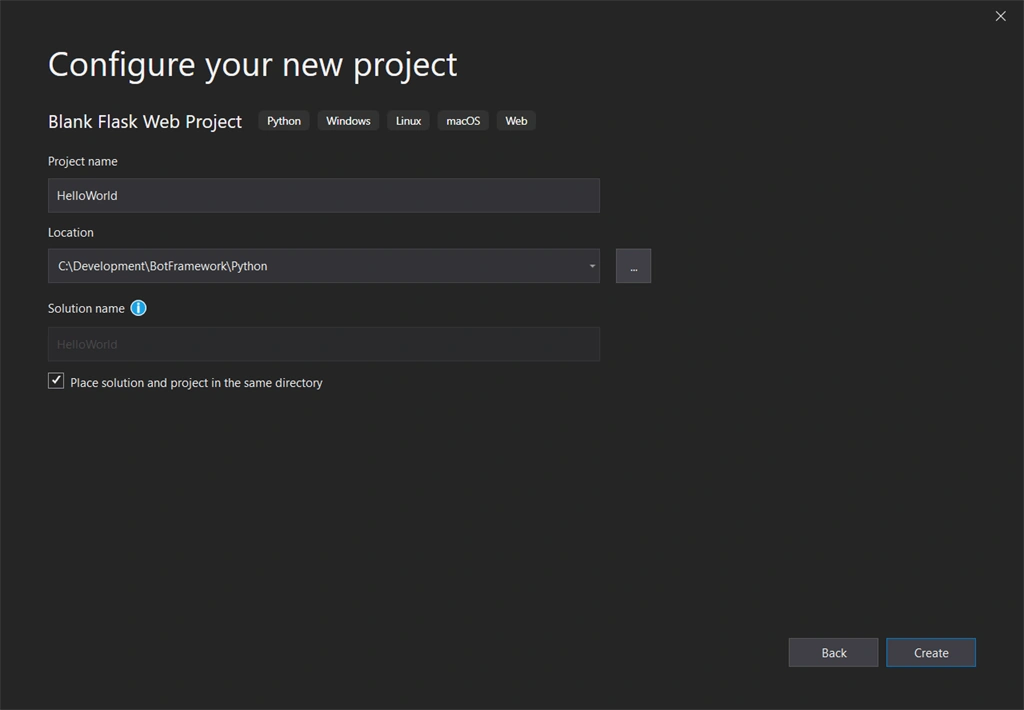
Project Name
Enter the project name “HelloWorld” and create a project.
The project is successfully created.
Create a virtual environment
Go to the Solution Explorer and open the “requirements.txt” file and add the below namespace:
botbuilder-core>=4.4.0b1 ,botbuilder-dialogs>=4.4.0b1 save and close the file.

In the tab, view header click the “Create virtual environment” and create the environment

Create a virtual environment,
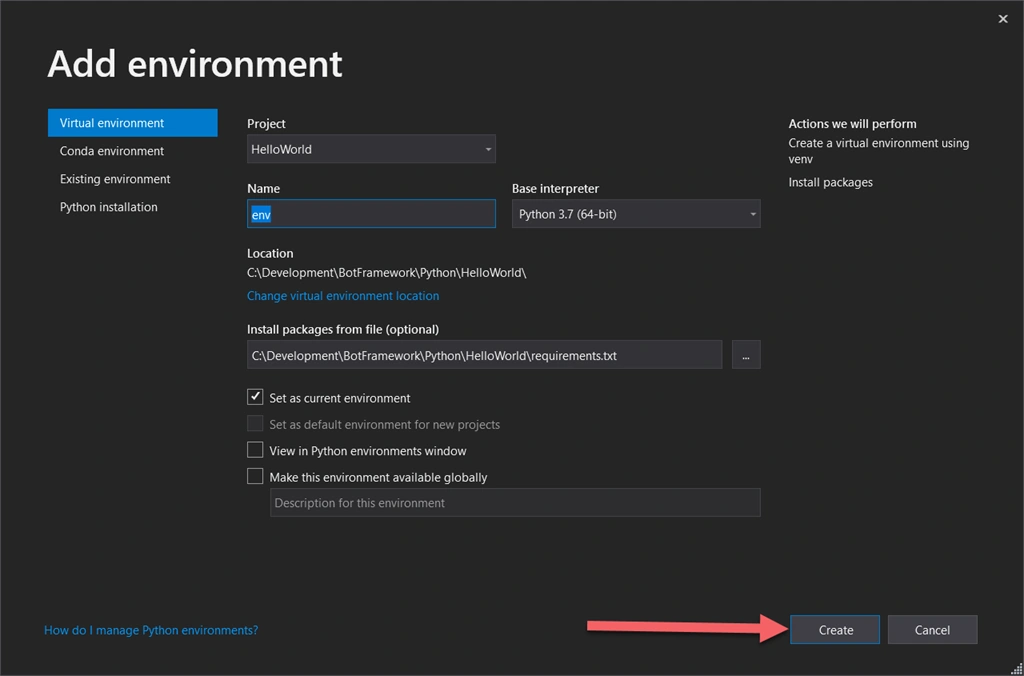
The virtual environment was created successfully.
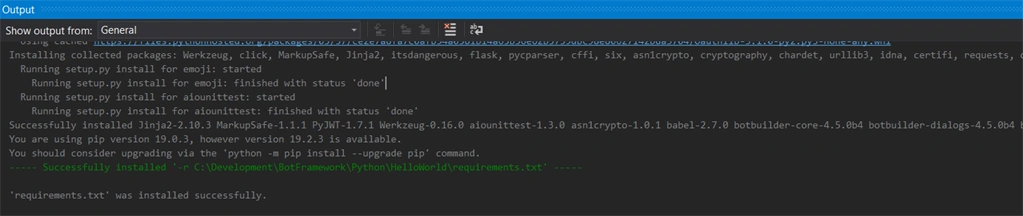
For conformation check the module name displayed in the solution explorer in the ("Env") area.
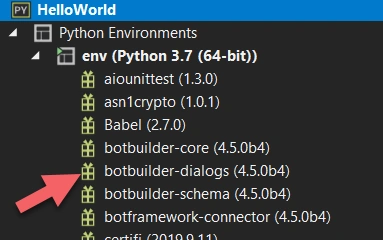
Our Project template changes are done. Next, I am going to change the code files
Code changes
Delete the default route function
Goto app.py file
Delete the hello() : function including app.route
- @app.route('/')
- def hello():
- """Renders a sample page."""
- return "Hello World!"
Port number update ( optional changes)
goto __main__ function and change the port number
- if __name__ == '__main__':
- import os
- HOST = os.environ.get('SERVER_HOST', 'localhost')
- try:
- PORT = int(os.environ.get('SERVER_PORT', '5555'))
- except ValueError:
- PORT = 5555
- app.run(HOST, PORT)
After changes the code looks like below:
- if __name__ == '__main__':
- import os
- HOST = os.environ.get('SERVER_HOST', 'localhost')
- try:
- PORT = 3978
- except ValueError:
- PORT = 5555
- app.run(HOST, PORT)
Create on_turn function handling the IO operation.
Create a new Python class file (ex: file name is: “echobot.py”). Add the new class “EchoBot”, this class adds the on_turn function. This function has two arguments
- Self, ref the current object
- “context” object, This object handles the activity details.
In this sample, we are reading the string which is sent by the user and sends back to the user the same string with the length of string.
- from sys import exit
- class EchoBot:
- async def on_turn(self, context):
- if context.activity.type == "message" and context.activity.text:
- strlen = len(context.activity.text)
- sendInfo = "Hey you send text : " + context.activity.text + " and the lenght of the string is " + str(strlen)
- await context.send_activity(sendInfo)
asyn/await concept
Go to the “app.py” and add “import asyncio”, this has supported the async/await concept and "import sys" provides the information about constants, functions, and methods.
- import asyncio
- import sys
Request and Response module
Add the request and response module in flask module.
- from flask import Flask, request, Response
Bot Framework module
Import the BotFrameworkAdapter, BotFrameworkAdapterSettings, TurnContext from botbuilder.core to handle the Bot related queries.
- from botbuilder.core import (
- BotFrameworkAdapter,
- BotFrameworkAdapterSettings,
- TurnContext,
- )
Import the Activity from botbuilder.schema,
- from botbuilder.schema import Activity
- from echobot import*
Object creation
Create the object for Echobot class and
- bot = EchoBot()
- SETTINGS = BotFrameworkAdapterSettings("","")
- ADAPTER = BotFrameworkAdapter(SETTINGS)
Create an object for event loop, when called from a coroutine or a callback, this function will always return the running event loop.
- LOOP = asyncio.get_event_loop()
This function is the heart of our application, and it handles all the requests and responses. Receiving the information from the request object as a JSON format and call the "await bot.on_turn(turn_context)" pass the turn_context as an argument.
In on_turn function we are checking the activity type. If its type is message, find the length of the string and send the information to the user using context.send_activity function.
- @app.route("/api/messages", methods=["POST"])
- def messages():
- if "application/json" in request.headers["Content-Type"]:
- body = request.json
- else:
- return Response(status=415)
- activity = Activity().deserialize(body)
- auth_header = (
- request.headers["Authorization"] if "Authorization" in request.headers else ""
- )
- async def aux_func(turn_context):
- await bot.on_turn(turn_context)
- try:
- task = LOOP.create_task(
- ADAPTER.process_activity(activity, auth_header, aux_func)
- )
- LOOP.run_until_complete(task)
- return Response(status=201)
- except Exception as exception:
- raise exception
Testing Steps
- Open the bot emulator and connect to the URL (http://localhost:3978/api/messages).
- Once it is connected, send the message
- Bot response to the channel and the information display in the emulator.
Output
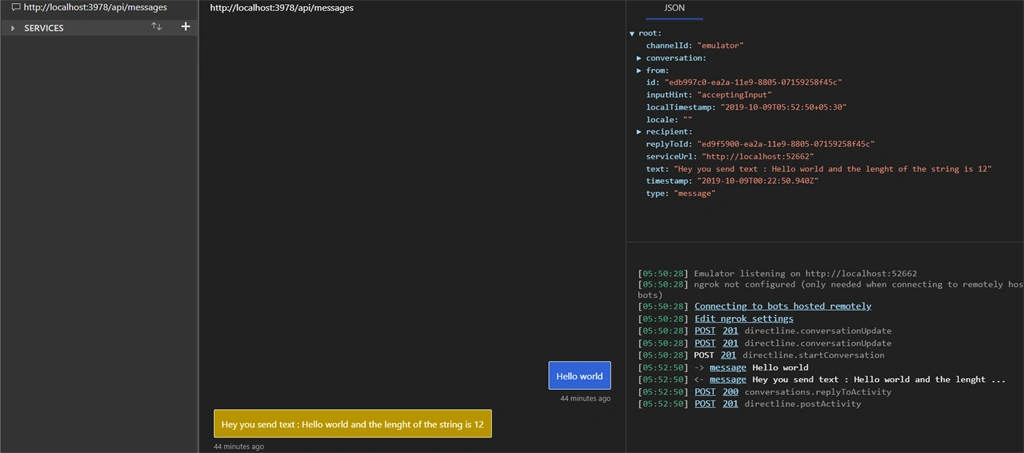
Please find the source from here
Conclusion
I hope you can understand the concept of how to create a bot application using Python. More articles are coming soon in Python languages, stay tuned.
Happy reading!!! Happy coding!!!
Swapnil KadamPosted Sep 15, 2020, 3:25 AM
Adding to the Below Comment ..I followed all the Steps and the code runs on random port rather than running 3978. When i update the resulting Endpoint in Bot emulator..the Bot doesnt respond....Can you help me where am i doing it wrong?..Let me know if you want to have a look at my code...
Swapnil KadamPosted Sep 15, 2020, 3:23 AM
Hi Firstly, Amazing Article and Amazing video on YouTube too..I followed the video on YouTube and all the Concepts were briefly explained..I enjoyed and understood the details that you have used in the code to create the Bot.
Mageshwaran RPosted Nov 16, 2019, 3:56 AM
Nice Article