

Today, we will be looking into creating a WordPress Web app on Azure. Azure has a greater advantage of implementing open source on the cloud and WordPress is a highly used application to build various types of websites. Combining it with Azure is one of the best options. So, let’s get started.
Step 1
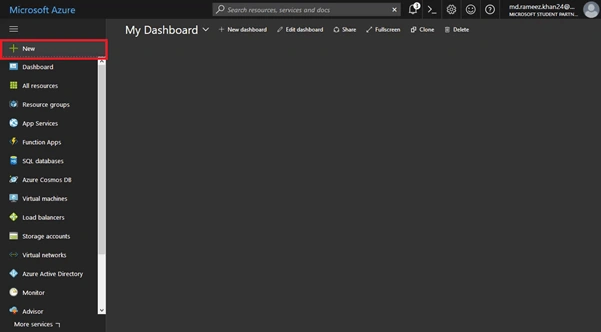
Log into the Azure portal and click "New".
Step 2
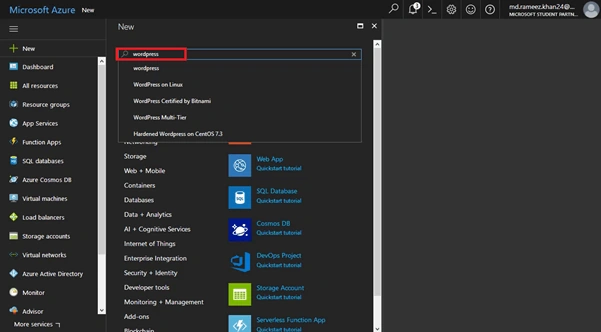
In the search bar, search with the keyword WordPress.
Step 3
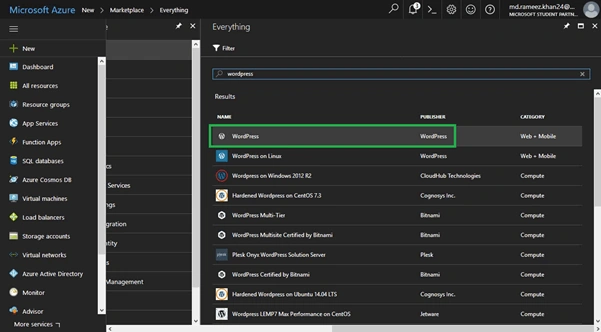
Choose the first option WordPress –category ‘Web+Mobile’.
Step 4
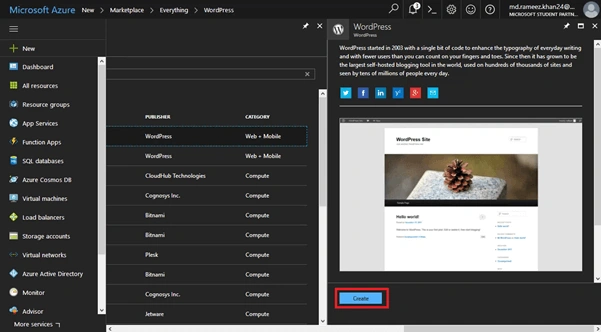
Click on Create in the new blade to submit the web app details.
Step 5
- Enter the name of the app.
- Choose a subscription whichever is applicable to you.
- You can create a new resource group or choose an existing one.
- Under database provider, we are going to choose MySQL in App.
What it does is, if your website is going to a static website where you will not be updating content, so often, like your profile website or a basic company website, choosing MySQL in-app option lets you save on cost by creating MySQL instance within the application so you don’t have to have a dedicated back-end server.
Note - MySQL in-app will have only one instance for the database that cannot be increased or scaled up. I would recommend choosing this option only for simple website building.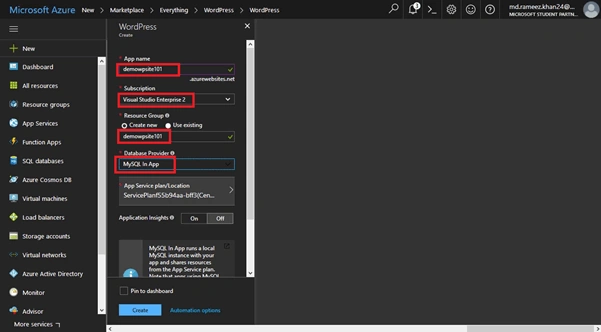
Step 6
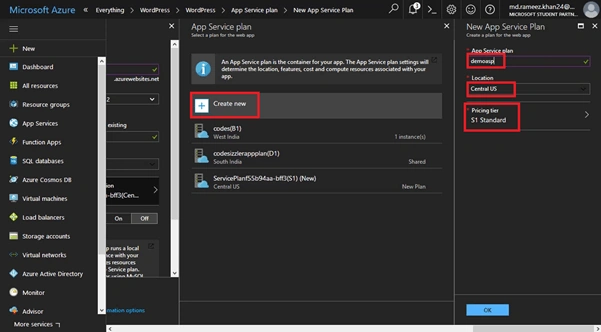
Create a new service plan or choose an existing plan if you already have an App Service Plan created.
- Name the service plan.
- Choose a location where you would like to deploy your app.
- Select a pricing tire depending on your requirement.
Finally, click on "Select" and OK to create an App Service Plan.
Step 7
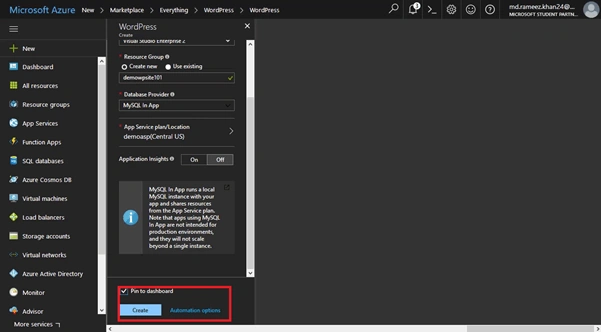
Check "Pin to dashboard" option and click "Create". Wait until the app gets created.
Step 8
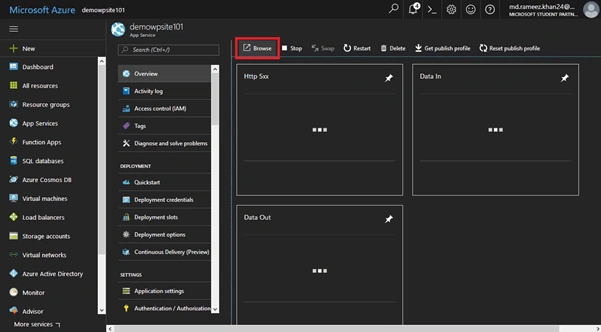
Once the app is created, click on the Browse option in the app.
Step 9
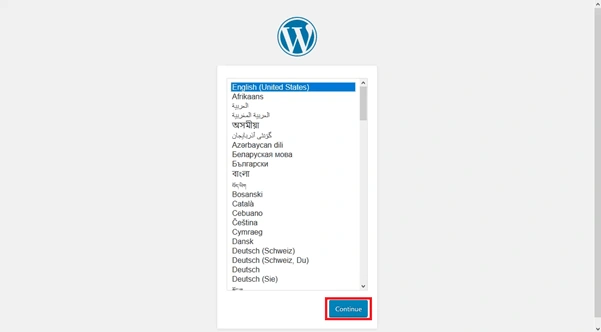
You will be taken to the WordPress installation procedure. Select the language you will be using and click "Continue".
Step 10
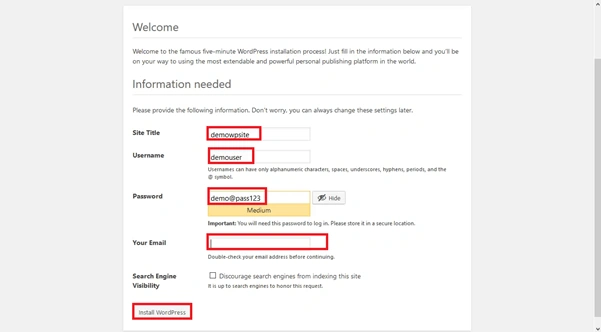
Here, you will be filling in your website details. Click "Install".
Step 11
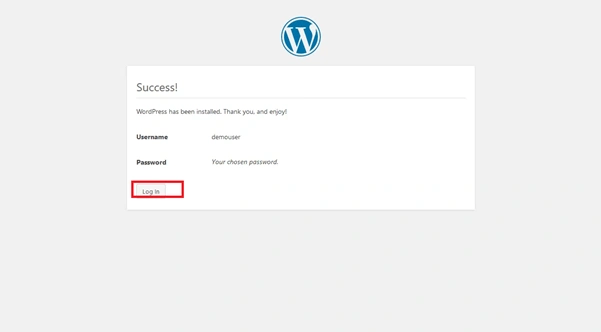
If the installation was successful, you will be asked to log into the site.
Step 12
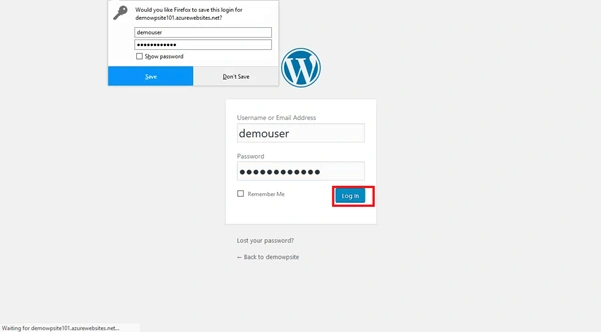
Enter the login details which were entered in the previous step and click "Login".
Step 13
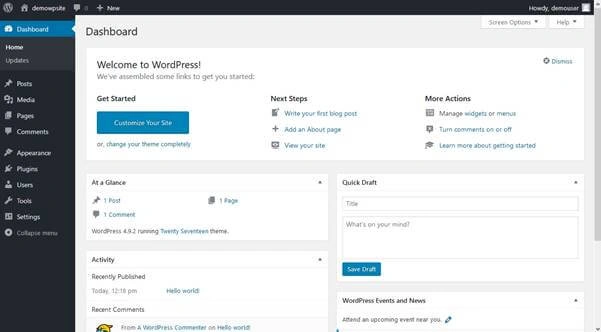
So, you have successfully installed and logged in to your WordPress website. And this is going to be your WordPress dashboard.
Step 14
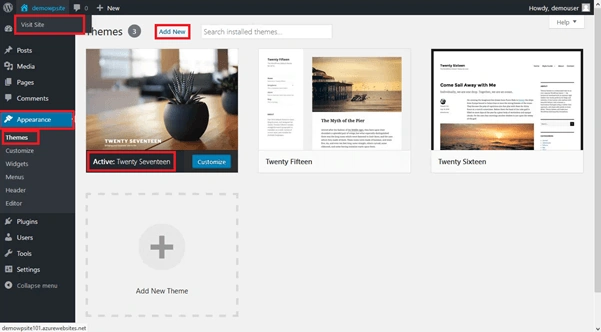
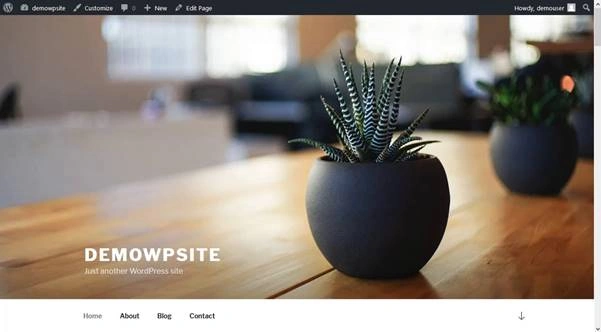
You can either click on "Visit Site" or "Themes" to change the themes.
Tellus ConsultingPosted Sep 26, 2020, 8:29 PM
Nice very simple and easy start to trying out Wordpress on Azure.
AnuPosted May 9, 2020, 3:47 AM
Hi, I have a extra fill box as database settings on step 7 , in between the service plan and insights. I can't create website without filling it. If possible can anyone tell me what to fill in that field???