

Introduction
Azure Bot Service provides an integrated development environment for bot building. Its integration with Power Virtual Agents, a fully hosted low-code platform, enables developers of all technical abilities build conversational AI bots—no code needed.
Source of introduction - Bot-services
Prerequisites
- Azure account. if you don't have then click here to create a free account.
- Required basic HTML knowledge.
Step by Step implementation
Step 1. Create Azure QnA cognitive service
- Open https://portal.azure.com/
- Log in with your Azure account.
- Click on Create a resource.
- Search QnA Maker service and click on it.
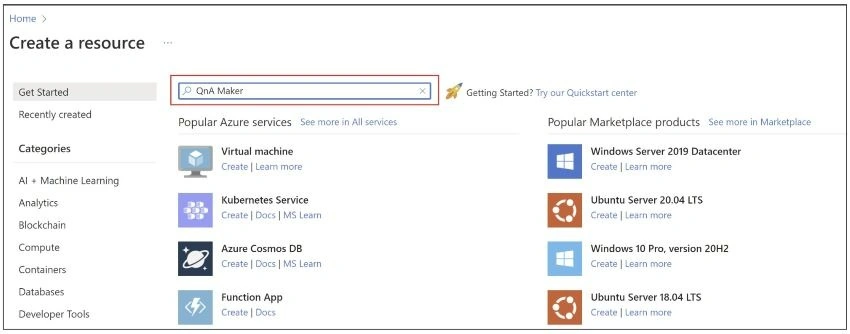
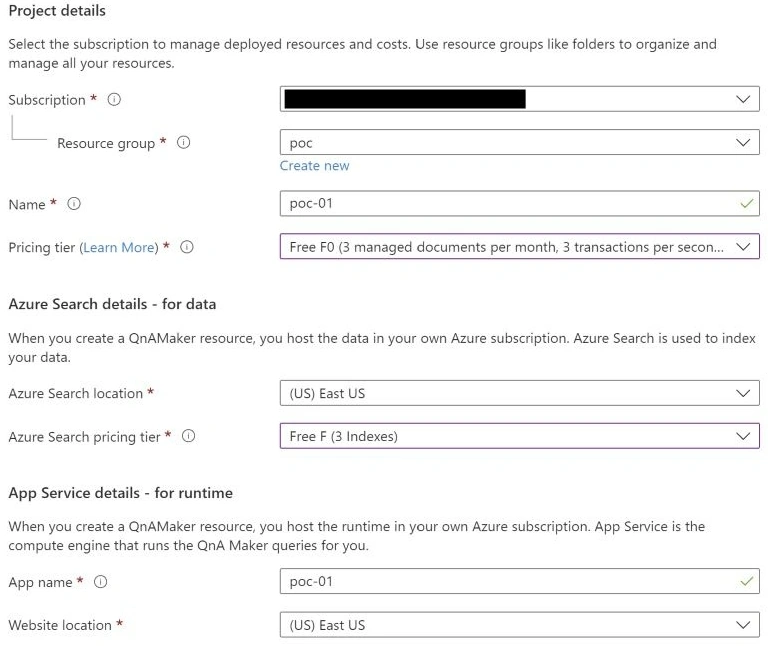
- Provide basic details and then click on "review and create" resource.
- Once the resource is created follow step 2.
Step 2. Setup QnA
- Open https://www.qnamaker.ai/
- Login with the same credentials that you have used for the Azure portal.
- Then we can see the created resource in the main page.
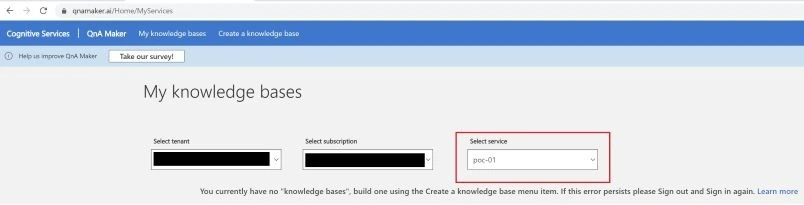
- Now we need to create knowledge bases. Let's follow step 3 to create it
Step 3. Setup knowledge base
- Open https://www.qnamaker.ai/
- Login with the same credentials that you have used for the Azure portal.
- Click on Create a Knowledge Base.
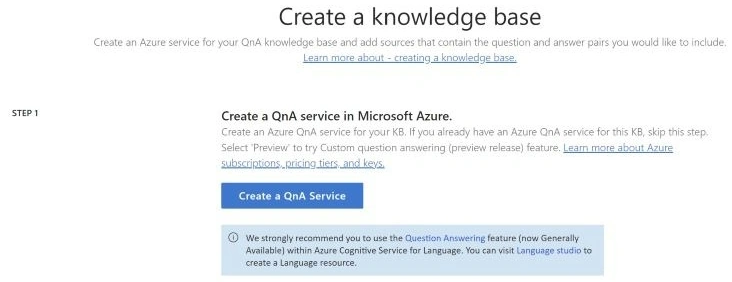
- We can skip step 1 in Create a Knowledge Base as the QnA resource is already created
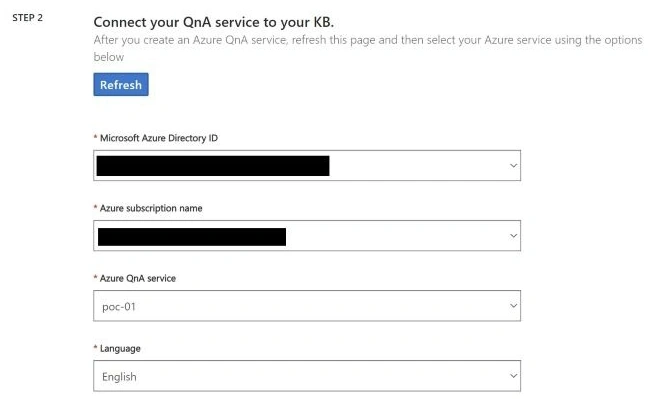
- Let's follow step 2 and provide all the required details
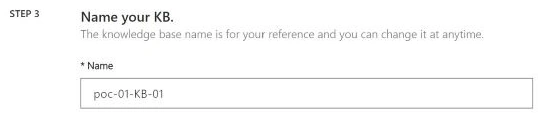
- Step 3. Provide a knowledge-based name whatever you want
- Step 4. We can skip it as we are creating a basic Azure chatbot. We can explore it in the next article.
- Step 5. Just click on the Create Your KB button and wait for some time to complete it.
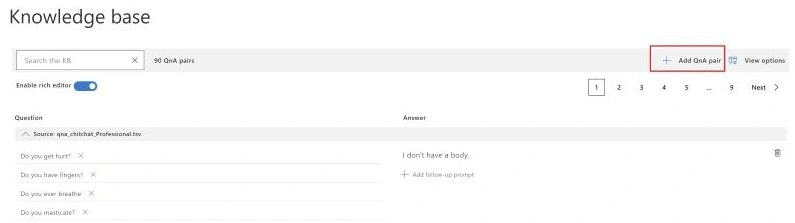
- As soon as the process is completed, you will be redirected to the knowledge base main page where we can add/edit/delete QnA. By default, we can see samples of QnAs.
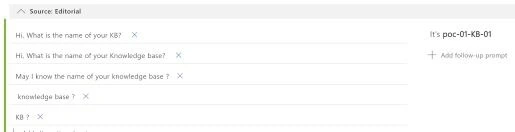
- Let's add some question and answer for Demo.
- Click on Add QnA pair
- Provide some sample Q&A.
- Click on Add QnA pair
- Click on the Save and Train button.
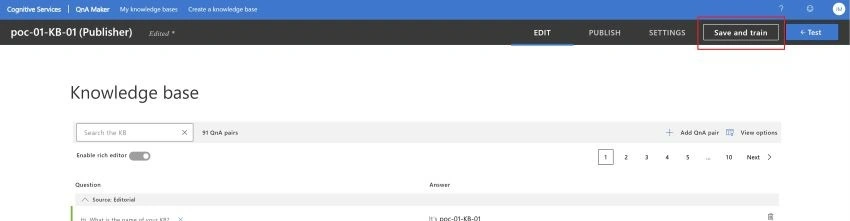
- Click on the PUBLISH menu on top and then click on the Publish button
- Then will get API information which we can use in Postman / soupUi for more testing or we can integrate it into our project.
- Now follow final step 4 to create azure bot
Step 4. Create an Azure chatbot
- Open https://www.qnamaker.ai/
- Login with the same credentials that you have used for the Azure portal.
- Click on My nowledge Base.
- We can see KB which we have created in the previous step. Just click on it.
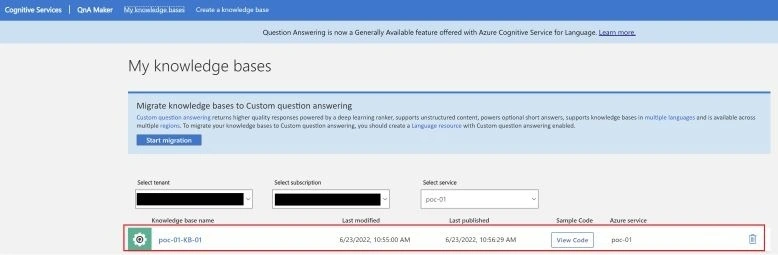
- Click on the PUBLISH menu on top and then click on the Publish button.
- Click on the Create Bot button then you will be redirected to the Azure portal.
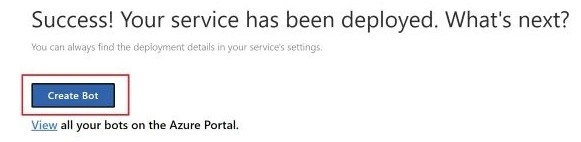
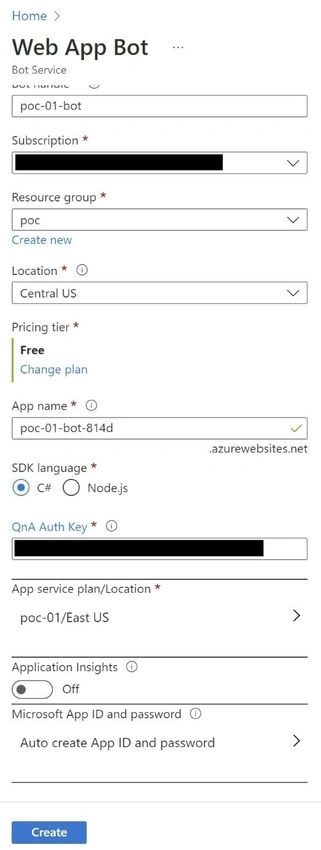
- Use the same credentials that we have used.
- All the information will be pre-filled based on the created KB.
- Just change the pricing tier to FREE and then click on the Create button.
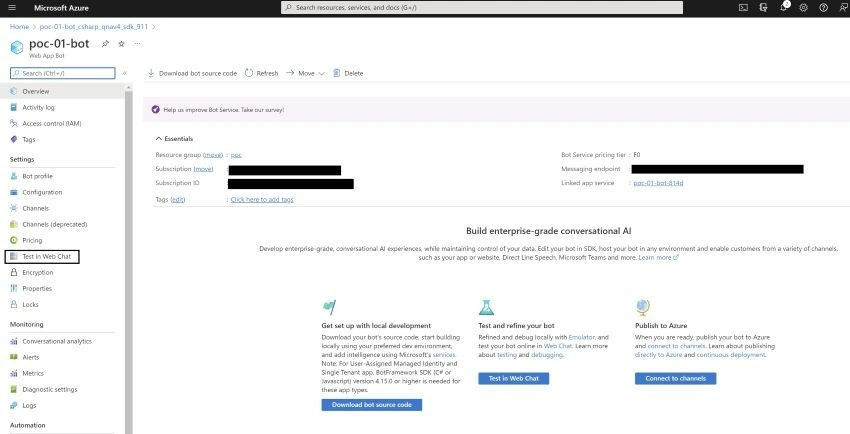
- Open poc-01-bot once it is created.
- Click on Test in the Web chat.
- Now we can test BOT.
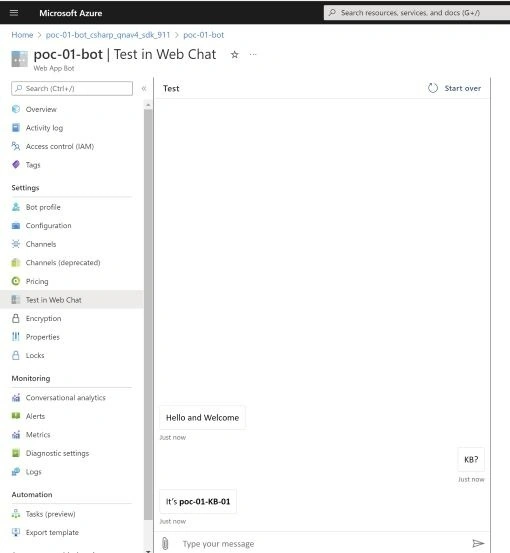
- Follow step 5 to integrate BOT in any web portal.
Step 5. Integrate BOT in any web portal
- Open https://portal.azure.com/
- Log in with your Azure account.
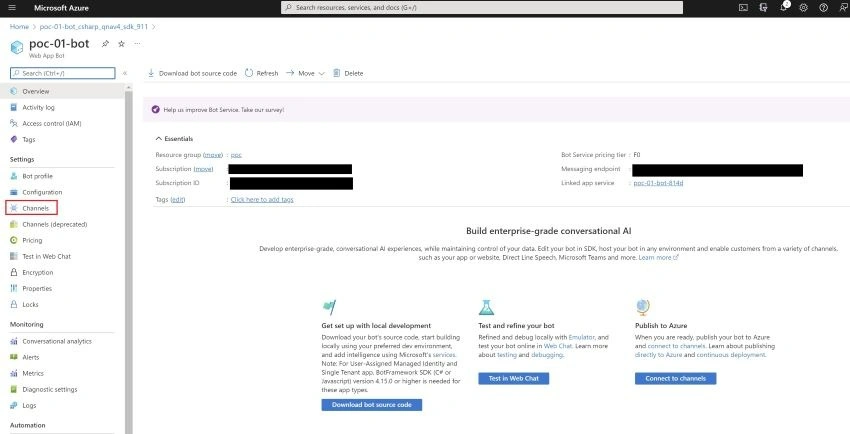
- Search and select your BOT.
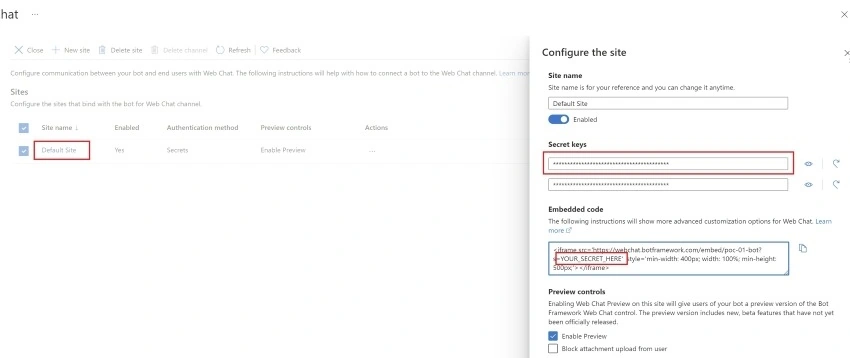
- Click on the channel from the left panel.
- Click on web chat
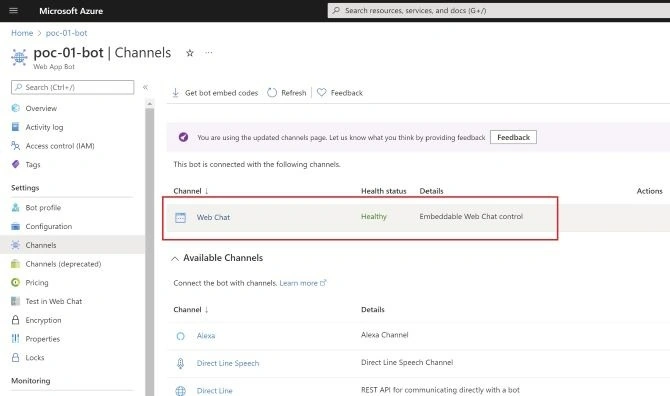
- Click on the default site copy the HTML iframe code from the right panel use the secret keys which are provided in the textbox and then replace it with {YOUR_SECRET_HERE}.
Thank you all !!
Join the conversation! Your thoughts help the community grow.