

Introduction
Android is one of the most popular operating systems for mobiles. In this article, I will show you how to create a Web Browser Android application using Android Studio.
Requirements
- Android Studio version 2.3.3
- Little bit XML and JAVA knowledge.
- Android Emulator (or) Android mobile
- Download link (Android Studio)
Steps to be followed
Follow these steps to create a web Browser Android application using Android Studio. I have included the source code above.
Step 1
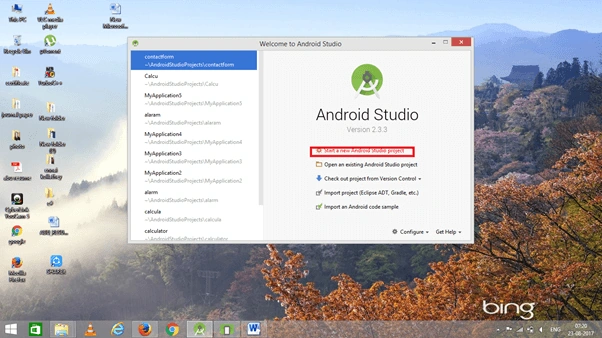
Open Android Studio and start a New Android Studio Project.
Step 2
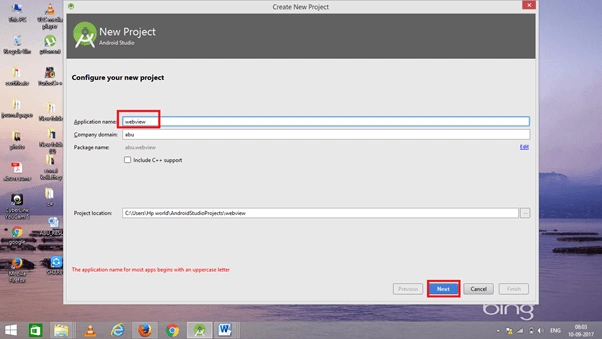
You can choose your application name and choose where your project is stored. If you wish to use C++ for coding the project, mark the "Include C++ support", and click the "Next" button.
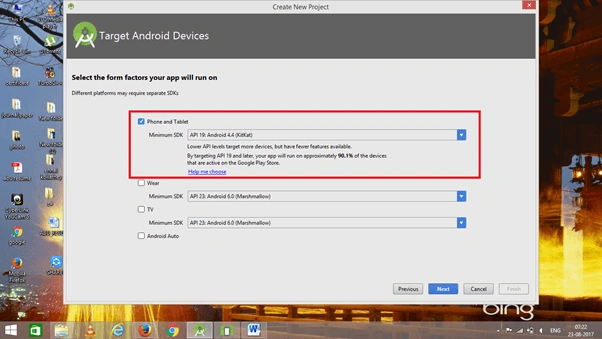
Now, select the version of Android and select the target Android devices.
Step 3
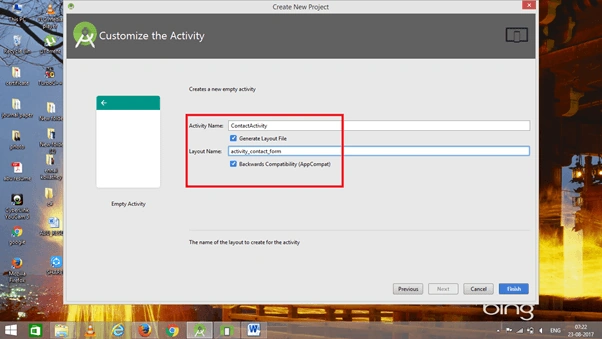
Now, add the activity and click the "Next" button.
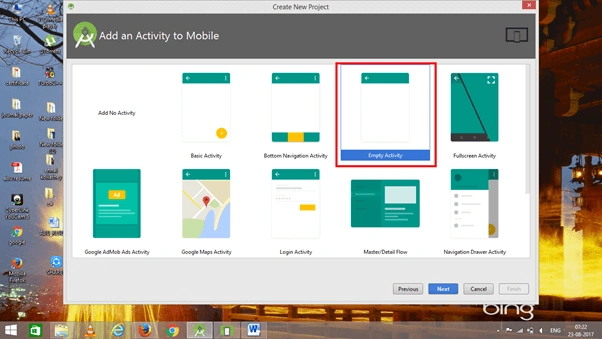 Add activity name and click "Finish".
Step 4
Go to activity_main.xml, This XML file contains the designing code for the app.
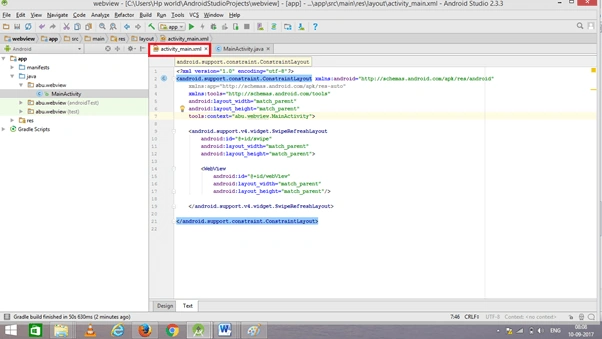 The XML code is given below.
- <?xml version="1.0" encoding="utf-8"?>
- <android.support.constraint.ConstraintLayout xmlns:android="http://schemas.android.com/apk/res/android"
- xmlns:app="http://schemas.android.com/apk/res-auto"
- xmlns:tools="http://schemas.android.com/tools"
- android:layout_width="match_parent"
- android:layout_height="match_parent"
- tools:context="abu.webview.MainActivity">
- <android.support.v4.widget.SwipeRefreshLayout
- android:id="@+id/swipe"
- android:layout_width="match_parent"
- android:layout_height="match_parent">
- <WebView
- android:id="@+id/webView"
- android:layout_width="match_parent"
- android:layout_height="match_parent"/>
- </android.support.v4.widget.SwipeRefreshLayout>
- </android.support.constraint.ConstraintLayout>
Step 5
We need to make network requests. So, add internet permissions in the AndroidManifest.xml file.
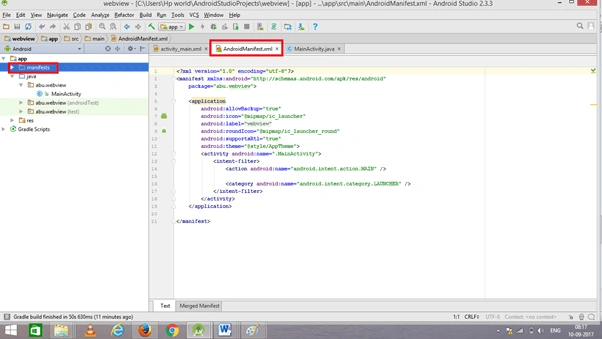 The AndroidManifest.xml code is given below.
- <?xml version="1.0" encoding="utf-8"?>
- <manifest xmlns:android="http://schemas.android.com/apk/res/android"
- package="abu.webview">
- <uses-permission android:name="android.permission.INTERNET"/>
- <application
- android:allowBackup="true"
- android:icon="@mipmap/ic_launcher"
- android:label="@string/app_name"
- android:roundIcon="@mipmap/ic_launcher_round"
- android:supportsRtl="true"
- android:theme="@style/AppTheme">
- <activity android:name=".MainActivity">
- <intent-filter>
- <action android:name="android.intent.action.MAIN" />
- <category android:name="android.intent.category.LAUNCHER" />
- </intent-filter>
- </activity>
- </application>
Step 6
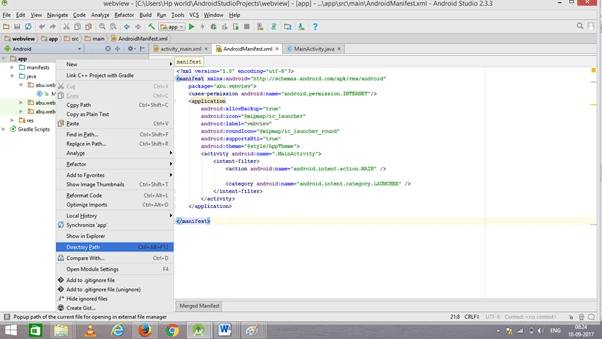
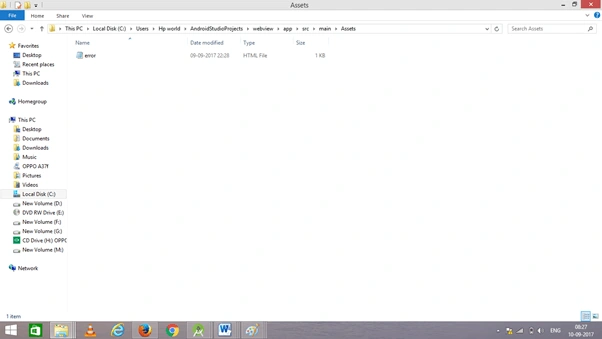
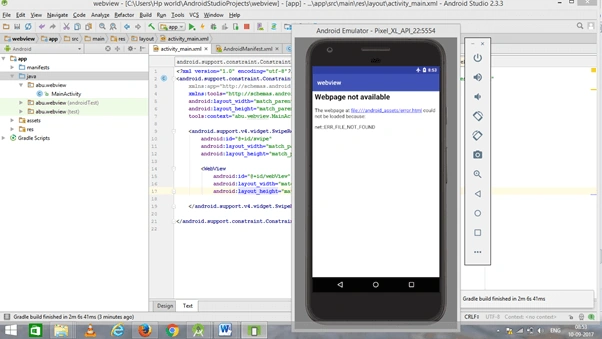
Go to the app, right-click “Directory path”, then click on the path and add a new folder named “Assets” in the main folder. The below template shows how to add an error file. I have attached an error file.
Step 7
Go to Main Activity.java. This Java program is the back-end language for Android.
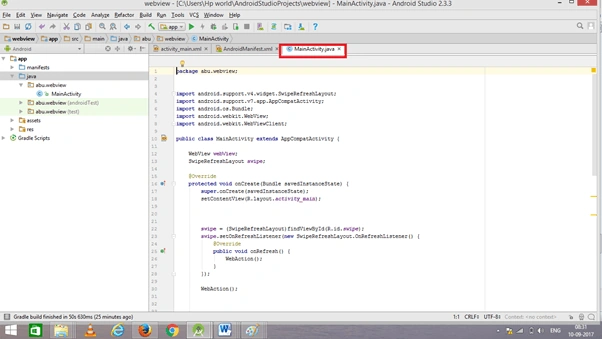 The Java code is given below.
- package abu.webview;
- import android.support.v4.widget.SwipeRefreshLayout;
- import android.support.v7.app.AppCompatActivity;
- import android.os.Bundle;
- import android.webkit.WebView;
- import android.webkit.WebViewClient;
- public class MainActivity extends AppCompatActivity {
- WebView webView;
- SwipeRefreshLayout swipe;
- @Override
- protected void onCreate(Bundle savedInstanceState) {
- super.onCreate(savedInstanceState);
- setContentView(R.layout.activity_main);
- swipe = (SwipeRefreshLayout)findViewById(R.id.swipe);
- swipe.setOnRefreshListener(new SwipeRefreshLayout.OnRefreshListener() {
- @Override
- public void onRefresh() {
- WebAction();
- }
- });
- WebAction();
- }
- public void WebAction(){
- webView = (WebView) findViewById(R.id.webView);
- webView.getSettings().setJavaScriptEnabled(true);
- webView.getSettings().setAppCacheEnabled(true);
- webView.loadUrl("https://www.google.com/");
- swipe.setRefreshing(true);
- webView.setWebViewClient(new WebViewClient(){
- public void onReceivedError(WebView view, int errorCode, String description, String failingUrl) {
- webView.loadUrl("file:///android_assets/error.html");
- }
- public void onPageFinished(WebView view, String url) {
- // do your stuff here
- swipe.setRefreshing(false);
- }
- });
- }
- @Override
- public void onBackPressed(){
- if (webView.canGoBack()){
- webView.goBack();
- }else {
- finish();
- }
- }
- }
Step 8
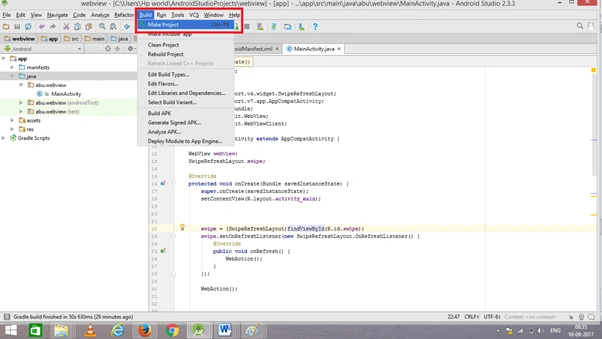
Now, either go to the menu bar and click "Make a project" or press ctrl+f9 to debug the error.
 Step 9
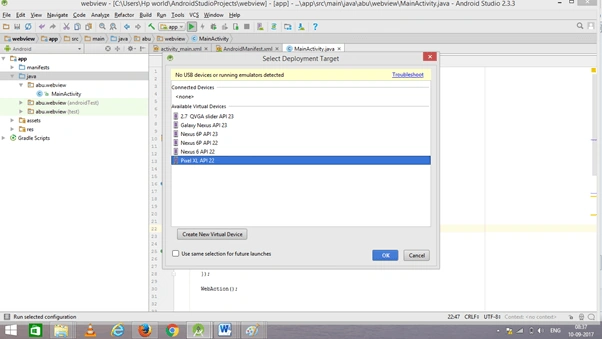
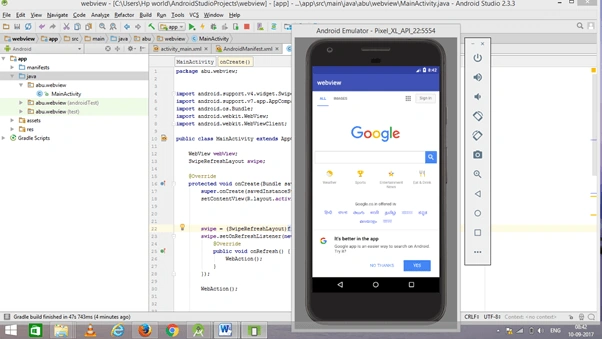
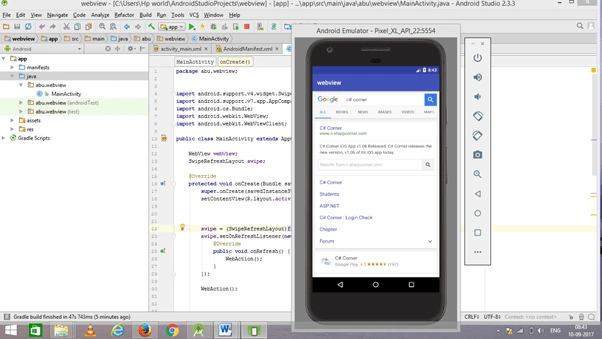
Then, click the "Run" button or press shift+f10 to run the project. Select the "virtual machine" option and click OK.
Conclusion
We have successfully created a Web Browser Android application using Android Studio.
A CPosted Jan 23, 2021, 5:10 PM
Hi, if I wanted a browser that doesn't load pages or anything at all but still can be set as default browser, how should your code be modified to do that? It's for learning purposes.
Prosper GunnerPosted Apr 18, 2020, 4:06 AM
Greetings Abubackkar. my webView, PDF files downloaded from sites which require you to log in, do not open after downloading them, but those downloaded otherwise will always open. Please why is that?
Pedro NacPosted Apr 16, 2020, 5:39 AM
Hello Abubackka, thanks for you tutorial. I would like to set up a defaut url to be open. How do I do ? An dI would like as well to be able to download files from the web. Best regards.
SANDEEP KUMARPosted Oct 10, 2019, 8:14 AM
Error: package android.support.v4.widget does not exist error: package android.support.v7.app does not exist error: method does not override or implement a method from a supertype error: cannot find symbol method onCreate(Bundle) error: cannot find symbol method setContentView(int) error: cannot find symbol method findViewById(int) error: cannot find symbol method findViewById(int) error: method does not override or implement a method from a supertype error: cannot find symbol method finish() uses or overrides a deprecated API. error show
SANDEEP KUMARPosted Oct 10, 2019, 8:14 AM
Not useful show more errors
sagir atacPosted May 28, 2019, 6:06 AM
Thanks for yor this project ,but the problem is upload and download not active how can solve this problem
Ryan TsePosted Apr 26, 2018, 10:38 PM
That's awesome,thank u guys,it's helpful