

Introduction
Requirements
- Android Studio version 2.3.3
- Little bit XML and Java knowledge.
- Android Emulator (or) Android mobile
- Download link (Android Studio)
Steps to be followed
Follow these steps to create a Native TimePicker Android application using Android Studio. I have included the source code in the attachment.
Step 1
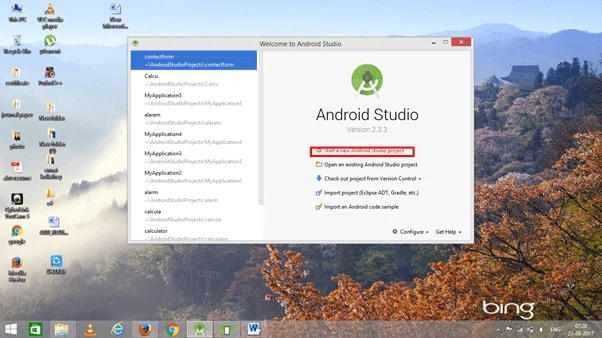
Open Android Studio and start a new Android Studio Project.
Step 2
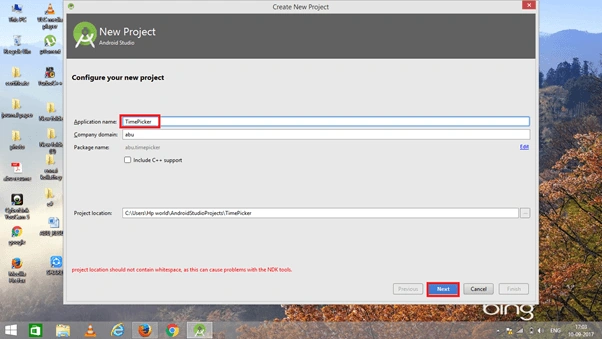
You can choose your application name and choose where your project is stored on the location. If you wish to use C++ for coding the project, mark the "Include C++ support", and click the "Next" button.
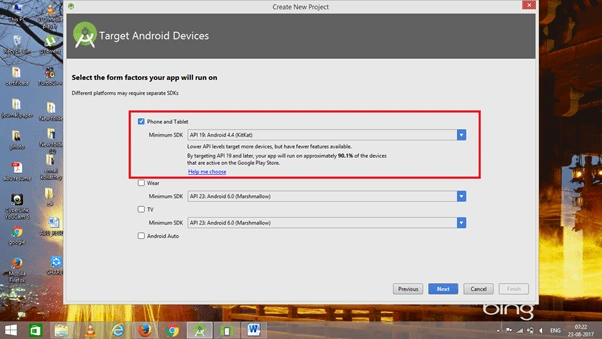
 Now, select the version of Android and select the target Android devices.
Step 3
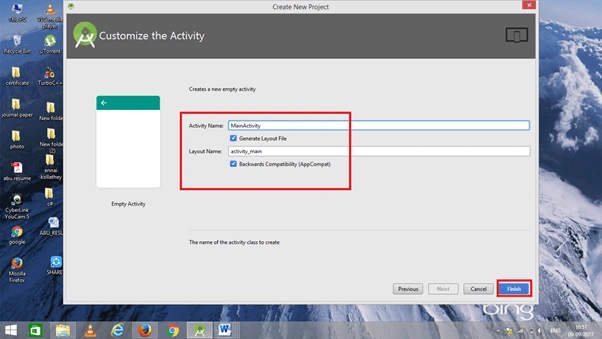
Now, add the activity and click the "Next" button.
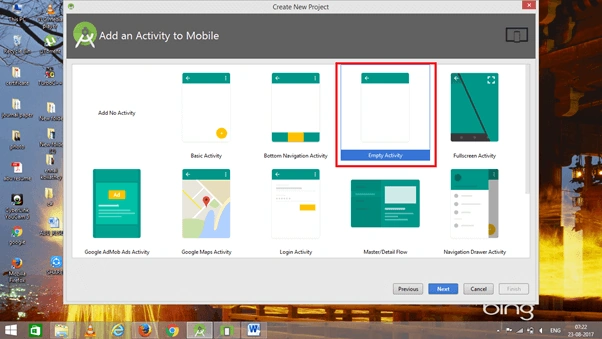 Add the activity name and click "Finish".
Step 4
Go to activity_main.xml. This XML file contains the designing code for an Android app in the activity_main.xml.
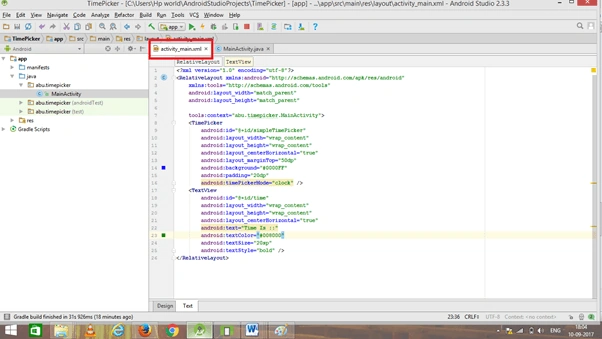 The XML code is given below.
- <?xml version="1.0" encoding="utf-8"?>
- <RelativeLayout xmlns:android="http://schemas.android.com/apk/res/android"
- xmlns:tools="http://schemas.android.com/tools"
- android:layout_width="match_parent"
- android:layout_height="match_parent"
- tools:context="abu.timepicker.MainActivity">
- <TimePicker
- android:id="@+id/simpleTimePicker"
- android:layout_width="wrap_content"
- android:layout_height="wrap_content"
- android:layout_centerHorizontal="true"
- android:layout_marginTop="50dp"
- android:background="#0000FF"
- android:padding="20dp"
- android:timePickerMode="clock" />
- <TextView
- android:id="@+id/time"
- android:layout_width="wrap_content"
- android:layout_height="wrap_content"
- android:layout_centerHorizontal="true"
- android:text="Time Is ::"
- android:textColor="#008000"
- android:textSize="20sp"
- android:textStyle="bold" />
- </RelativeLayout>
Step 5
Go to MainActivity.java. This Java program is the back-end language for Android.
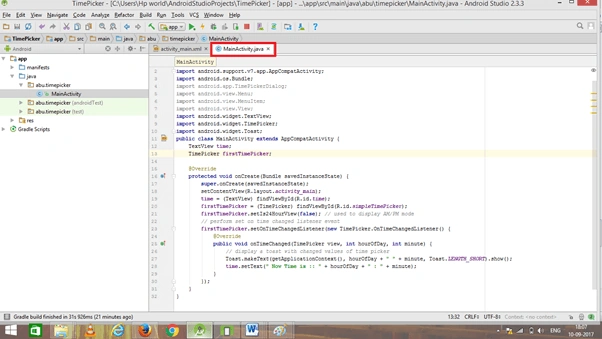 The Java code is given below.
- package abu.timepicker;
- import android.support.v7.app.AppCompatActivity;
- import android.os.Bundle;
- import android.app.TimePickerDialog;
- import android.view.Menu;
- import android.view.MenuItem;
- import android.view.View;
- import android.widget.TextView;
- import android.widget.TimePicker;
- import android.widget.Toast;
- public class MainActivity extends AppCompatActivity {
- TextView time;
- TimePicker firstTimePicker;
- @Override
- protected void onCreate(Bundle savedInstanceState) {
- super.onCreate(savedInstanceState);
- setContentView(R.layout.activity_main);
- time = (TextView) findViewById(R.id.time);
- firstTimePicker = (TimePicker) findViewById(R.id.simpleTimePicker);
- firstTimePicker.setIs24HourView(false); // used to display AM/PM mode
- // perform set on time changed listener event
- firstTimePicker.setOnTimeChangedListener(new TimePicker.OnTimeChangedListener() {
- @Override
- public void onTimeChanged(TimePicker view, int hourOfDay, int minute) {
- // display a toast with changed values of time picker
- Toast.makeText(getApplicationContext(), hourOfDay + " " + minute, Toast.LENGTH_SHORT).show();
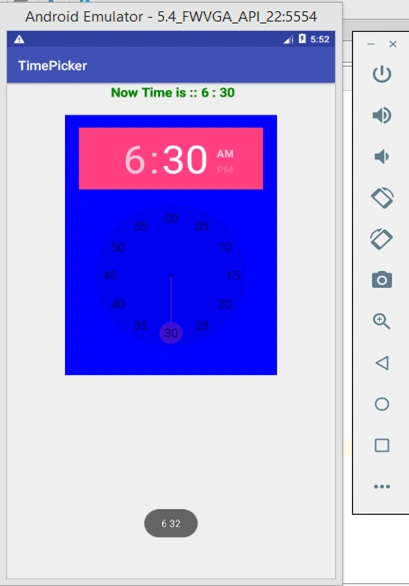
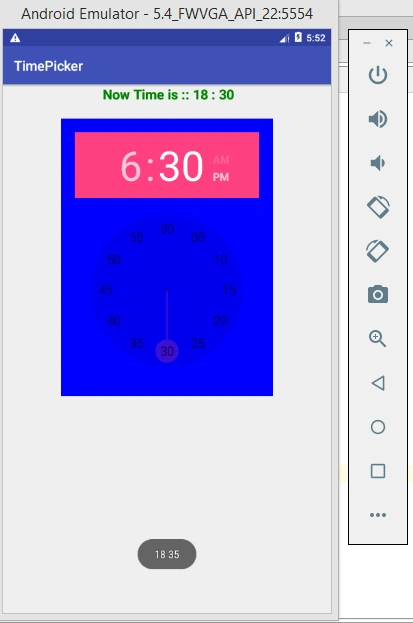
- time.setText(" Now Time is :: " + hourOfDay + " : " + minute);
- }
- });
- }
- }
Step 6
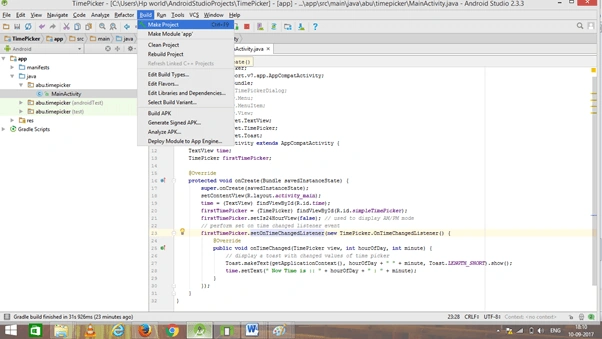
Now, go to the menu bar and click "Make a project" or press ctrl+f9 to debug the app from errors.
Step 7
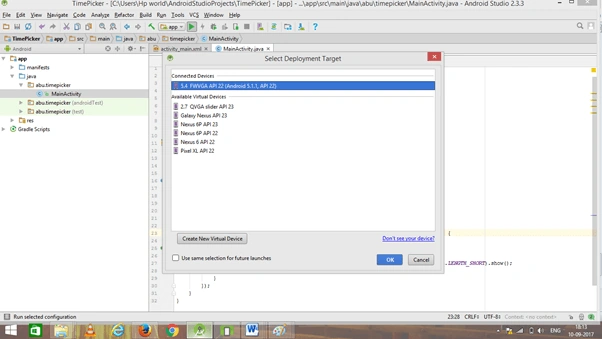
Then, click the "Run" button or press shift+f10 to run the project. Choose the "virtual machine" and click OK.
Conclusion
We have successfully created a TimePicker Android application using Android Studio.
Join the conversation! Your thoughts help the community grow.