

Introduction
In my previous article, we got an overview of CloudShell and how to use it for creating a web app in Azure. In this article, we will explore how to create an Azure Function using CloudShell (PowerShell).
Scenario
During deployment, we need to provide a more automated approach to create and manage Azure resources. In this article, we will see the step by step process of creating the Azure Function using PowerShell.
Prerequisites
- Azure cloud subscription
- Basic knowledge of PowerShell
CloudShell
- CloudShell is a feature in the Azure cloud which gives us the facility to write in commands with browser-based experience.
- CloudShell helps the Azure technical team to manage and control Azure Resources.
- We have the following choices – Bash, PowerShell.
- Secure access to authenticate account access for PowerShell and CLI.
- CloudShell is integrated to open source objects as well.
- CloudShell supports multiple languages – .NET Core, Go, Java, Nods.JS, PowerShell, and Python etc.
Now, we will focus on the actual steps using CloudShell to create an Azure Function.
Step 1
Log into Azure Portal.
Step 2
Click on the CloudShell icon. This icon is present on the top horizontal bar on Azure Portal site.

Step 3
Now, we will execute the below commands one by one.
To create a web app in Azure – first, we need to create a resource group and a service plan.
- Create variables and assign values.
- # RG and location
- $rg = "Name"
- $location = "Central US"
- #Storage Account
- $sa = "Name"
- $storageSku = 'Standard_LRS'
- # function names
- $fun1 = "functioname"
- Create Resource Group
- #create Resource Group
- New-AzureRMResourceGroup -Name $rg -Location $location
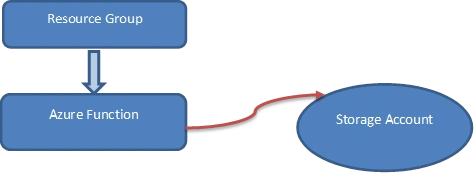
Why do we need a storage account? Because an Azure Function holds function files; hence we need to have file storage to hold these files.
Prepare the parameters like resource group, location etc. for storage account and create it by using the command
- # Set Parameters for Storage account
- $newStorageParams = @{
- ResourceGroupName = $rg
- AccountName = $sa
- Location = $location
- SkuName = $storageSku
- }
- # create storage account with above parameters
- $storageAccount = New-AzureRmStorageAccount @newStorageParams
- $storageAccount
- # Get storage account key and create connection string
- $accountKey = Get-AzureRmStorageAccountKey -ResourceGroupName $rg -AccountName $sa | Where-Object {$_.KeyName -eq 'Key1'} | Select-Object -ExpandProperty Value
- $storageConnectionString = "DefaultEndpointsProtocol=https;AccountName=$sa;AccountKey=$accountKey"
First, we will prepare the parameters of the Azure Function, like function name, resource group, data center location etc. and then, will create that.
- #create function app
- $newFunctionAppParams = @{
- ResourceType = 'Microsoft.Web/Sites'
- ResourceName = $fun1
- Kind = 'functionapp'
- Location = $location
- ResourceGroupName = $rg
- Properties = @{}
- Force = $true
- }
- #create function
- $functionApp = New-AzureRmResource @newFunctionAppParams
- $functionApp
- # Set Function app settings
- $functionAppSettings = @{
- AzureWebJobDashboard = $storageConnectionString
- AzureWebJobsStorage = $storageConnectionString
- FUNCTIONS_EXTENSION_VERSION = '~1'
- WEBSITE_CONTENTAZUREFILECONNECTIONSTRING = $storageConnectionString
- WEBSITE_CONTENTSHARE = $sa
- }
- $functionAppSettings
- $setWebAppParams = @{
- Name = $fun1
- ResourceGroupName = $rg
- AppSettings = $functionAppSettings
- }
- $webApp = Set-AzureRmWebApp @setWebAppParams
- $webApp
Prabu ElavarasanPosted Nov 17, 2018, 9:56 AM
Nice article..