

Introduction
Requirements
- Android Studio version 2.3.3
- A bit of XML and JAVA knowledge.
- Android Emulator (or) Android mobile
- Download link (Android Studio)
Steps to be followed
Follow these steps to create an SMS app using Android Studio. I have attached the source code too.
Step 1
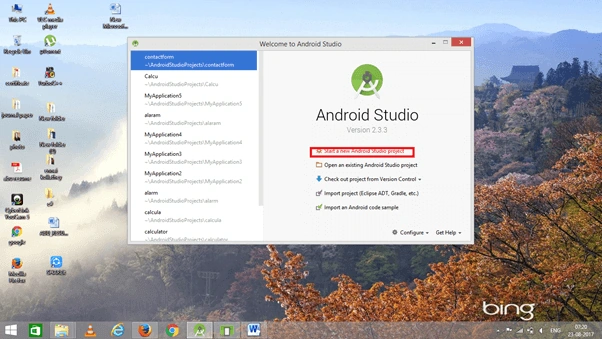
Open Android Studio and start a new Android Studio Project.
Step 2
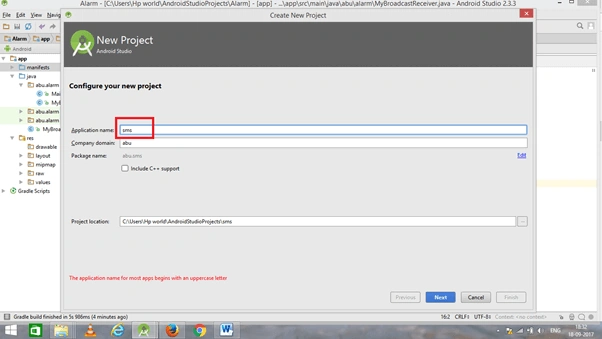
You can choose your application name and choose the location where your project is stored. If you wish to use C++ for coding the project, mark the "Include C++ support", and click the "Next" button.
Step 3
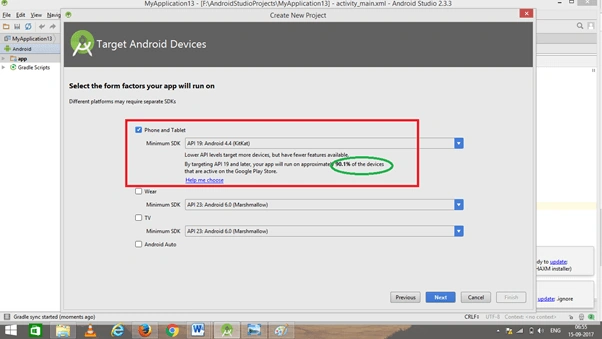
Now, select the version of Android and select the target Android devices. We need to choose the SDK level which plays an important role in running the application.
Step 4
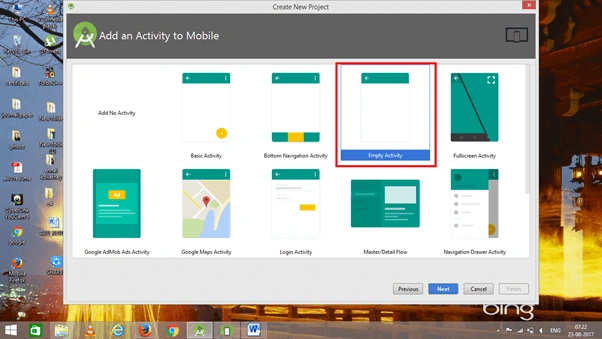
Now, add the activity and click the "Next" button.
Step 5
Add Activity name and click "Finish".
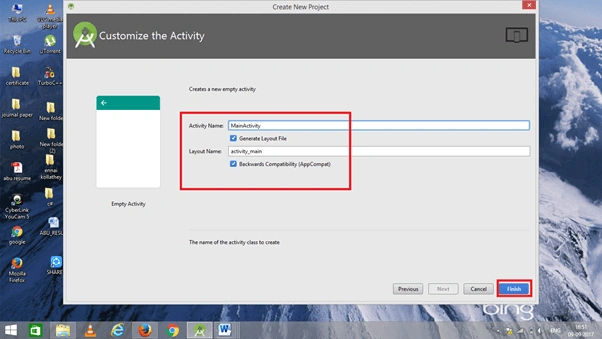
Step 6
Go to activity_main.xml. This XML file contains the designing code for your Android app.
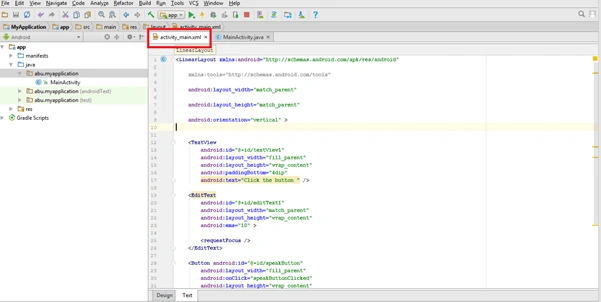 The XML code is given below.
<RelativeLayout xmlns:android="http://schemas.android.com/apk/res/android"
      android:layout_width="match_parent"
      android:layout_height="match_parent"
      android:background="@android:color/white"
      android:orientation="vertical" >
     <EditText
      android:id="@+id/editText1"
      android:layout_width="wrap_content"
      android:layout_height="wrap_content"
      android:layout_alignParentRight="true"
      android:layout_alignParentTop="true"
      android:layout_marginRight="20dp"
      android:ems="10" />
     <EditText
      android:id="@+id/editText2"
      android:layout_width="wrap_content"
      android:layout_height="wrap_content"
      android:layout_alignLeft="@+id/editText1"
      android:layout_below="@+id/editText1"
      android:layout_marginTop="26dp"
      android:ems="10"
      android:inputType="textMultiLine" />
     <TextView
      android:id="@+id/textView1"
      android:layout_width="wrap_content"
      android:layout_height="wrap_content"
      android:layout_alignBaseline="@+id/editText1"
      android:layout_alignBottom="@+id/editText1"
      android:layout_toLeftOf="@+id/editText1"
      android:text="Mobile No:" />
     <TextView
      android:id="@+id/textView2"
      android:layout_width="wrap_content"
      android:layout_height="wrap_content"
      android:layout_alignBaseline="@+id/editText2"
      android:layout_alignBottom="@+id/editText2"
      android:layout_alignLeft="@+id/textView1"
      android:text="Message:" />
     <Button
      android:id="@+id/button1"
      android:layout_width="wrap_content"
      android:layout_height="wrap_content"
      android:layout_alignLeft="@+id/editText2"
      android:layout_below="@+id/editText2"
      android:layout_marginLeft="34dp"
      android:layout_marginTop="48dp"
      android:text="Send SMS" />
     </RelativeLayout>
Step 7
Go to Main Activity.java. This Java program is the backend language for Android.
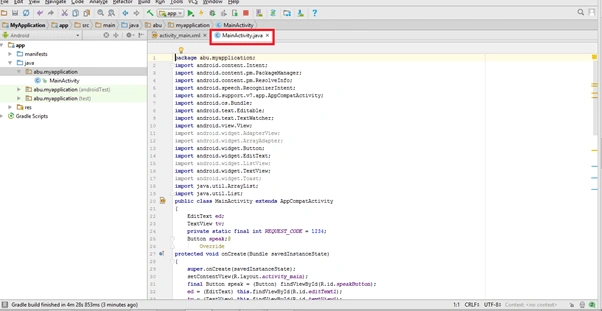 The java code is given below.
- package abu.sms;
- import android.os.Bundle;
- import android.app.Activity;
- import android.app.PendingIntent;
- import android.content.Intent;
- import android.telephony.SmsManager;
- import android.view.Menu;
- import android.view.View;
- import android.view.View.OnClickListener;
- import android.widget.Button;
- import android.widget.EditText;
- import android.widget.Toast;
- public class MainActivity extends Activity {
- EditText mobileno,message;
- Button sendsms;
- @Override
- protected void onCreate(Bundle savedInstanceState) {
- super.onCreate(savedInstanceState);
- setContentView(R.layout.activity_main);
- mobileno=(EditText)findViewById(R.id.editText1);
- message=(EditText)findViewById(R.id.editText2);
- sendsms=(Button)findViewById(R.id.button1);
- sendsms.setOnClickListener(new OnClickListener() {
- @Override
- public void onClick(View arg0) {
- String no=mobileno.getText().toString();
- String msg=message.getText().toString();
- Intent intent=new Intent(getApplicationContext(),MainActivity.class);
- PendingIntent pi=PendingIntent.getActivity(getApplicationContext(), 0, intent,0);
- SmsManager sms=SmsManager.getDefault();
- sms.sendTextMessage(no, null, msg, pi,null);
- Toast.makeText(getApplicationContext(), "Message Sent successfully!",
- Toast.LENGTH_LONG).show();
- }
- });
- }
- @Override
- public boolean onCreateOptionsMenu(Menu menu)
- getMenuInflater().inflate(R.menu.activity_main, menu);
- return true;
- }
- }
Step 8
We need to make Sender and Receiver requests. So, add Bluetooth permissions in an AndroidManifest.xml.
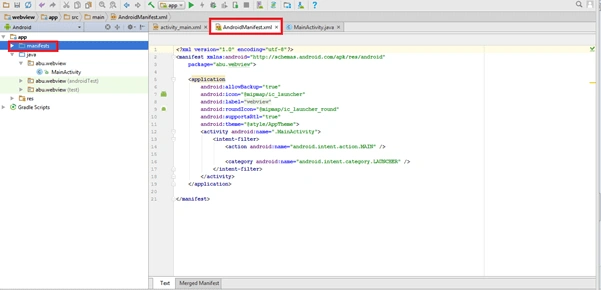 The AndroidManifest.xml code is given below.
- <?xml version="1.0" encoding="utf-8"?>
- <manifest xmlns:android="http://schemas.android.com/apk/res/android"
- package="abu.sms">
- <uses-permission android:name="android.permission.SEND_SMS"/>
- <uses-permission android:name="android.permission.RECEIVE_SMS"/>
- <application
- android:allowBackup="true"
- android:icon="@mipmap/ic_launcher"
- android:label="@string/app_name"
- android:roundIcon="@mipmap/ic_launcher_round"
- android:supportsRtl="true"
- android:theme="@style/AppTheme">
- <activity android:name=".MainActivity">
- <intent-filter>
- <action android:name="android.intent.action.MAIN" />
- <category android:name="android.intent.category.LAUNCHER" />
- </intent-filter>
- </activity>
- </application>
- </manifest>
Step 9
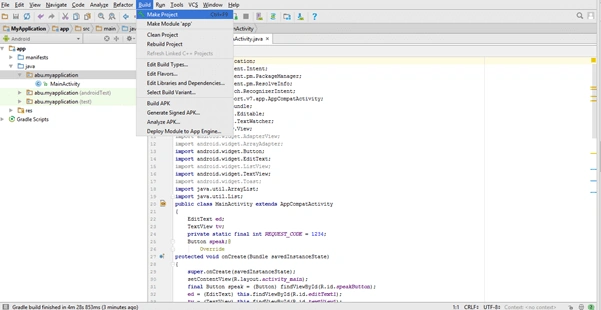
Now, go to the menu bar and click the "Make Project" option or press ctrl+f9 to debug the error.
Step 10
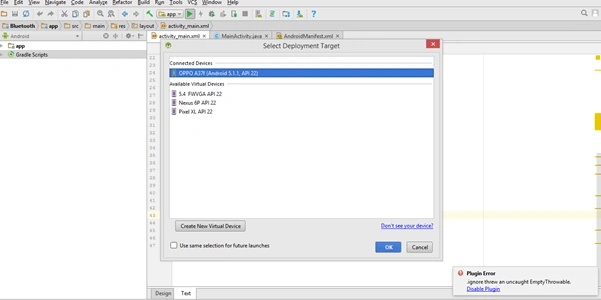
Then, click the "Run" button or press shift+f10 to run the project. And, choose the "virtual machine" option and click OK.
Conclusion
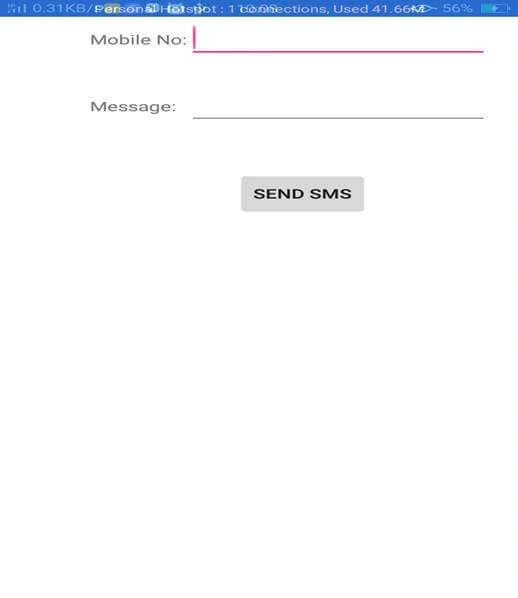
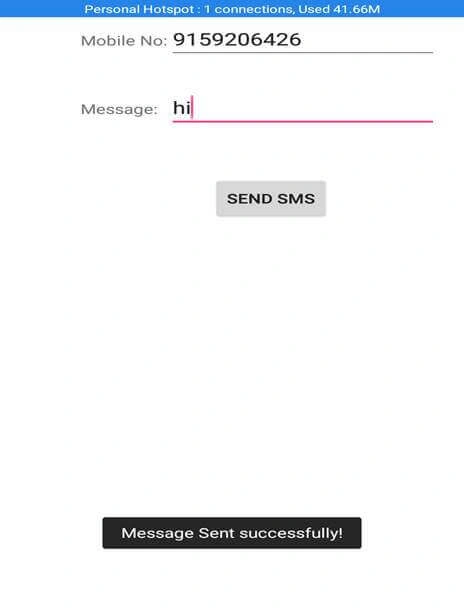
We have successfully created an SMS Android application using the Android Studio. Here is the output.
shahid pervaizPosted Nov 28, 2020, 7:40 AM
I can use this app for bulk sms.
Νίκος ΣώκοςPosted Mar 24, 2020, 9:13 AM
You just miss a { after public boolean onCreateOptionsMenu(Menu menu)
Anupam SinghPosted Jun 25, 2018, 4:42 AM
There is error in getMenuInflater().inflate(R.menu.activity_main, menu);
zaher thaifaniPosted Jun 13, 2018, 4:02 PM
Not run where the menu " getMenuInflater().inflate(R.menu.activity_main, menu); "
Kalhaar SavajPosted May 29, 2018, 3:02 PM
R.menu is making an error " error is cannot resolve symbol 'menu'"
tema solutionsPosted Jan 23, 2018, 6:35 AM
It's not running bro... i had some error
Abubackkar ShithikPosted Sep 24, 2017, 6:03 PM
Thank you follow me.. In c# corner
Humayun Kabir MamunPosted Sep 24, 2017, 3:40 PM
Thanks for this nice article...