

This article describes how to create SQL Reporting Services in Business Intelligence Development Studio. We create the same reporting services in Excel and QlikView also but cannot deploy these reporting services.
In Business Intelligence Development Studio, there are so many reporting services connection wizard. SQL Server Reporting Services is very useful. After creating the report we can import this report to any file, like Excel, PDF, Word and so on.
So to overcome this problem, we create the same reporting services in Business Intelligence Development Studio.
What is Business Intelligence Development Studio?
In my previous article I provided an Introduction of Business Intelligence Development Studio and how to install
Creation of SQL report service in Business Intelligence Development Studio
So let's start with the procedure.
Step 1: Create Project
Open Visual Studio and select "File" -> "New" -> "Project...".
The first and major step is to open Visual Studio and select a new project.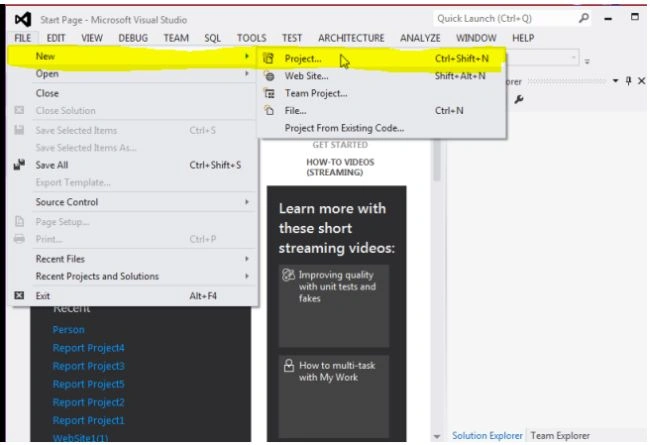
Step 2: Select report service type
The next step is to select the report service type in the business intelligence project templates then click on the OK button.
Now you will see this window and click on the Next button.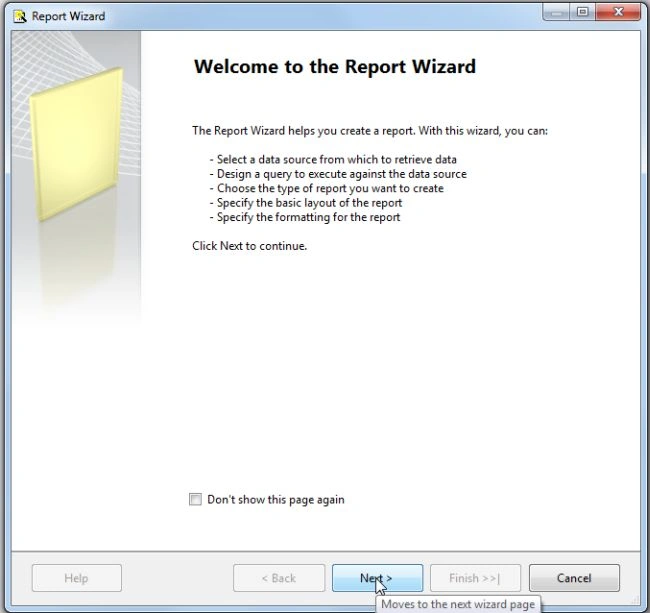
Step 3: Select data source
Now the next step is to select a data source from which to obtain data for this report and also select data source type.
Step 4: Select edit button
The next step is to select the edit button for setting the connection properties.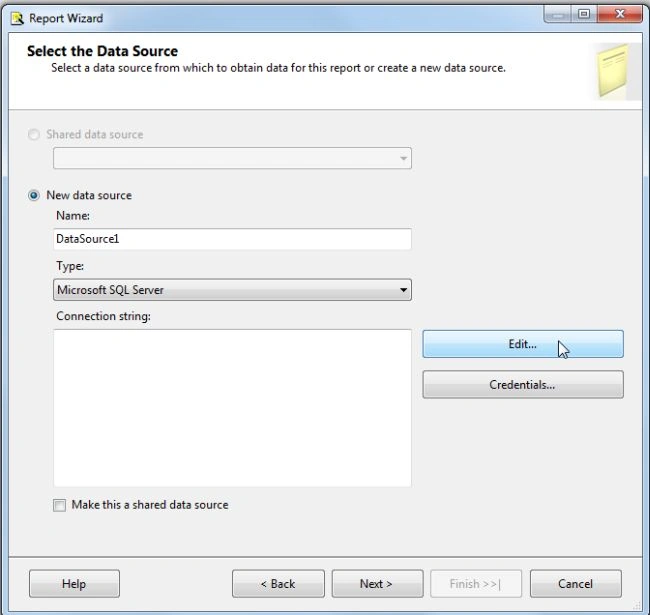
Step 5: Set connection properties
The next step is to set the connection property and click on the OK button.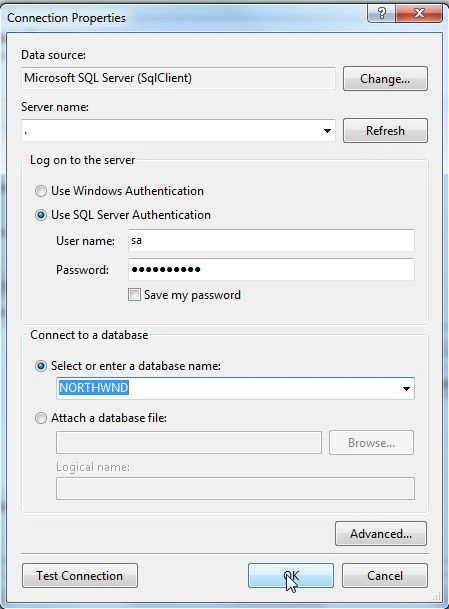
Step 6: Proceed
Then click on the "Next" button.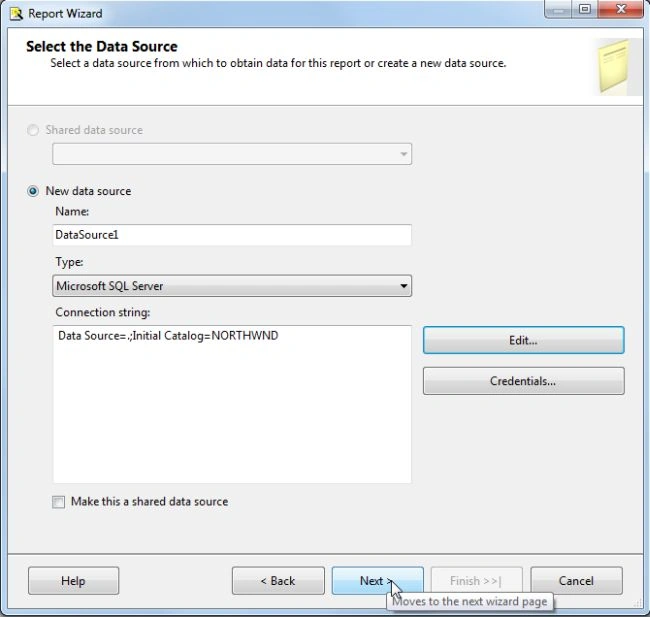
Step 7: Design the query
The next step is to specify a query to execute to get the data for the report. In this window either you define a query directly or specify a query string.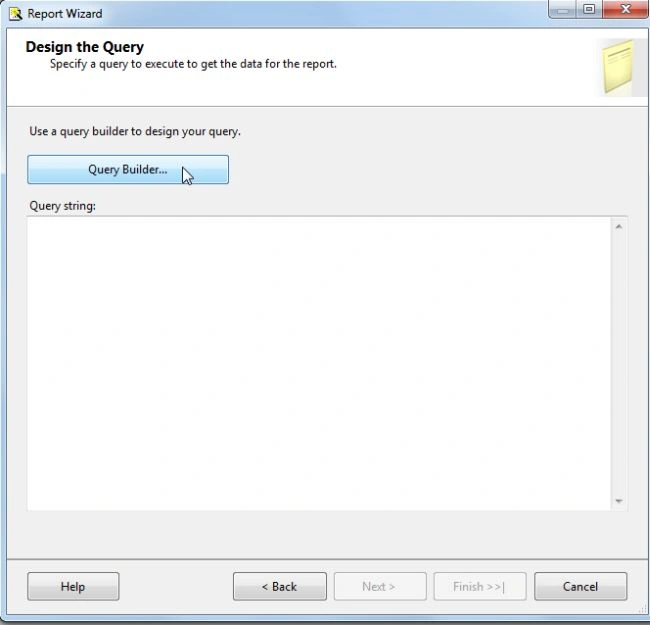
Step 8: Query design window
Now in this window, add a table.
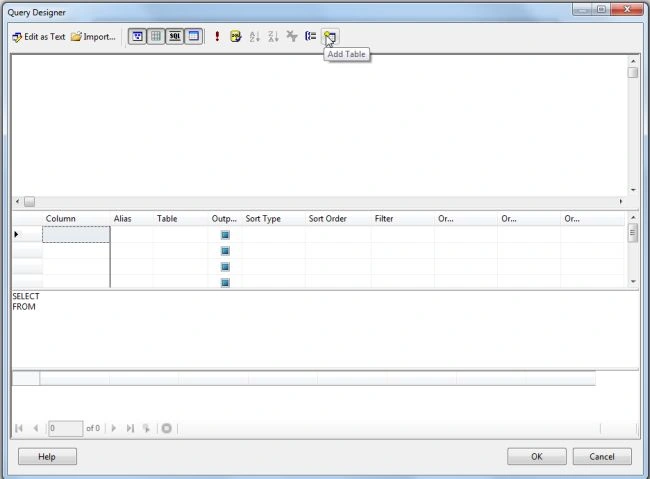
Step 9: Select the table
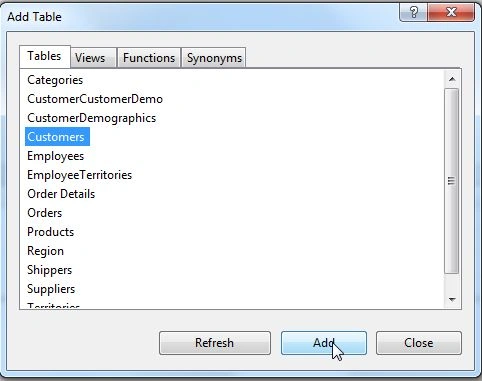
Step 10: Select columns
The next step is to select the column from the table that we want to show as a table in the report and click on the "OK" button.
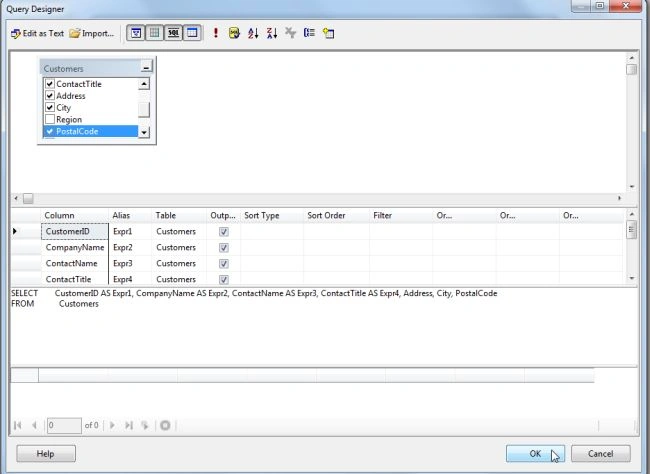
Now you can see the query string.
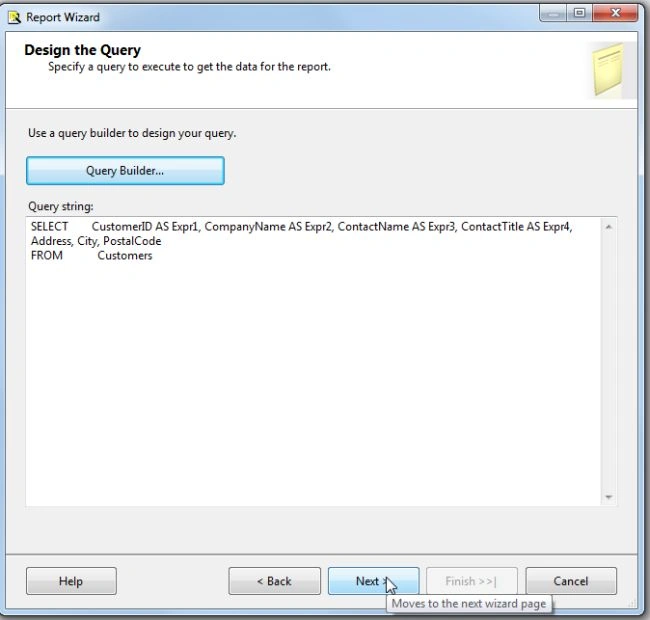
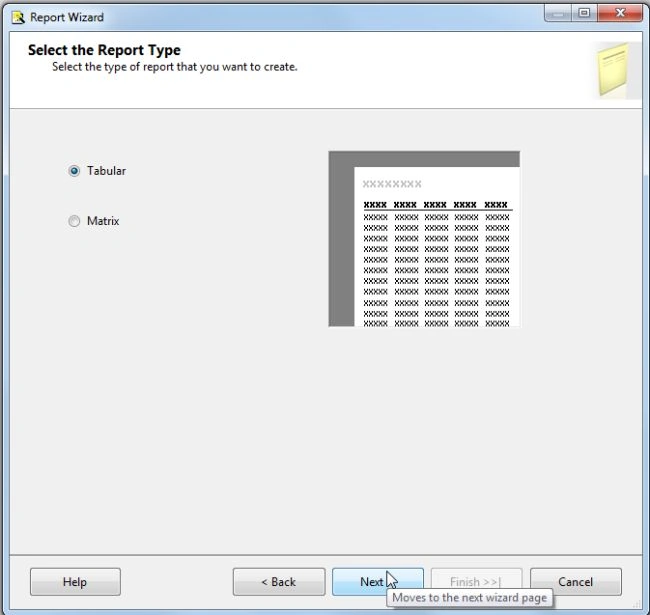
Step 11: Select report type
The next step is to select the report type for displaying the report as a table and matrix.
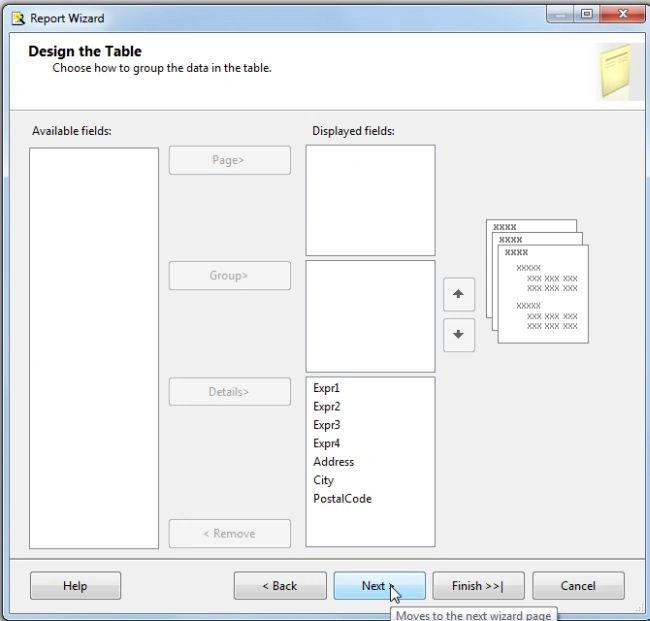
Step 12: Design the table
The next step is to design the table, in other words how to display the data in the table.
Step 13: Select table style
The next step is to select the table style for the table.
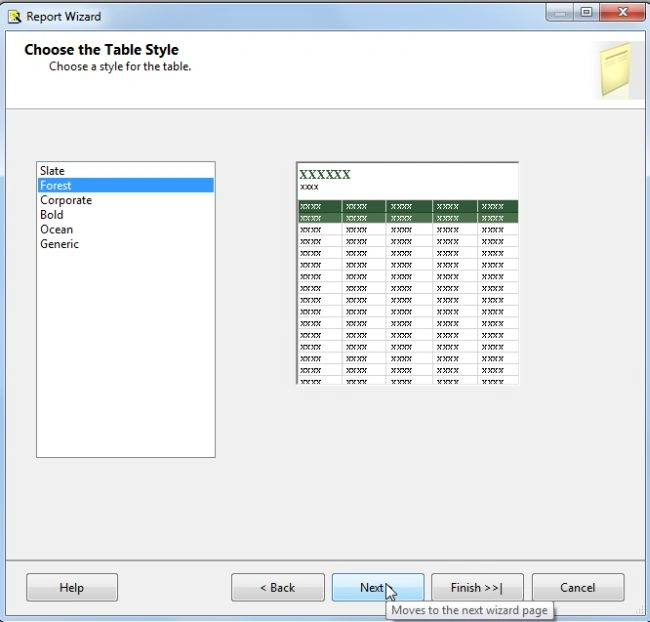
Step 14: Select deployment location
The next step is to select the deployment location to deploy the report to.
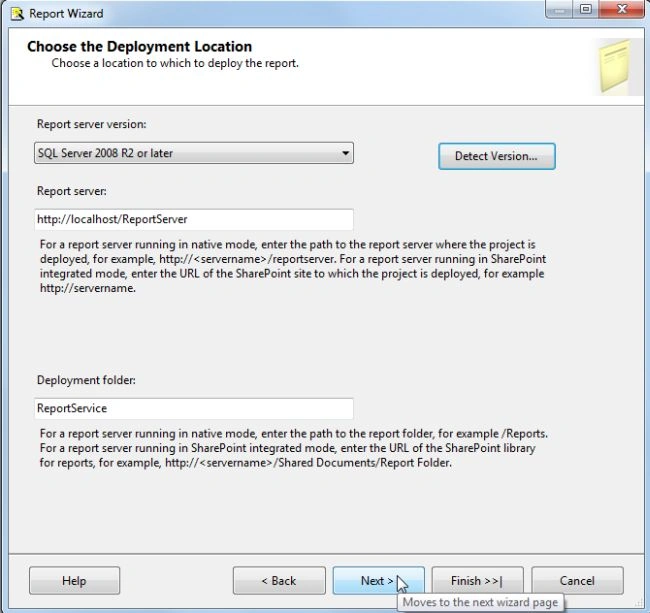
Step 15: Completing report wizard
The next step is to provide a name to the service and click Finish to create the new report.

Step 16

Step 17: Preview of report
Now you can see a preview of the report.
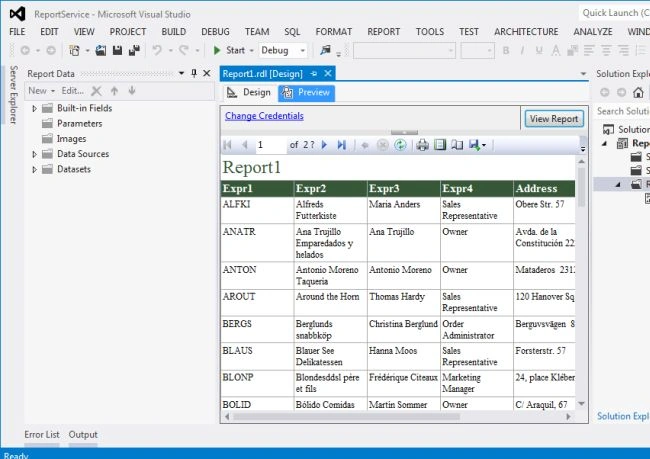
Step 18
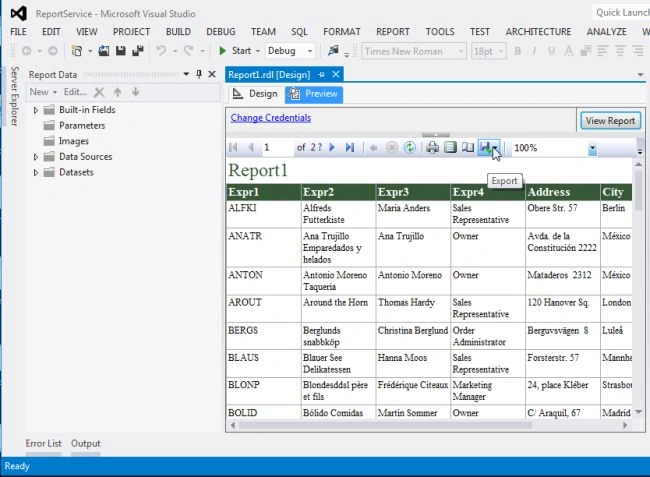
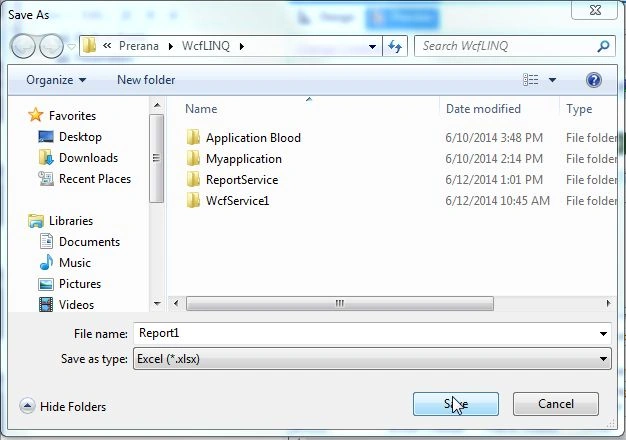
Then this window will be opened and save the report.
Summary
This article described how to create SQL Server Reporting Services using the Business Intelligence Development Studio. This article defines a very simple way to create a report. I hope this is useful for you.
Shamim UddinPosted Sep 7, 2016, 10:04 PM
Nice
Pradeep SahooPosted May 16, 2016, 11:32 PM
Good share ...
Rajeev KumarPosted Jul 22, 2014, 2:51 PM
tnx
Sourabh SomaniPosted Jun 15, 2014, 12:21 PM
Nice Article