

Introduction
In this article, I will create a Read/Write API and consume it by a HTML client. In the previous article we created a Read Only API "Create Read Only Web API". Now we will perform some changes in the previous article for creating the Read/Write.
Open the "ReadOnly" Web API application.
Step 1
In the "SimpleRepository.cs" file we add the data persistence features that allows the application for accepting the user input and a new instance.
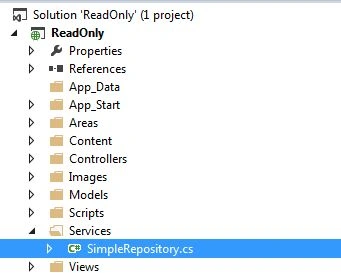
- Open the "SimpleRepository.cs" file from the "Services" folder and add the key name of cache item to this file.
- private const string CacheKey = "SimpleStore";
- Now we add the Constructor in this repository class:
- public SimpleRepository()
- {
- var smp = HttpContext.Current;
- if (smp != null)
- {
- if (smp.Cache[CacheKey] == null)
- {
- var simples = new Simple[]
- {
- new Simple
- {
- ID=1,
- Name="Smith Patel"
- },
- new Simple
- {
- ID=2,
- Name="Virat Kohli"
- },
- new Simple
- {
- ID=3,
- Name="Rohit Shrma"
- }
- };
- smp.Cache[CacheKey] = simples;
- }
- }
- }
- Now we must modife the "GetAllSimples()" method in the Repository class. The modified code is that:
The main purpose of this example is to use the web server as the storage medium. This provides the values for the multiple clients simultaneously. And we can use it as a storage medium or Request a storage medium.- public Simple[] GetAllSimples()
- {
- var smp = HttpContext.Current;
- if (smp != null)
- {
- return (Simple[])smp.Cache[CacheKey];
- }
- return new Simple[]
- {
- new Simple
- {
- ID = 0,
- Name = "Placeholder"
- }
- };
- }
- Now we will add the new method "SaveSimple" for saving the new record. It will take a single parameter at a time and return a Boolean value, it is saved or not.
- public bool SaveSimple(Simple contact)
- {
- var smp = HttpContext.Current;
- if (smp != null)
- {
- try
- {
- var currentData = ((Simple[])smp.Cache[CacheKey]).ToList();
- currentData.Add(contact);
- smp.Cache[CacheKey] = currentData.ToArray();
- return true;
- }
- catch (Exception ex)
- {
- Console.WriteLine(ex.ToString());
- return false;
- }
- }
- return false;
Step 2
Now we consume the Web API by the HTML client. So we need to make some change in the "index.cshtml" file. Open the "index.cshtml" file and add the new code to the file.
- In the Solution Explorer.
- Select the Views/Home and open the "index.cshtml" file.
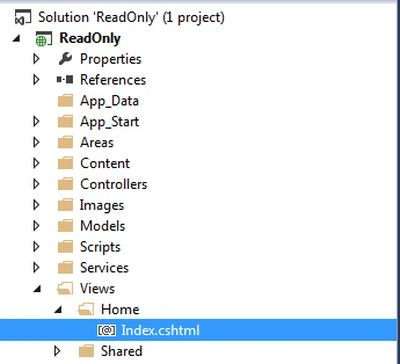
Replace this HTML code in the body tag:
- <div id="body">
- <ul id="simples"></ul>
- </div>
Now add this JavaScript code at the end of the <div> closing tag:
- @section scripts{
- <script type="text/javascript">
- $(function () {
- $.getJSON('/api/simple', function (contactsJsonPayload) {
- $(contactsJsonPayload).each(function (i, item) {
- $('#simples').append('<li>' + item.Name + '</li>');
- });
- });
- });
- </script>
- }
Step 3
Now execute the application, we can see that all the records are called by the Web API and displayed on the browser:

Step 4
Now we need to change the View of the "index.cshtml" file for creating the new records. We modify the index view, add the HTML page for catching the input of the user and send it to the Web API for adding the new record. And in the "SimpleController.cs" class add a new Method POST for adding a new record.
First open the SimpleController class and add the POST method:
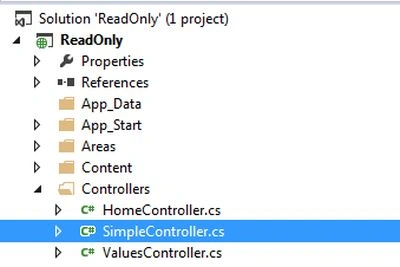
- In the Solution Explorer.
- Select the Controller folder and open the SimpleController.cs.
- Add the following code:
- public HttpResponseMessage Post(Simple simple)
- {
- this.simplerepository.SaveSimple(simple);
- var response = Request.CreateResponse<Simple>(System.Net.HttpStatusCode.Created, simple);
- return response;
- }
Step 5
Now again modify the index.cshtml file.
We will add the following HTML code at the bottom of the creating the unordered list.
- <form id="saveSimpleForm" method="post">
- <h3>Create a new Simple</h3>
- <p>
- <label for="simpleId">Simple Id:</label>
- <input type="text" name="ID" />
- </p>
- <p>
- <label for="simpleName">Simple Name:</label>
- <input type="text" name="Name" />
- </p>
- <input type="button" id="saveSimple" value="Save" />
- </form>
Now we will add the following scripting code within the Script tag.
- $('#saveSimple').click(function()
- {
- $.post("api/simple",
- $("#saveSimpleForm").serialize(),
- function(value)
- {
- $('#simples').append('<li>' + value.Name + '</li>');
- },
- "json"
- );
- });
Step 6
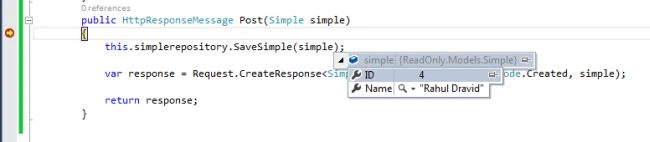
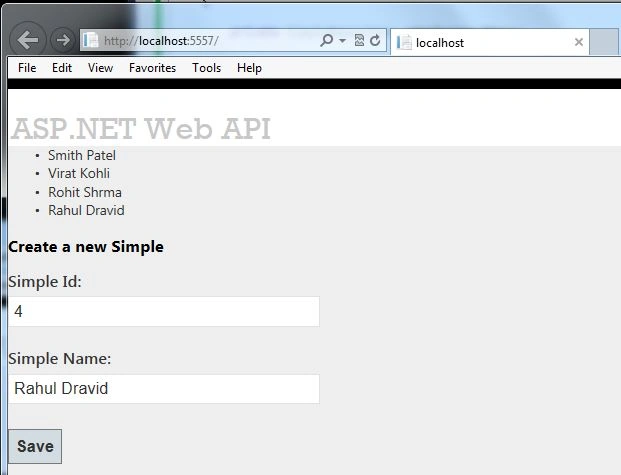
Insert the breakpoint on the POST method in the SimpleController class. Then execute the application, insert the id and name and click on the "Save" button then we can see that it breaks the POST method and see the property of the simple parameter, we can see the value passed in these parameters.
Step 7
Now remove the breakpoint and execute the application again. When we insert the new record and click on the "Save" button, it is stored by the SimpleRepository class.
Join the conversation! Your thoughts help the community grow.