

Introduction
This is the simple
application for beginners that help how to create the partial view in ASP.NET
MVC 3 application. This article also help how to display the person details used
MVC 3 tools. We have know that the MVC is the integrated modules that is
models,views,controllers. Model is provide the business logic, View is provide
the presentation and Controllers is handle the all request provided by models
and views. In this application we have create the two partial view that name is
"person" and "address" and show the records. The Model-View-Controller (MVC)
pattern is an architectural design principle that separates the components of a
Web application. This separation gives you more control over the individual
parts of the application which lets you more easily develop, modify, and test
them.
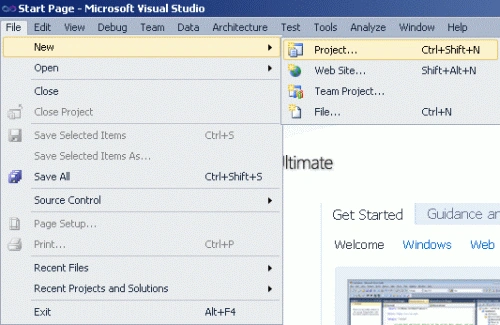
Step1: Open Visual Studio 2010.
- Go to file -> New->Projects.
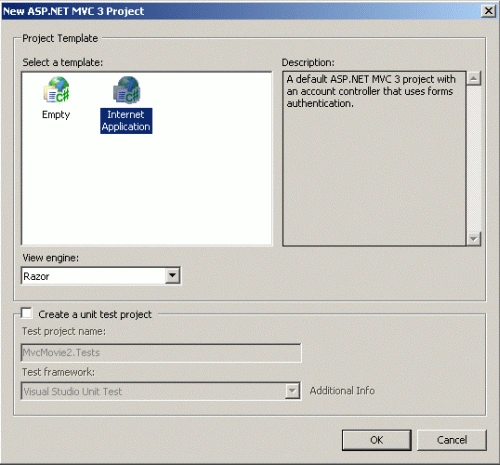
- Create an ASP.NET MVC 3 Web Application.
- Name of "MvcMovie".

Step2: Add a class in the model folder.
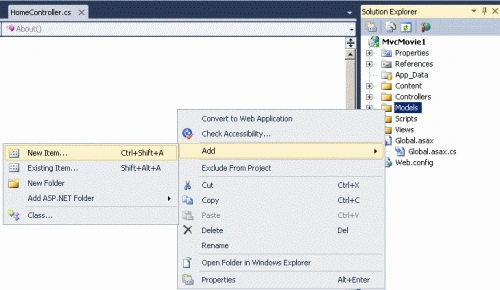
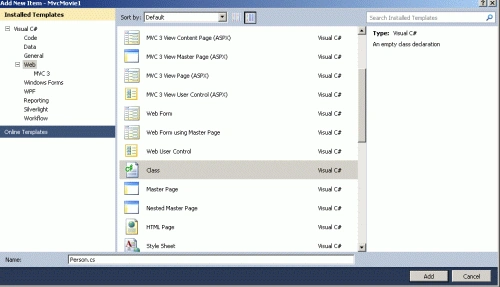
- Right click on the Models folder ->add new items->add class.
- Name of Class is "Person".
- In a class define the properties.
Code:
using
System;
using
System.Collections.Generic;
using
System.Linq;
using
System.Web;
namespace
MvcMovie1.Models
{
public class
Address
{
public string
StreetAddress { get;
set; }
public string
City { get; set;
}
public string
PostalCode { get; set;
}
}
Step3: Add a class in the model folder.
- Right click on the Models folder ->add new items->add class.
- Name of Class is "Address".
- In a class define the properties.

Code:
public
class Person
{
public int
ID { get; set; }
public string
FirstName { get; set;
}
public string
LastName { get; set;
}
public string
Phone { get; set;
}
public
Address HomeAddress;
}
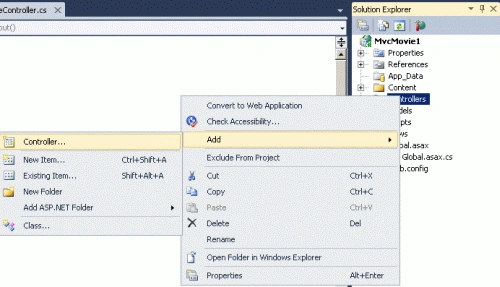
Step4: Add a controller.
- Right click on the Controllers folder ->add->Controllers.
- Name of Controllers is "MovieController".
- In a controller, define the request.

Code:
using
System;
using
System.Collections.Generic;
using
System.Linq;
using
System.Web;
using
System.Web.Mvc;
using
MvcMovie1.Models;
namespace
MvcMovie1.Controllers
{
public class
MovieController :
Controller
{
//
// GET: /Movie/
public
ActionResult Index()
{
return View();
}
Person
GetPerson(int id)
{
var p = new
Person
{
ID = 1,
FirstName = "Joe",
LastName = "Smith",
Phone = "123-456",
HomeAddress = new
Address
{
City = "Great Falls",
StreetAddress = "1234 N 57th St",
PostalCode = "95045"
}
};
return p;
}
public
ActionResult PersonDetail(int id = 0)
{
return View(GetPerson(id));
}
}
}
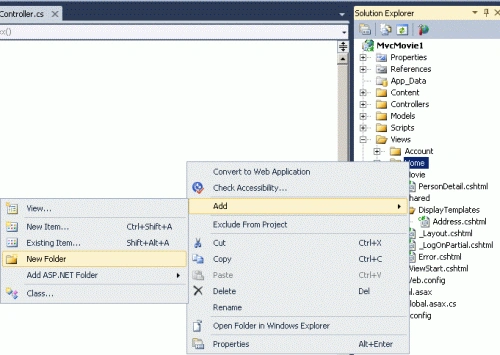
Step5: Add a Folder in view
- Right click of Home folder->add->add folder.
- The name of folder is "Movie".
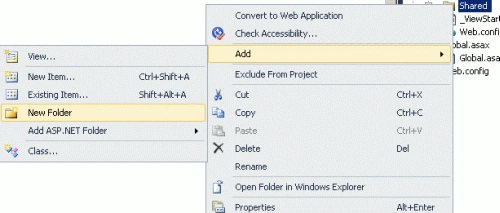
Step6: Add a another Folder in view
- Right click of Shared Folder->Add->Add Folder.
- The name of Folder is "DisplayTemplates".
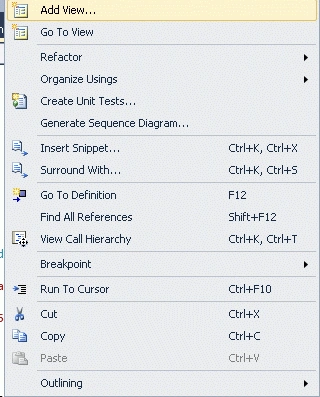
Step7: Add the view in Movie Folder.
- Right click of Movie Folder->Add->view.
- Name of view is "PersonDetails".
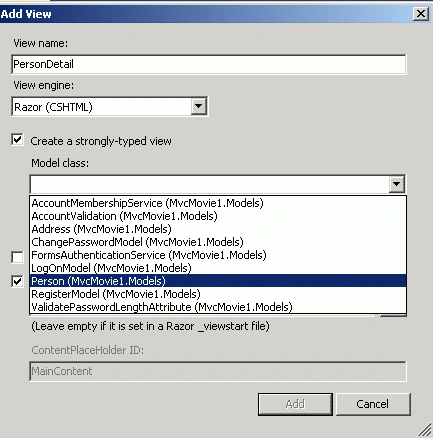
Code:
@model
MvcMovie1.Models.Person
@{
ViewBag.Title =
"PersonDetail";
}
<h2>Person
Detail</h2>
@Html.DisplayForModel()
@Html.DisplayFor(
x => x.HomeAddress )
<fieldset>
<legend>Person</legend>
<div
class="display-label">FirstName</div>
<div
class="display-field">@Model.FirstName</div>
<div
class="display-label">LastName</div>
<div
class="display-field">@Model.LastName</div>
<div
class="display-label">Phone</div>
<div
class="display-field">@Model.Phone</div>
</fieldset>
<p>
@Html.ActionLink("Edit",
"Edit", new {
id=Model.ID }) |
@Html.ActionLink("Back
to List", "Index")
</p>
Step8: Add the view in DisplayTemplates
folder.
- Right click of DisplayTemplates Folder->Add->view.
- Name of view is "Address.cshtml".

Code:
@model
MvcMovie1.Models.Address
<fieldset>
<legend>Address</legend>
<div
class="display-label">StreetAddress</div>
<div
class="display-field">@Model.StreetAddress</div>
<div
class="display-label">City</div>
<div
class="display-field">@Model.City</div>
<div
class="display-label">PostalCode</div>
<div
class="display-field">@Model.PostalCode</div>
</fieldset>
<p>
@Html.ActionLink("Edit",
"Edit", new {
/* id=Model.PrimaryKey */ }) |
@Html.ActionLink("Back
to List", "Index")
</p>
Step9: Set the root of your application.
- Open Global.aspx file.
Code:
public
static void
RegisterRoutes(RouteCollection routes)
{
routes.IgnoreRoute("{resource}.axd/{*pathInfo}");
routes.MapRoute(
"Default",
// Route name
"{controller}/{action}/{id}",
// URL with parameters
new { controller =
"Movie", action =
"PersonDetail", id = UrlParameter.Optional
} // Parameter defaults
);
}
Step10: Press crtl+f5 run the program.
Output:

Join the conversation! Your thoughts help the community grow.