

Now, you must be wondering what Drag and Drop Lists are, right? Well, that’s natural!
In simple words, Drag n Drop lists give you the facility to move your items from one list to another as well as rearrange items of the same list. Well, before starting the actual implementation of it, I would like to show you one demo of what we will be implementing at the end of this article.
So, let’s now start implementation. The first step is to create a new app, install Angular Material into your app, and then run it.
- Ng new angular-dragdroplist -app
- Cd angular- dragdroplist -app
- ng add @angular/material
- ng serve
Here, I am adding the screenshot of the process that the above-mentioned Material command will start.
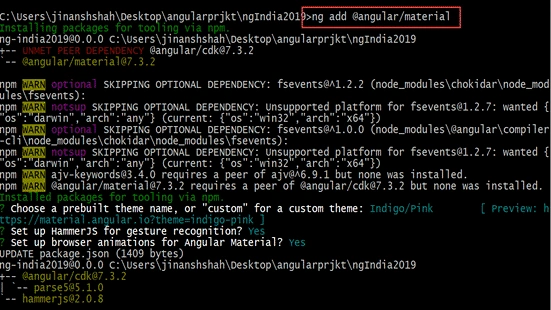
Angular Material will add the BrowserAnimationsModule to your app.module.ts. Angular Material is a library developed by the Angular Team for building high-quality UI Components in Angular that are based on Google’s Material.
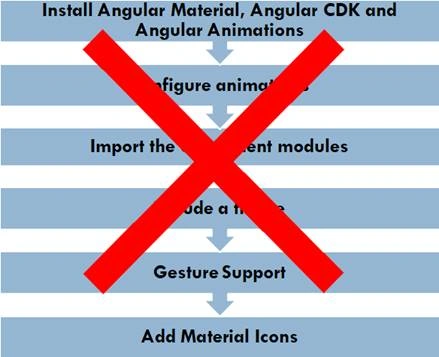
Earlier, to install Angular Material on your computer, you had to go through a tedious long process. Now, it is replaced by one single command.
So, let’s move to the next part. Open your newly created Angular application. Add this code into your app.module.ts file.
- import { BrowserModule } from '@angular/platform-browser';
- import { NgModule } from '@angular/core';
- import { AppComponent } from './app.component';
- import { BrowserAnimationsModule } from '@angular/platform-browser/animations';
- import { DragDropModule } from '@angular/cdk/drag-drop';
- @NgModule({
- declarations: [
- AppComponent
- ],
- imports: [
- BrowserModule,
- BrowserAnimationsModule,
- DragDropModule
- ],
- providers: [],
- bootstrap: [AppComponent]
- })
- export class AppModule { }
Now, let's learn a little about CDK. CDK gives the developers more tools to build awesome components for the web. Also, it allows us to use features of Angular Material without adopting the Material Design Visual Language.
The next step is to add the following code to your app.component.html.
- <div class="container">
- <h2>To do</h2>
- <div cdkDropList #todoList="cdkDropList" [cdkDropListData]="todo"
- [cdkDropListConnectedTo]="doneList" class="list" (cdkDropListDropped)="drop($event)">
- <div class="list-item" *ngFor="let item of todo" cdkDrag>{{item}}</div>
- </div>
- </div>
- <div class="container">
- <h2>Done</h2>
- <div cdkDropList #doneList="cdkDropList" [cdkDropListData]="done"
- [cdkDropListConnectedTo]="todoList" class="list" (cdkDropListDropped)="drop($event)">
- <div class="list-item" *ngFor="let item of done" cdkDrag>{{item}}</div>
- </div>
- </div>
- Here, I am binding two lists to my HTML - one is a todo list and the other one is a done list. They both are of type cdkDropList.
- I have assigned the names to both the forms using template reference; in my case #todoList and #doneList respectively.
- Next, I am assigning data to both the lists using property cdkDropListData and as a value, I have assigned the names of the array which I want to give it as data.
- Next, I am establishing the connection between my two lists using the property cdkDropListConnectedTo.
- cdkDropListDropped is the event I am binding with my two lists. It will be fired when any of the items is dropped from the list.
- At last, I am looping through my array and have assigned items to the lists.
Next, add the following code to your app.component.ts.
- import { Component } from '@angular/core';
- import { CdkDragDrop, moveItemInArray, transferArrayItem } from '@angular/cdk/drag-drop';
- @Component({
- selector: 'app-root',
- templateUrl: './app.component.html',
- styleUrls: ['./app.component.css']
- })
- export class AppComponent
- {
- todo = [
- 'Get to work',
- 'Pick up groceries',
- 'Go home',
- 'Fall asleep'
- ];
- done = [
- 'Get up',
- 'Brush teeth',
- 'Take a shower',
- 'Check e-mail',
- 'Walk dog'
- ];
- drop(event: CdkDragDrop<string[]>) {
- if (event.previousContainer === event.container) {
- moveItemInArray(event.container.data, event.previousIndex, event.currentIndex);
- } else {
- transferArrayItem(event.previousContainer.data,
- event.container.data,
- event.previousIndex,
- event.currentIndex);
- }
- }
- }
- First, import three items cdkdragDrop, moveItemInArray, transferArrayItem from @angular/cdk/drag-drop.
- Next, create two arrays - one for todo and another one for done respectively.
- And lastly, create the function named drop which will be fired whenever one of the items will be moved (as I have explained before).
- Now, as we know, drop function will be called in two cases -
- When we want to rearrange the items within one list only
- When we want to move the item from one list to other.
So, that’s the only condition I am checking inside my function.
If the previous container of the item is the same as the current one, then we want to moveItemInArray of one list and if it is not the case, then we want to transferItem from one list to the other one.
So, now it should work as per the demo I have shown you earlier.
Thank you!
Join the conversation! Your thoughts help the community grow.