

Introduction
Android is one of the most popular operating systems for mobiles. In this article, I will show you how to create a Calendar Android application. The calendar is an important thing to handle events and commitments. So, I will show you how to create a calendar in Android applications using Android Studio.
Requirements
- Android Studio version 2.3.3
- Little bit XML and JAVA knowledge.
- Android Emulator (or) Android mobile
- Download link (Android Studio)
Steps should be followed
Follow these steps to create a Native Calendar Android application using Android Studio. I have attached the source code too.
Step 1
Open Android Studio and start a New Android Studio Project.
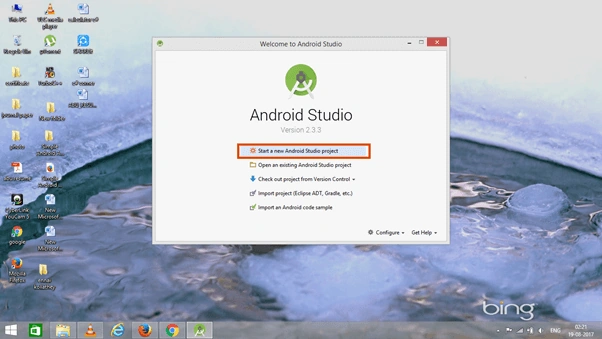
Step 2
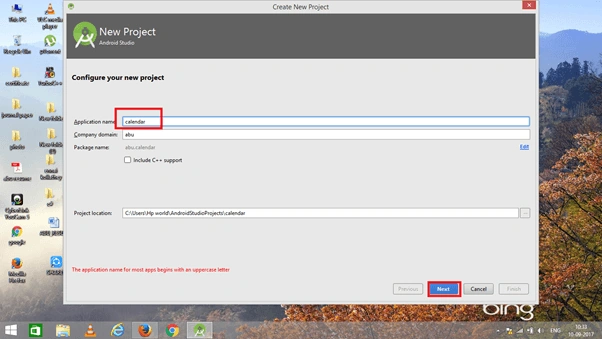
You can choose your application name and choose where your project is stored. If you wish to use C++ for coding the project, mark the "Include C++ support", and click the "Next" button.
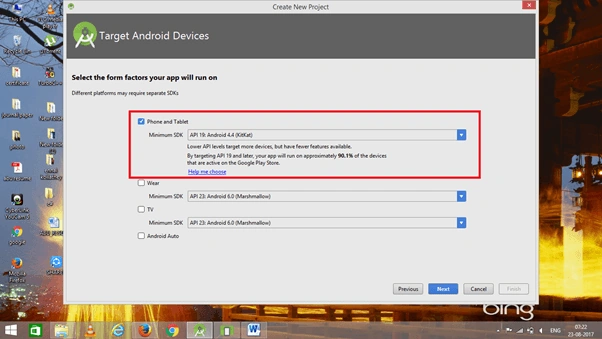
 Now, select the version of Android and select the target Android devices.
Step 3
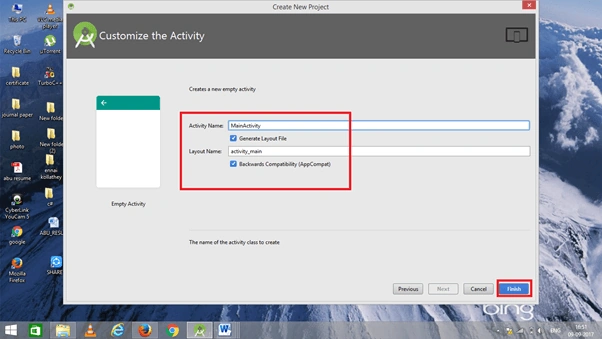
Now, add the activity and click the "Next" button.
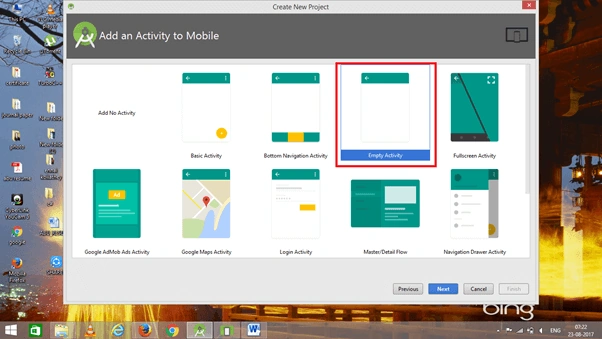 Add activity name and click "Finish".
Step 4
Go to activity_main.xml, This XML file contains the designing code for an Android app.
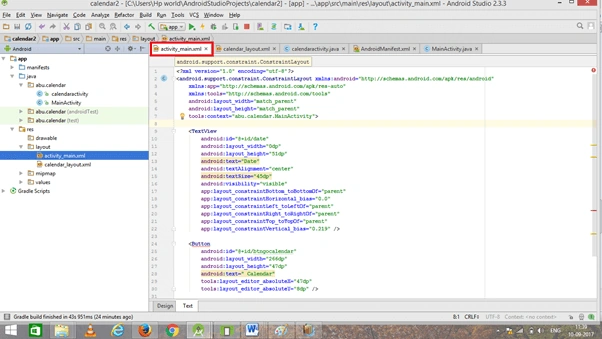 The XML code is given below.
- <?xml version="1.0" encoding="utf-8"?>
- <android.support.constraint.ConstraintLayout xmlns:android="http://schemas.android.com/apk/res/android"
- xmlns:app="http://schemas.android.com/apk/res-auto"
- xmlns:tools="http://schemas.android.com/tools"
- android:layout_width="match_parent"
- android:layout_height="match_parent"
- tools:context="abu.calendar.MainActivity">
- <TextView
- android:id="@+id/date"
- android:layout_width="0dp"
- android:layout_height="51dp"
- android:text="Date"
- android:textAlignment="center"
- android:textSize="45dp"
- android:visibility="visible"
- app:layout_constraintBottom_toBottomOf="parent"
- app:layout_constraintHorizontal_bias="0.0"
- app:layout_constraintLeft_toLeftOf="parent"
- app:layout_constraintRight_toRightOf="parent"
- app:layout_constraintTop_toTopOf="parent"
- app:layout_constraintVertical_bias="0.219" />
- <Button
- android:id="@+id/btngocalendar"
- android:layout_width="266dp"
- android:layout_height="47dp"
- android:text=" Calendar"
- tools:layout_editor_absoluteX="47dp"
- tools:layout_editor_absoluteY="8dp" />
- </android.support.constraint.ConstraintLayout>
Step 5
Go to layout ⇒ New ⇒XML⇒Layout XML file.
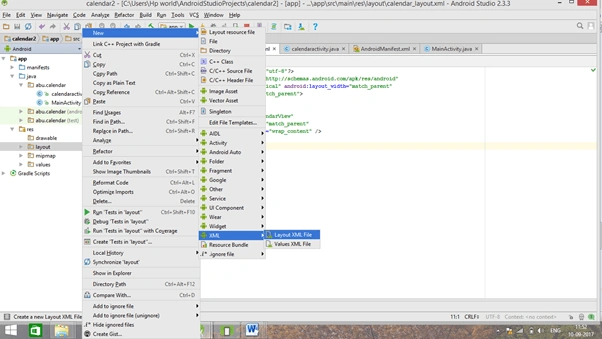 The layout XML code is given below.
- <?xml version="1.0" encoding="utf-8"?>
- <LinearLayout xmlns:android="http://schemas.android.com/apk/res/android"
- android:orientation="vertical" android:layout_width="match_parent"
- android:layout_height="match_parent">
- <CalendarView
- android:id="@+id/calendarView"
- android:layout_width="match_parent"
- android:layout_height="wrap_content" />
- </LinearLayout>
Step 6
Go to Java ⇒ New ⇒Java class.
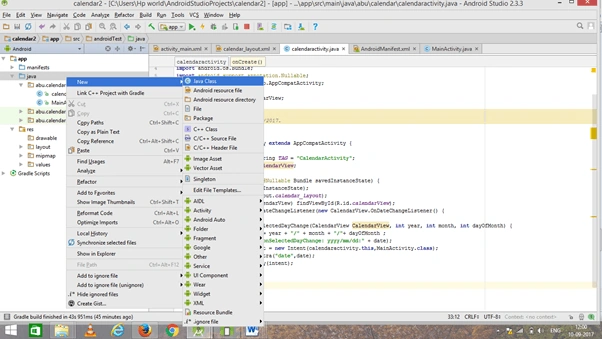 The calendar activity java code is given below.
- package abu.calendar;
- import android.content.Intent;
- import android.os.Bundle;
- import android.support.annotation.Nullable;
- import android.support.v7.app.AppCompatActivity;
- import android.util.Log;
- import android.widget.CalendarView;
- public class calendaractivity extends AppCompatActivity {
- private static final String TAG = "CalendarActivity";
- private CalendarView mCalendarView;
- @Override
- protected void onCreate(@Nullable Bundle savedInstanceState) {
- super.onCreate(savedInstanceState);
- setContentView(R.layout.calendar_layout);
- mCalendarView = (CalendarView) findViewById(R.id.calendarView);
- mCalendarView.setOnDateChangeListener(new CalendarView.OnDateChangeListener() {
- @Override
- public void onSelectedDayChange(CalendarView CalendarView, int year, int month, int dayOfMonth) {
- String date = year + "/" + month + "/"+ dayOfMonth ;
- Log.d(TAG, "onSelectedDayChange: yyyy/mm/dd:" + date);
- Intent intent = new Intent(calendaractivity.this,MainActivity.class);
- intent.putExtra("date",date);
- startActivity(intent);
- }
- });
- }
- }
Step 7
Go to Main Activity.java. This Java program is the back-end language for Android. The Java code is given below.
- package abu.calendar;
- import android.content.Intent;
- import android.os.Bundle;
- import android.support.v7.app.AppCompatActivity;
- import android.view.View;
- import android.widget.Button;
- import android.widget.TextView;
- public class MainActivity extends AppCompatActivity {
- private static final String TAG = "MainActivity";
- private TextView thedate;
- private Button btngocalendar;
- @Override
- protected void onCreate(Bundle savedInstanceState) {
- super.onCreate(savedInstanceState);
- setContentView(R.layout.activity_main);
- thedate = (TextView) findViewById(R.id.date);
- btngocalendar = (Button) findViewById(R.id.btngocalendar);
- Intent incoming = getIntent();
- String date = incoming.getStringExtra("date");
- thedate.setText(date);
- btngocalendar.setOnClickListener(new View.OnClickListener() {
- @Override
- public void onClick(View v) {
- Intent intent = new Intent(MainActivity.this,calendaractivity.class);
- startActivity(intent);
- }
- });
- }
- }
Step 8
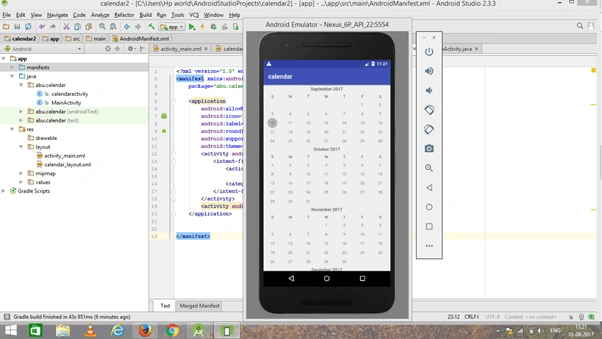
We need to make Calendar View. So, add calendaractivity in an AndroidManifest.xml.
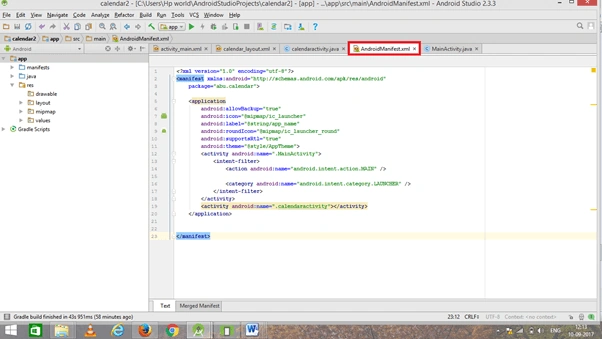 The AndroidManifest.xml Code is this,
- <?xml version="1.0" encoding="utf-8"?>
- <manifest xmlns:android="http://schemas.android.com/apk/res/android"
- package="abu.calendar">
- <application
- android:allowBackup="true"
- android:icon="@mipmap/ic_launcher"
- android:label="@string/app_name"
- android:roundIcon="@mipmap/ic_launcher_round"
- android:supportsRtl="true"
- android:theme="@style/AppTheme">
- <activity android:name=".MainActivity">
- <intent-filter>
- <action android:name="android.intent.action.MAIN" />
- <category android:name="android.intent.category.LAUNCHER" />
- </intent-filter>
- </activity>
- <activity android:name=".calendaractivity"></activity>
- </application>
- </manifest>
Step 9
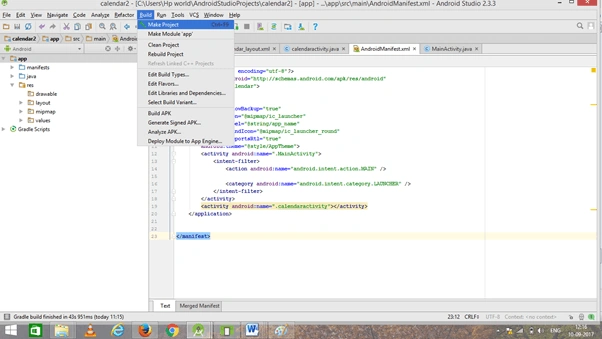
Now, either go to the menu bar and click "Make a project" or press ctrl+f9 to debug the error.
Step 10
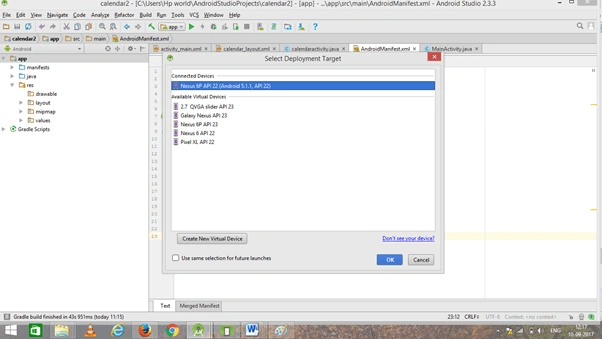
Then, click the "Run" button or press shift+f10 to run the project. Select the "virtual machine" option and click OK.
Conclusion
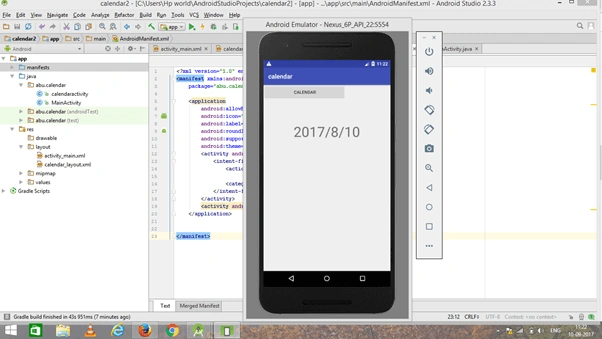
We have successfully created a Calendar Android application using Android Studio.
Join the conversation! Your thoughts help the community grow.