

Description
This article has been prepared to provide a step-by-step approach for getting your first Azure Synapse Analytics Link for SQL created through Synapse studio. I also consider that you have active azure subscription with an SQL Server 2022/Azure SQL database and an Azure Synapse workspace available to treat as Source and Destination for creating the link.
Configure Source Azure SQL Database
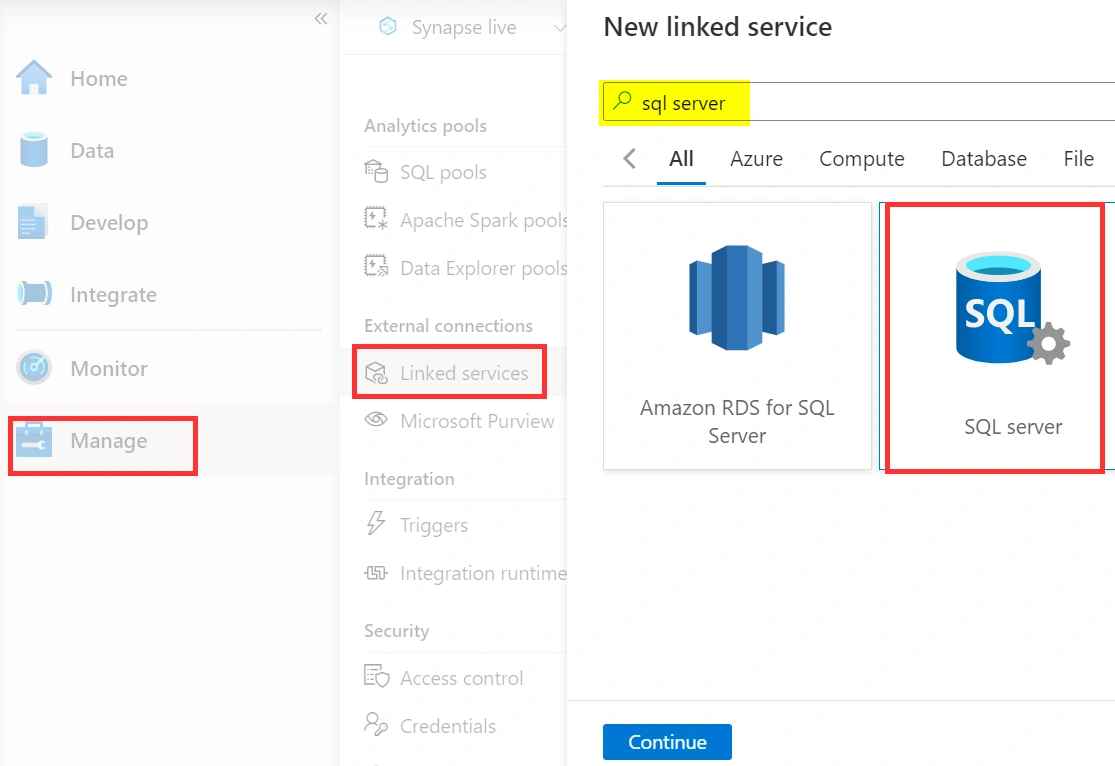
Create a linked service to your source database. It can be an Azure SQL database or SQL Server 2022; in my case, I have an Azure SQL readily available hence I am going to use that.
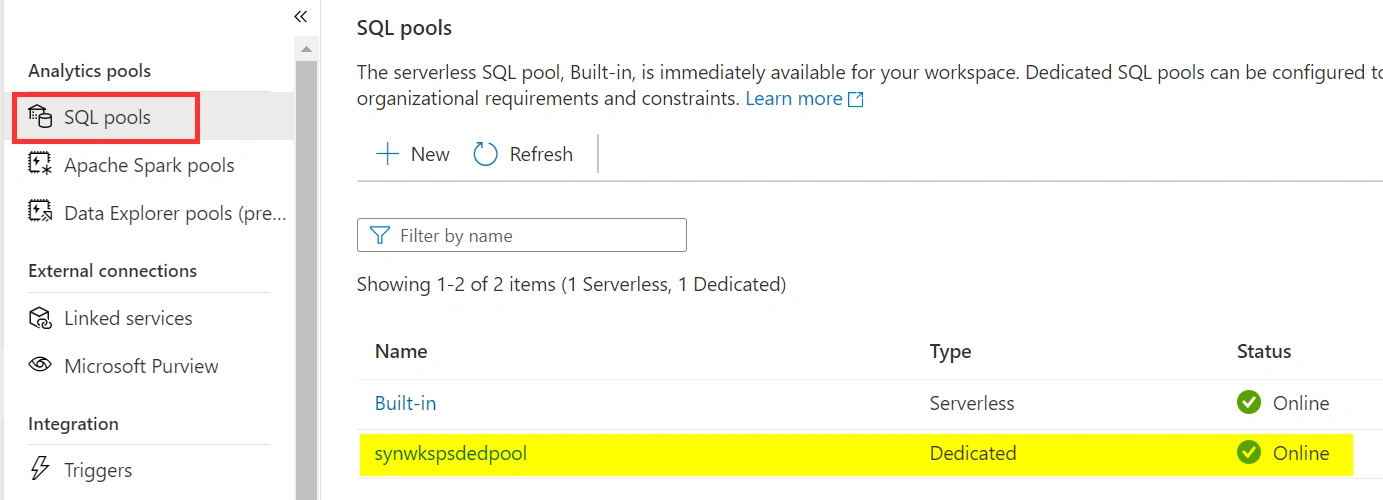
Create target dedicated synapse pool
If you are using SQL Server 2022 as your data source, you will have to perform the following steps but not required for Azure SQL databases.
- Create a ‘Azure Data Lake Storage Gen2’ which will be used as a landing zone. The files present inside this storage will be used by Azure synapse link for SQL for its internal operations like changing the retention policy or file format.
- You will need to create a ‘Linked Service to Landing Zone’ pointing to the storage account created above.
Create the Azure Synapse Link connection
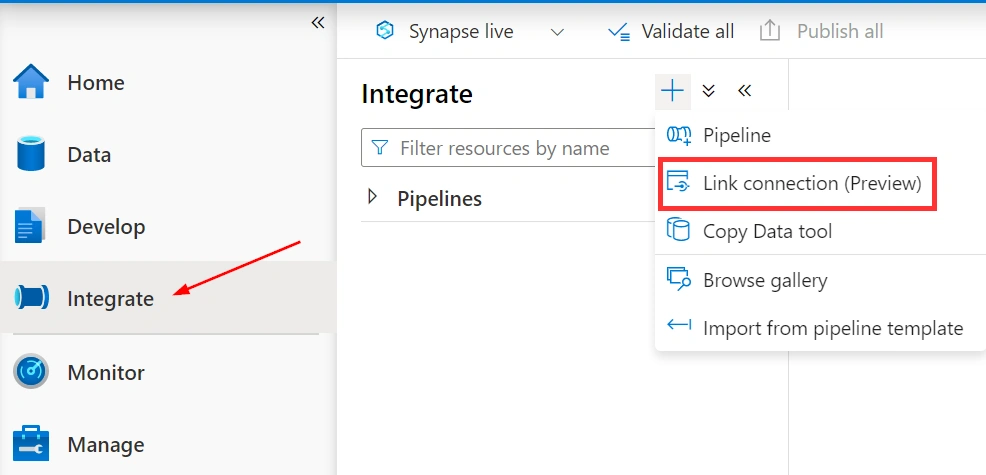
Open the integrate tab at the left side and click on the ‘+’ button to create a new link connection.
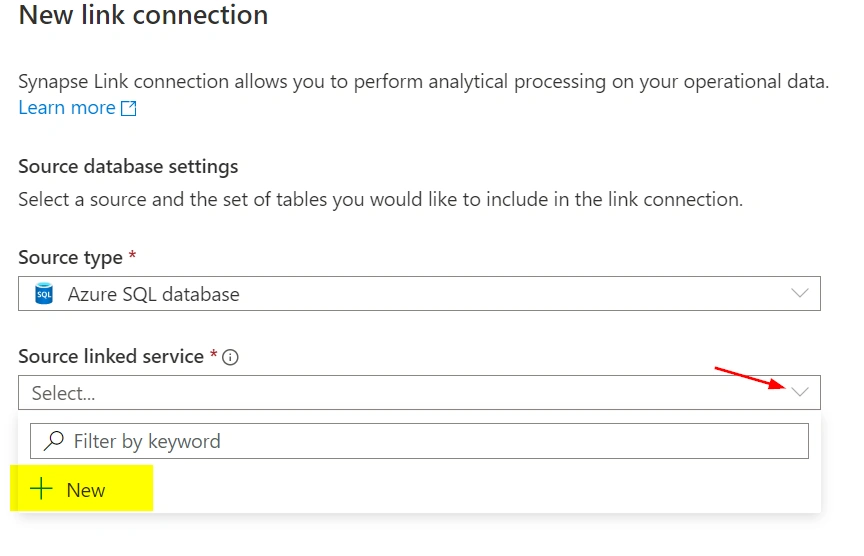
Under the ‘Source linked service,’ select ‘+New.’ You can provide your source database server and database details to create a source link point from which the data replication will be initiated followed by replication.
Once you click on create you will have the option to select the tables from the list which includes the schema name with preview option. But make sure the source database tables you are going to replicate has primary keys present in them, else you may receive an error like below.
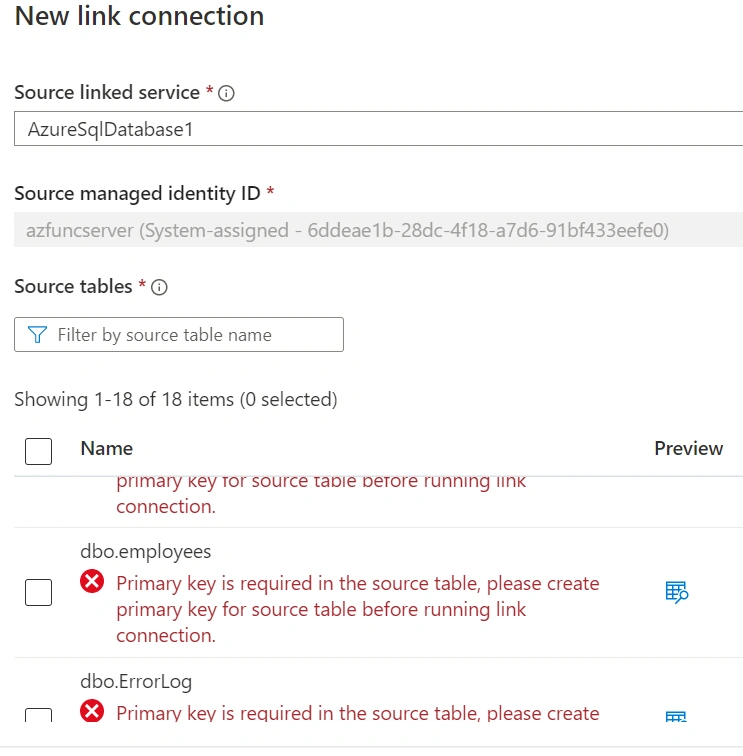
If you are a SQL Server database user, you will know the required prerequisites for SQL Server replication, same goes to ‘SQL Link for Synapse’ feature and following it you can eventually avoid the above error.
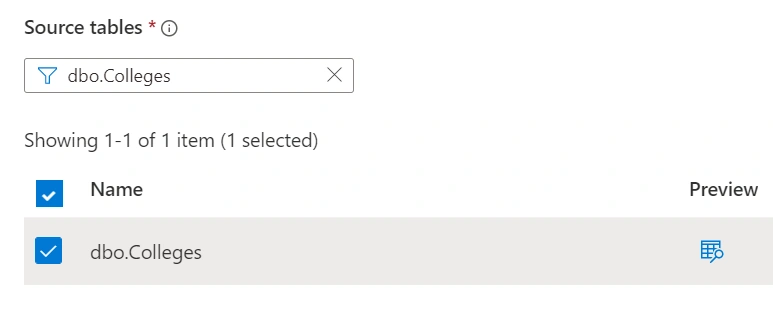
I have selected a demo table with a few rows, and I filtered that in the search column with schema name. Don’t know why the search box has been set case sensitive, the table only appears if you key in the exact table name.
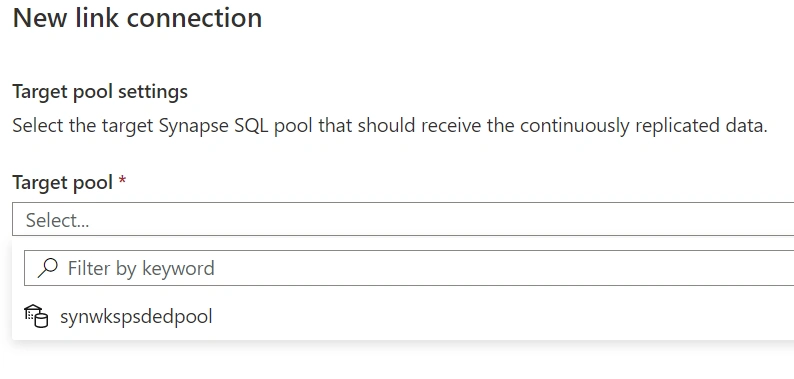
Select the synapse ‘Target pool’ which would be receiving the replicated data.
Note:
- The linked service that you create here is not only dedicated to Azure Synapse Link for SQL but it can also be used by any workspace user that has the appropriate permissions
- A given source table can only be enabled in at most one link connection at a time.
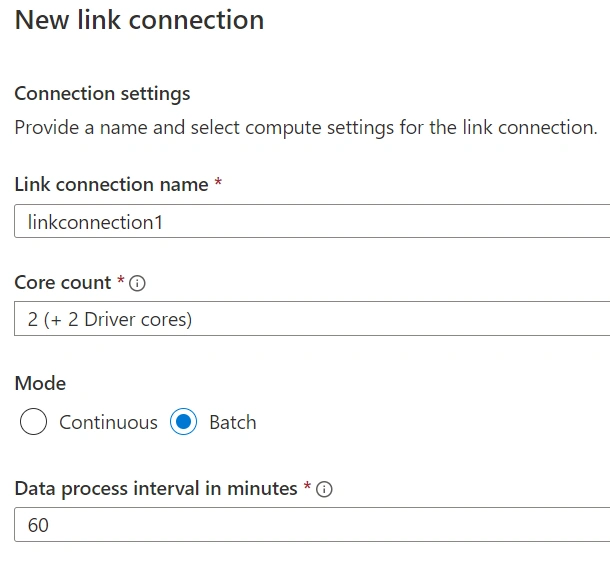
Name the Synapse Link connection and select the number of cores. These cores will be used for the movement of data from the source to the target. I have selected batch mode which will replicate every 60 mins, the time duration is customizable between 20-60 mins as per your requirements.
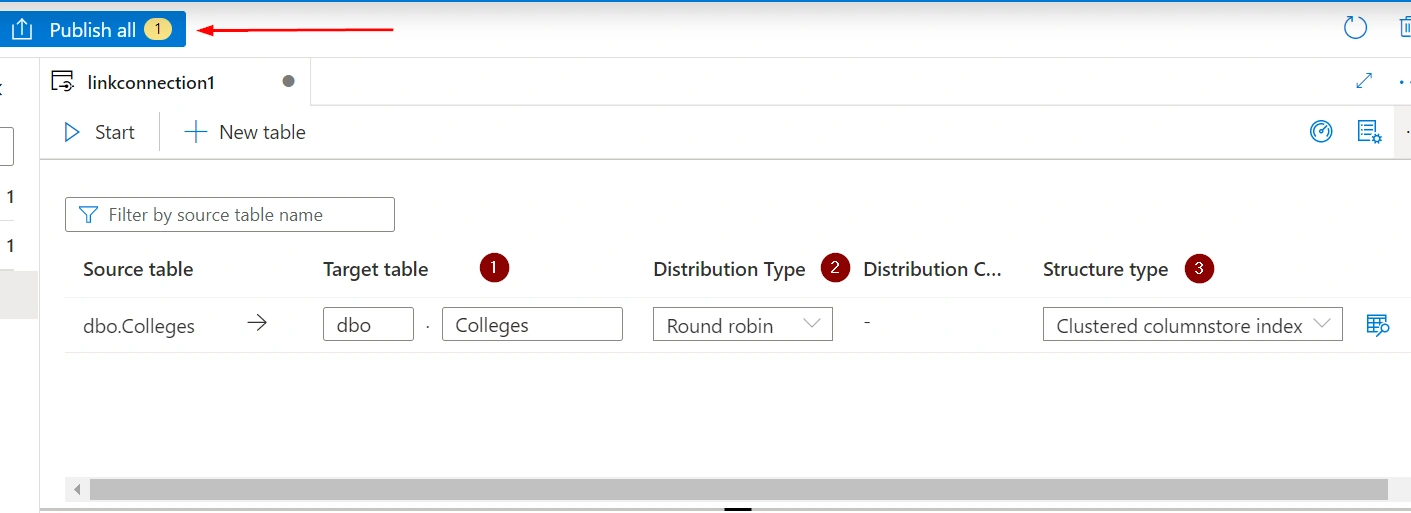
For each table you set in the connection, you will have the option to specify:
- Table and Schema names: You can change the Table and schema names in your target dedicated SQL pool. There are no conditions for these to be the same as the source table and schema names.
- Distribution type: You can either use round robin, hash-distributed, or replicated tables distribution type.
- Structure type: Organize your table as either a heap, a clustered columnstore index, or a clustered index.
Select Publish all to save the new link connection to the service
Note:
- Consider heap table for structure type when your data contains varchar(max), nvarchar(max), and varbinary(max).
- Make sure the schema in your Synapse dedicated SQL pool has already been created before you start the link connection. Azure Synapse Link for SQL will create tables automatically under your schema in the Synapse dedicated SQL pool.
- You can add/remove tables for replication after stopping the link and then restart again
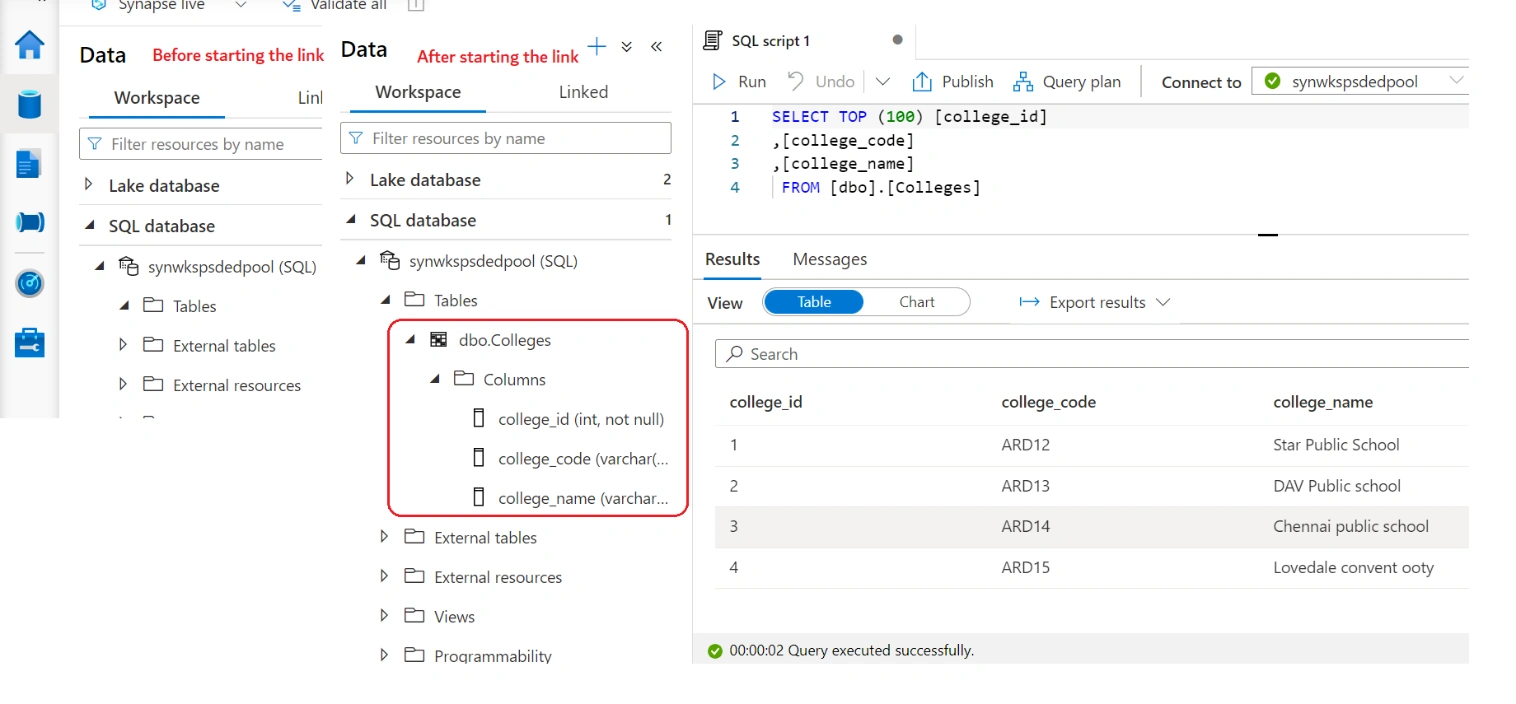
I successfully started the link, and it has completed after few mins. As we usually see, it will take a few mins to start the pool for the first time and it is a normal behaviour.
After finished I can see the table has been created in the destination synapse SQL database which I have provided, and all the data rows has been replicated as well.
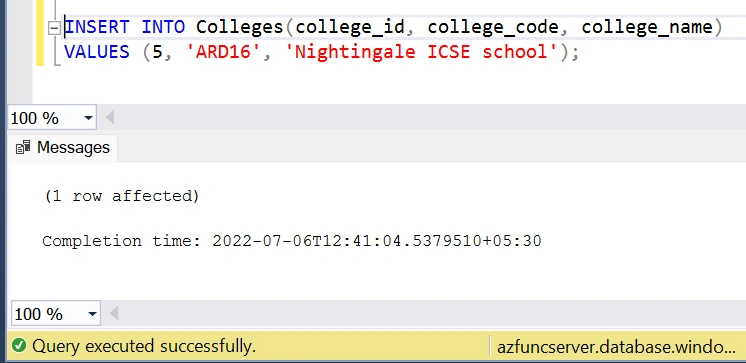
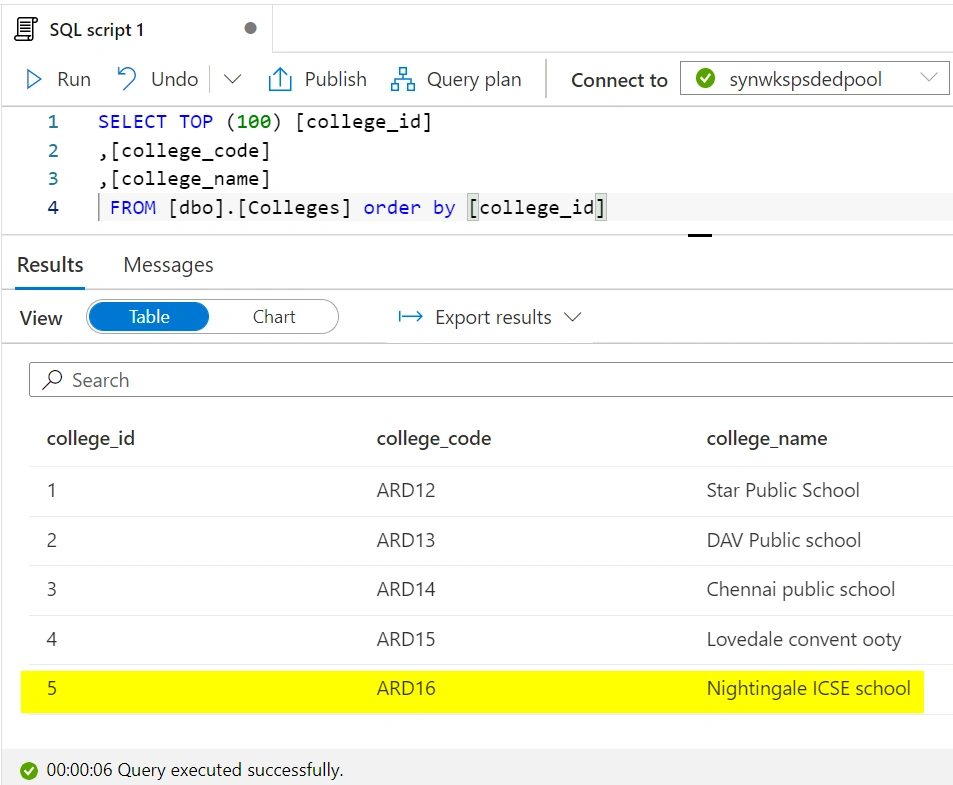
Let us insert a row in source and see if this is getting replicated as well.
We can see the fifth row that we have inserted is now available in the destination database.
Summary
This is a detailed step-by-step article on how to create SQL Link for Synapse analytics. We will see how to monitor it and the replication in the background in a future article.
Join the conversation! Your thoughts help the community grow.