
Introduction:
Composite Custom Controls are those controls which contain other controls. It is almost like a custom user control in ASP.NET which is used like a a container to keep another control in it. Here we are going to discuss about the composite custom control, how can we make it and used them later inside a web application. For this we have to inherit the Composite Control Class, It is very useful class we can use it's functionality or features which becomes very helpful to us. In the Composite Control you will have to create the instance of the control for which control you want to add into the container. Let we move forward that how will we create and use later, Now follow some step which is given below.
Step 1: Firstly we are going to open the Web server Control application.
-
Go to visual studio and open File->New->Project->Add ASP.NET Server Control application.
-
Click OK.
-
Give the name as Composite_control.
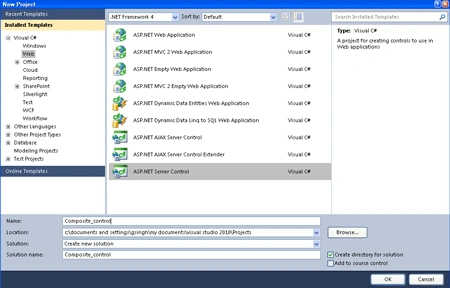
Step 2: Now you have to change the name of the ServerControl.cs file to MC_Control.cs.
Step 3: Further Toolbox Data attribute for the class, change the string "ServerCOntrol1" to "MC_Control" in both places where it occurs. let see how we will add it.
[ToolboxData("<{0}:MC_Control runat=server></{0}:MC_Control>")]
Step 4: Now write code for the class named as MC_Control.cs which inherits the base class name as Composite Control.
Code:
using
System;
using
System.Collections.Generic;
using
System.ComponentModel;
using
System.Linq;
using
System.Text;
using System.Web;
using
System.Web.UI;
using
System.Web.UI.WebControls;
using
System.Drawing;
namespace
Composite_control
{
[ToolboxData("<{0}:MC_Control
runat=server></{0}:MC_Control>")]
public class
MC_Control :
CompositeControl
{
protected
TextBox txtbox = new
TextBox();
protected Label
lbl = new Label();
protected
Button btn = new
Button();
[Bindable(true)]
[Category("Appearance")]
[DefaultValue("")]
[Localizable(true)]
public
string text
{
get
{
EnsureChildControls();
return txtbox.Text;
}
set
{
EnsureChildControls();
txtbox.Text = value;
}
}
protected override
void CreateChildControls()
{
base.CreateChildControls();
lbl.Text = "User Name:<br>";
btn.Text = "Submit";
btn.BackColor = Color.Red;
this.Controls.Add(lbl);
this.Controls.Add(txtbox);
this.Controls.Add(btn);
}
}
}
In this code given above we are using two things; first a property and second a method, Property which named is text which will set the text property of the textbox whatever we write in the text property of the textbox it will display value inside the textbox. Further we have to make a method named as CreateChildControls (which is a method of base class Composite Control), will override to implement some other changes into the controls we are making. It is used to add the instances of the Controls which we have made above to the container. In this method we can implement the text and color properties of the controls that will apply to your composite control. You can add also more properties which is you want to implement.
Step 5: Now after doing all that we have to open a file named AssemblyInfo.cs and write the code given below.
-
Firstly add a namespace to the Top of the AssemblyInfo.cs file named as
using System.Web.UI;
-
Now write the assembly name at the end of the AssemblyInfo.cs file.
[assembly: TagPrefix("Composite_control", "CC")].
Step 6: Now we have to build the application by click on build solution and close it.
Step 7: Now we have to take a ASP.NET Empty web application to test the application.
-
File->New->ASP.NET Empty Web application.
-
Click OK.
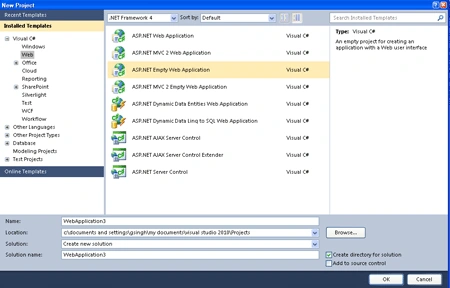
Step 8: Now we will add a new project
-
Go to Solution Explorer
-
Right Click on it and add existing project
-
Add the Composite_control project to the website project.
-
Now it will appear like that.
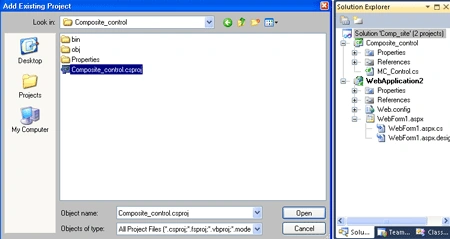
Step 9: Right click on Solution Explorer and set as start up project.
Step 10: Now Right Click on Website project and add reference of the project name as Composite_control.
-
Go to add reference.
-
And select Project then add project named as Composite_control.
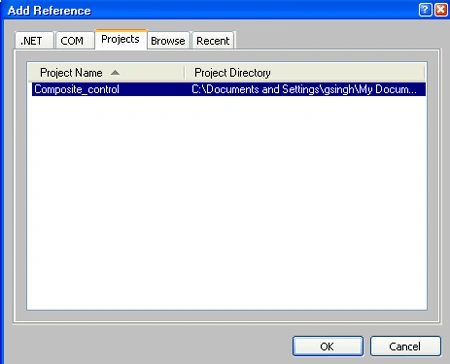
-
Now go to Browse of that window and further select the H_calendar.dll file and click OK.
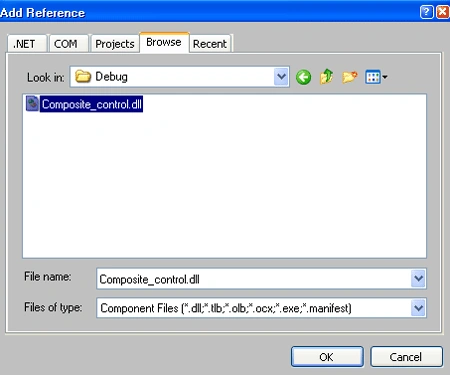
Step 11: Now it will appear into the Composite_control Component which is at the top of the toolbox.
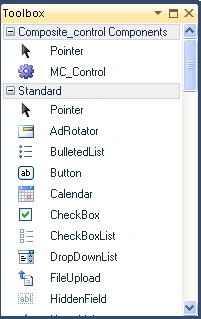
Step 12: Now if you want to add it into the Toolbox Control then
-
Right Click on any control of Toolbox.
-
And Select Choose item.
-
Select the .NET Component and browse the button add the Composite_control.dll to the .NET Component
-
Now the component will be added to the .net framework component.
-
Click OK let see how it will appear
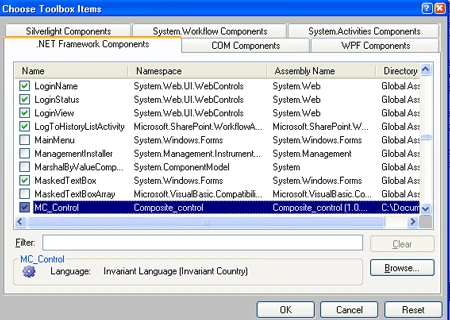
-
Now the control will appear into the toolbox.
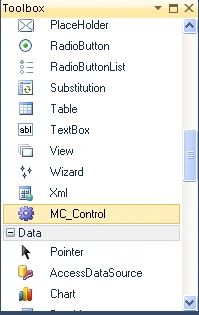
Step 13: Further you have to drag and drop the derived control from the toolbox and you see that in the source file of webform1.aspx there is something added like as a directive and a instance of control information shown in the source file of webform1.aspx, it will seem like as given below. You can add this register directive to the other pages to access the control.
<%@ Register assembly="Composite_control" namespace="Composite_control" tagprefix="CC" %>
<CC:MC_Control ID="MC_Control1" runat="server" style="z-index: 1; left: 10px; top: 15px; position: absolute" BackColor="#FF9966" BorderColor="#006666" BorderStyle="Groove" />
Step 14: Now you will run the application by pressing F5.
Output:
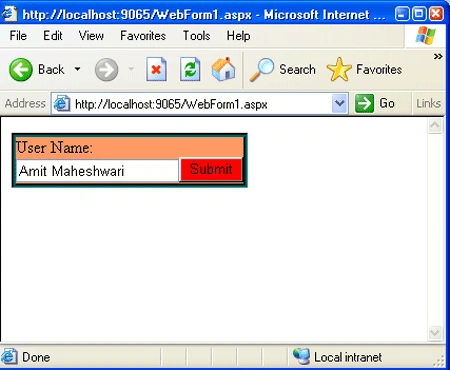
dgPosted Apr 17, 2014, 10:04 AM
The download file does not contain the CompositeControl project. Also, how do you make the button in the control respond to the click event?