

Introduction
Azure storage is a solution from Microsoft Azure that provides storage that is highly available, secure, durable, scalable, and redundant.
In this article, I have shown how to create a storage account simply in your Azure portal.
Step 1
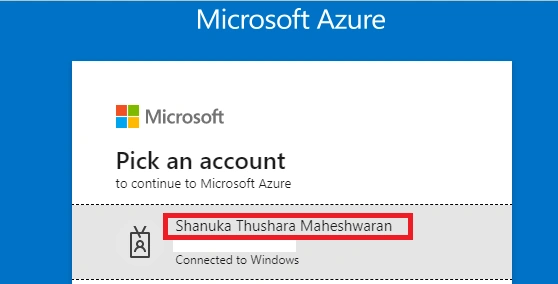
Sign in to your azure portal.
Step 2
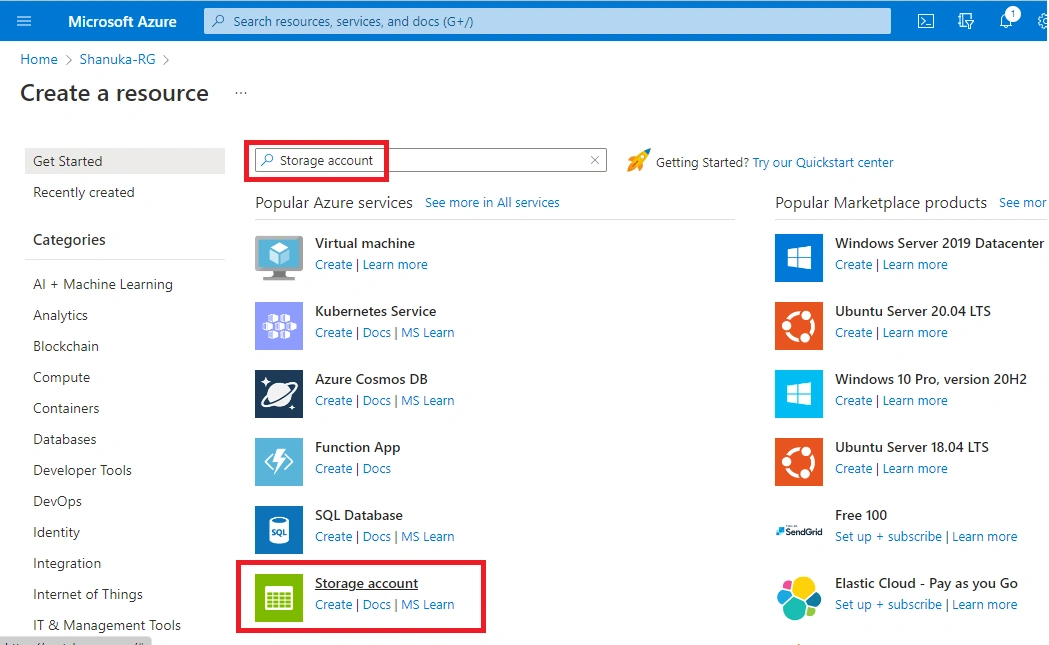
Search the Storage account and select.
Step 3
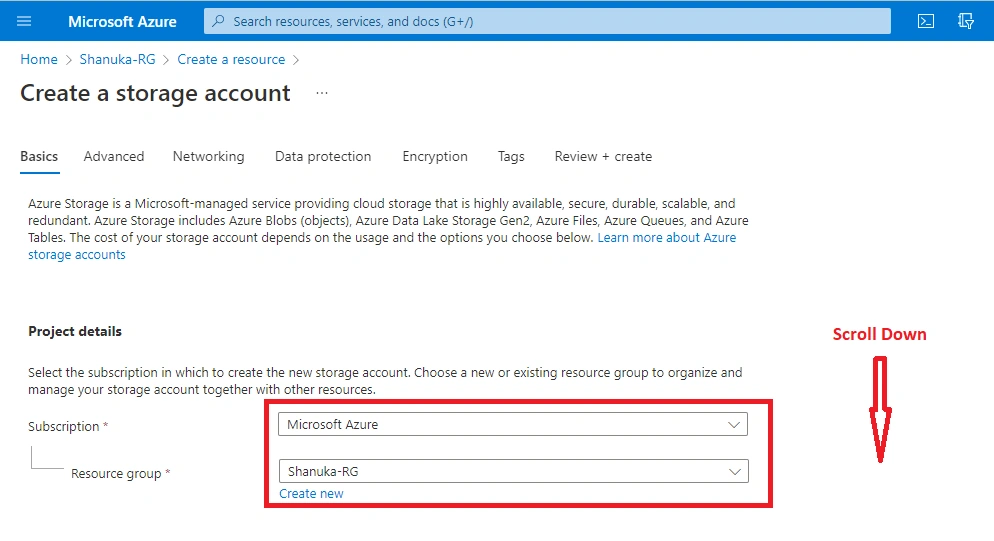
Make sure the mentioned details on the screenshot and scroll down
Step 4
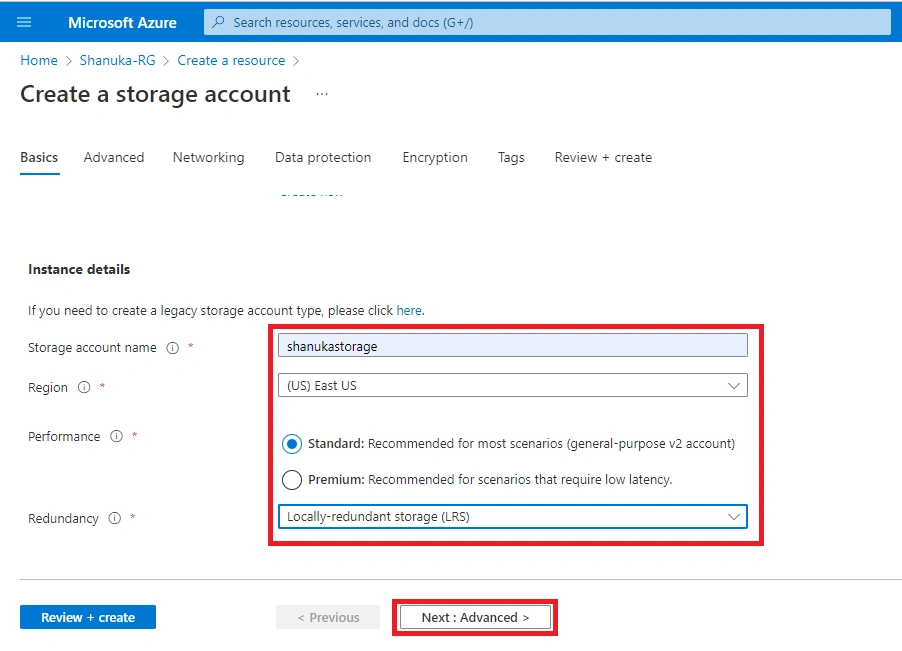
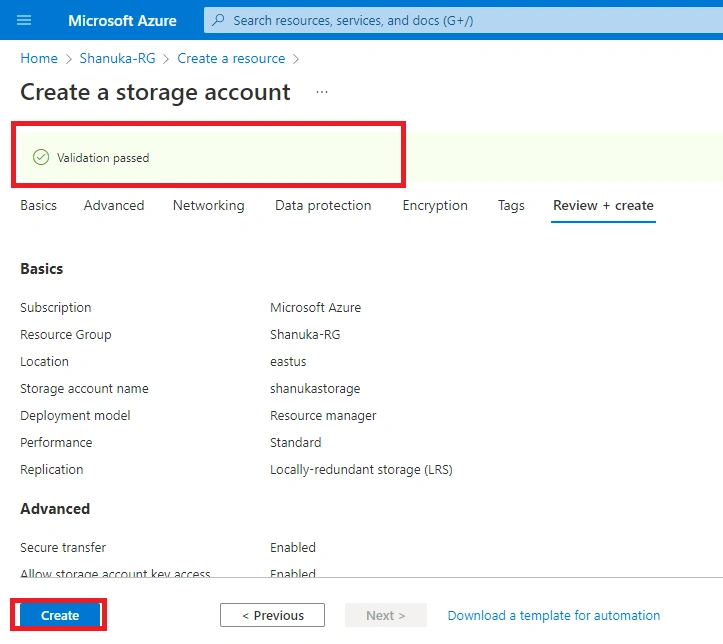
The storage name will be unique. In my case, I have created “shanukastorage”
Important: Redundancy options are available (LRS, GRS, ZRS, and GZRS) as per your requirement you can choose the option. In my scenario, I have chosen LRS and clicked Next: Advanced
Step 5
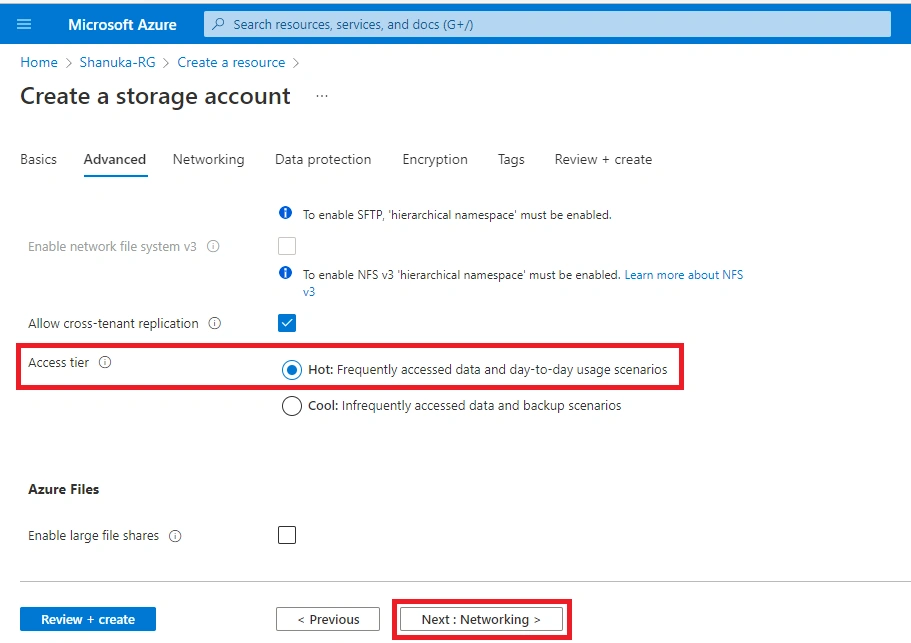
In the Advanced tab, you have to consider the Access tire option. It should be a Hot mode as per the requirement you can choose Archive or Cool Mode.
Step 6
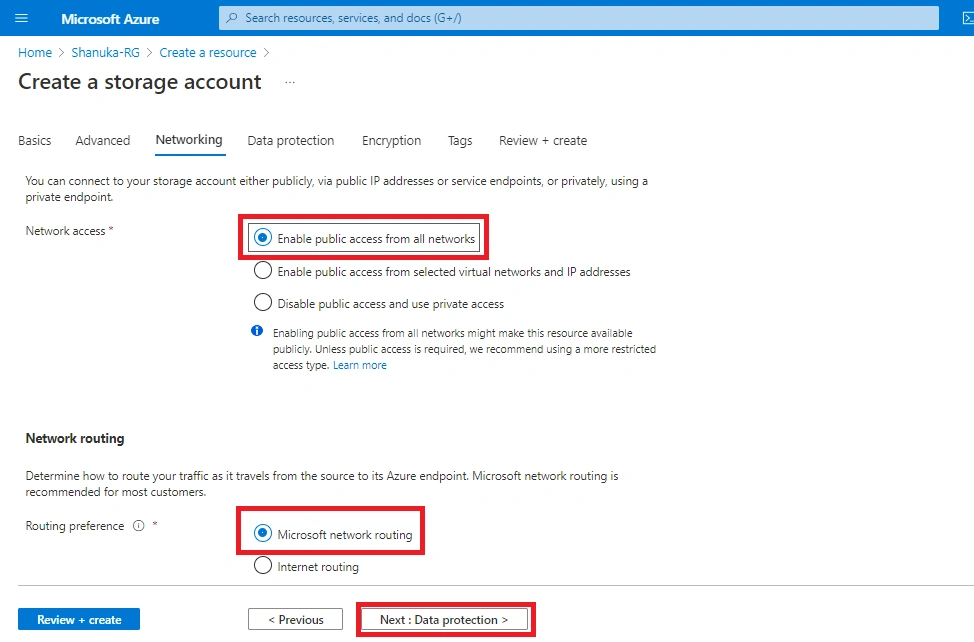
Network access: I have enabled Public access. If you enabled a selected network you can communicate with that particular network only.
Step 7
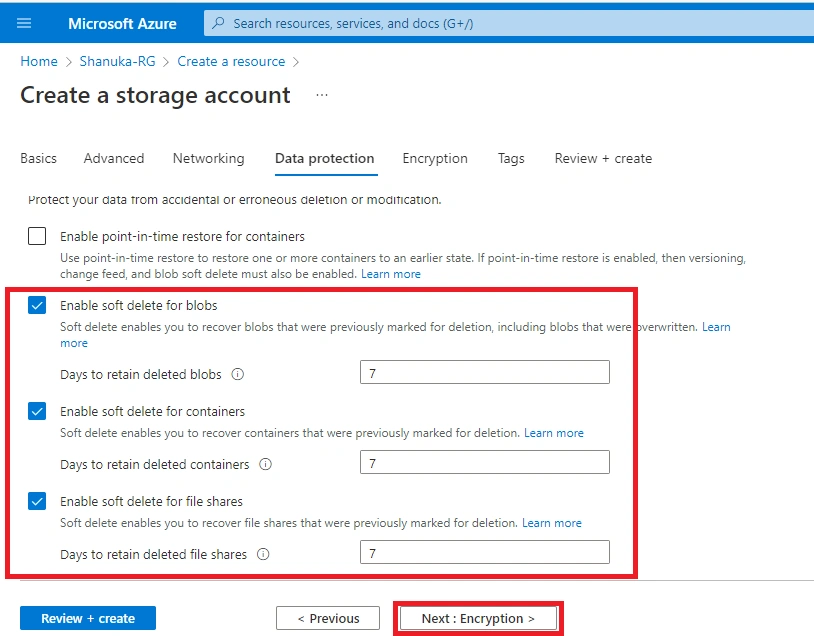
Those options should be ticked for Data Protection
Step 8
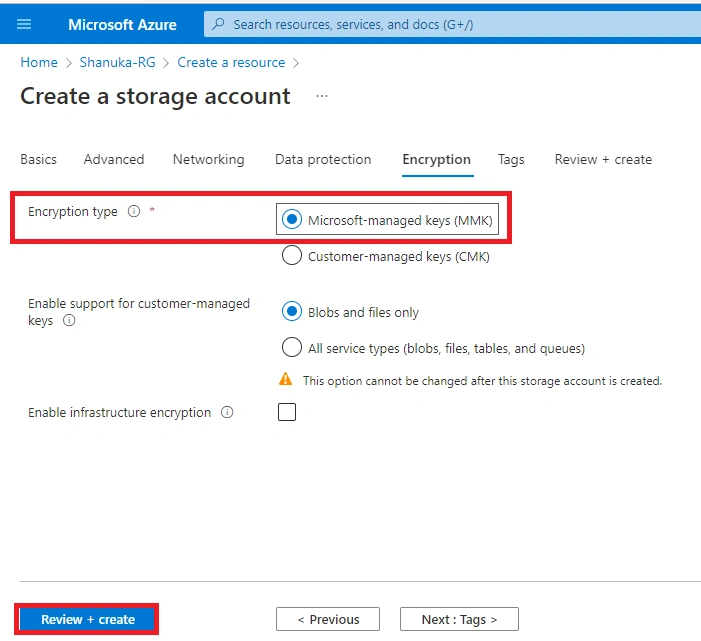
Encryption should be select Microsoft-Managed-Key (MMK) and Review+create
Step 10
Review the summary and create it.
Step 11
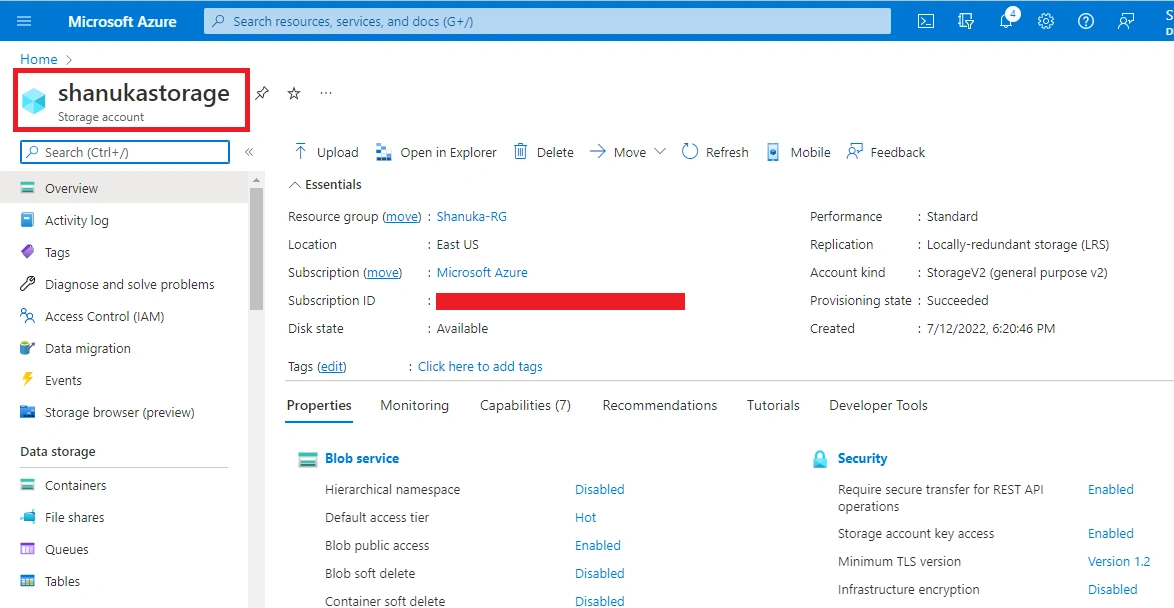
I've successfully created my Storage Account
Conclusion
This article taught us how to create a Storage account in our Azure portal. And if you have any questions don't hesitate to get in touch with me.
Thanks.
Viknaraj ManogararajahPosted Aug 30, 2022, 8:24 AM
Nice Article Shanuka