

Introduction: This is a simple MVC ASP.NET application now this application we have learn how to create the login form using the ASP.NET MVC tools. In this program we create the three views name is index,create,details. Models in a MVC based application are the components of the application that are responsible for maintaining state. Views in a MVC based application are the components responsible for displaying the application user interface. Controllers in a MVC based application are the components responsible for handling end user interaction, manipulating the model and ultimately choosing a view to render to display UI.
Step1: Open Visual Studio 2010.
- Go to file -> New->Projects.
- Create an ASP.NET MVC 2 Empty Web Application.
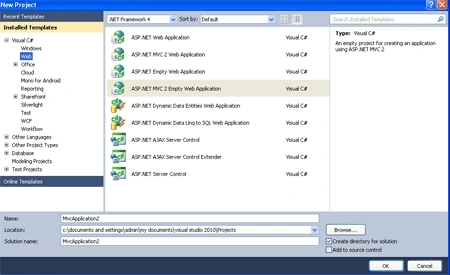
Step 2: Add a class in model folder.
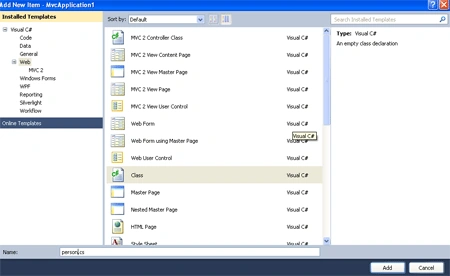
- Right click on the Model folder ->add new items->add class.
- Name of Class is "Person".
- In a class define the properties.
code:
using
System;
using
System.Collections.Generic;
using
System.Linq;
using
System.Web;
namespace
MvcApplication1.Models
{
public class
person
{
public int
Id { get; set; }
public string
Name { get; set;
}
public int
Age { get; set;
}
public string
Street { get; set;
}
public string
City { get; set;
}
}
}
Step 3: Add a controller.
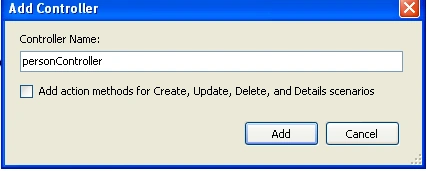
- Right click on the Controllers folder ->add->Controllers.
- Name of Controllers is "person".
- In a controller, define the request.
Code:
using
System;
using
System.Collections.Generic;
using
System.Linq;
using
System.Web;
using
System.Web.Mvc;
using
MvcApplication1.Models;
namespace
MvcApplication1.Controllers
{
public class
personController :
Controller
{
static List<person>
man = new List<person>();
public
ActionResult Index()
{
return View(man);
}
public
ActionResult Details(person person)
{
return View(person);
}
public
ActionResult Create()
{
return View();
}
[AcceptVerbs(HttpVerbs.Post)]
public
ActionResult Create(person person)
{
if (!ModelState.IsValid)
{
return View("Create",
person);
}
man.Add(person);
return RedirectToAction("Index");
}
}
}
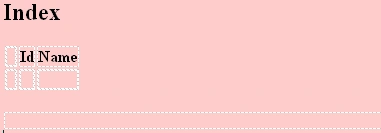
Step 4: Add three views.
-
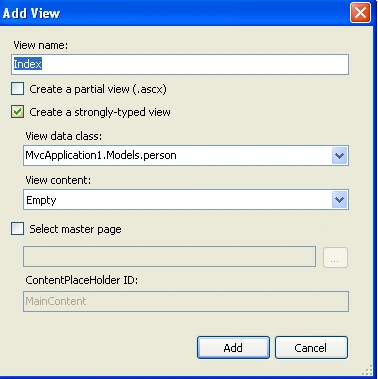
Right click on the Index Method -> Add View.
-
View name same as "Index".
-
Create a Strong type View.
-
When you create the Strong type view automatically take the namespace and class name.
Code:
<%@
Page Language="C#"
Inherits="System.Web.Mvc.ViewPage<IEnumerable<MvcApplication1.Models.person>>"
%>
<!DOCTYPE
html PUBLIC
"-//W3C//DTD XHTML 1.0 Transitional//EN"
"http://www.w3.org/TR/xhtml1/DTD/xhtml1-transitional.dtd">
<html
xmlns="http://www.w3.org/1999/xhtml"
>
<head
runat="server">
<title>Index</title>
</head>
<body
bgcolor="#ffcccc">
<div>
<h2>Index</h2>
<table>
<tr>
<th></th>
<th>
Id
</th>
<th>
Name
</th>
</tr>
<%
foreach (var
person in Model) {
%>
<tr>
<td>
<%=
Html.ActionLink("Details",
"Details", person )%>
</td>
<td>
<%=
Html.Encode(person.Id) %>
</td>
<td>
<%=
Html.Encode(person.Name) %>
</td>
</tr>
<%
} %>
</table>
<p>
<%= Html.ActionLink("Create
New", "Create")
%>
</p>
</div>
</body>
</html>
Step5:Add second views
-
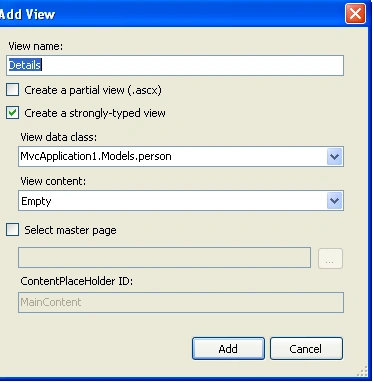
Right click on the Details Method -> Add View.
- View name same as "Details".
- Create a Strong type View.
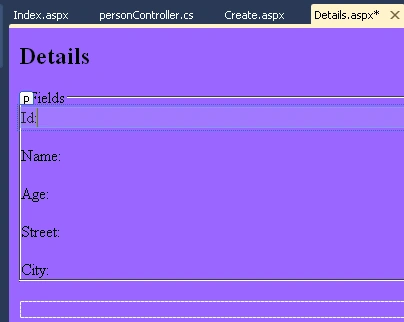
- When you create the Strong type view automatically take the namespace and class name.
Code:
<%@
Page Language="C#"
Inherits="System.Web.Mvc.ViewPage<MvcApplication1.Models.person>"
%>
<!DOCTYPE
html PUBLIC
"-//W3C//DTD XHTML 1.0 Transitional//EN"
"http://www.w3.org/TR/xhtml1/DTD/xhtml1-transitional.dtd">
<html
xmlns="http://www.w3.org/1999/xhtml"
>
<head
id="Head1"
runat="server">
<title>Details</title>
</head>
<body
bgcolor="#9966ff">
<div>
<h2>Details</h2>
<fieldset>
<legend>Fields</legend>
<p>
Id:
<%=
Html.Encode(Model.Id) %>
</p>
<p>
Name:
<%=
Html.Encode(Model.Name) %>
</p>
<p>
Age:
<%=
Html.Encode(Model.Age) %>
</p>
<p>
Street:
<%=
Html.Encode(Model.Street) %>
</p>
<p>
City:
<%=
Html.Encode(Model.City) %>
</p>
</fieldset>
<p>
<%=Html.ActionLink("Back
to List", "Index")
%>
</p>
</div>
</body>
</html>
Step6: Add third view.
-
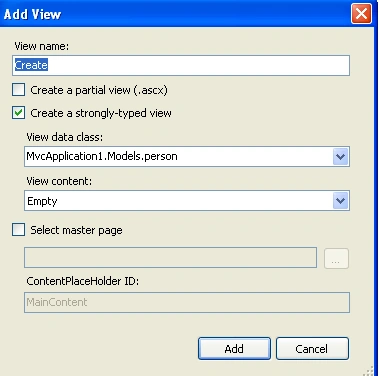
Right click on the Create Method -> Add View.
- View name same as "Create".
- Create a Strong type View.
- When you create the Strong type view automatically take the namespace and class name.
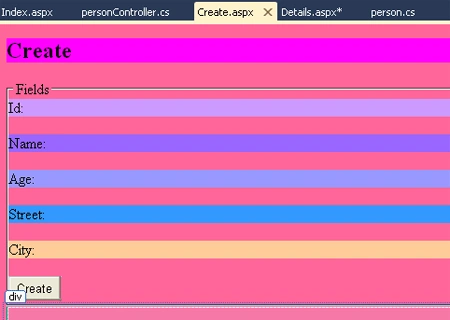
Code:
<%@
Page Language="C#"
Inherits="System.Web.Mvc.ViewPage<MvcApplication1.Models.person>"
%>}
<!DOCTYPE
html PUBLIC
"-//W3C//DTD XHTML 1.0 Transitional//EN"
"http://www.w3.org/TR/xhtml1/DTD/xhtml1-transitional.dtd">
<html
xmlns="http://www.w3.org/1999/xhtml"
>
<head
runat="server">
<title>Create</title>
</head>
<body
bgcolor="#ff6699">
<div>
<h2
style="background-color:
#FF00FF">Create</h2>
<%=
Html.ValidationSummary("Create was unsuccessful.
Please correct the errors and try again.")
%>
<%
using (Html.BeginForm()) {%>
<fieldset>
<legend>Fields</legend>
<p
style="background-color:
#CC99FF">
<label
for="Id">Id:</label>
<%=
Html.TextBox("Id")
%>
<%=
Html.ValidationMessage("Id",
"*") %>
</p>
<p
style="background-color:
#9966FF">
<label
for="Name">Name:</label>
<%=
Html.TextBox("Name")
%>
<%=
Html.ValidationMessage("Name",
"*") %>
</p>
<p
style="background-color:
#9999FF">
<label
for="Age">Age:</label>
<%=
Html.TextBox("Age")
%>
<%=
Html.ValidationMessage("Age",
"*") %>
</p>
<p
style="background-color:
#3399FF">
<label
for="Street">Street:</label>
<%=
Html.TextBox("Street")
%>
<%=
Html.ValidationMessage("Street",
"*") %>
</p>
<p
style="background-color:
#FFCC99">
<label
for="City">City:</label>
<%=
Html.TextBox("City")
%>
<%=
Html.ValidationMessage("City",
"*") %>
</p>
<p>
<input
type="submit"
value="Create"
/>
</p>
</fieldset>
<%
} %>
<div>
<%=Html.ActionLink("Back
to List", "Index")
%>
</div>
</div>
</body>
</html>
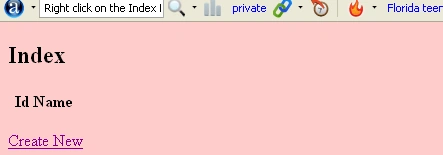
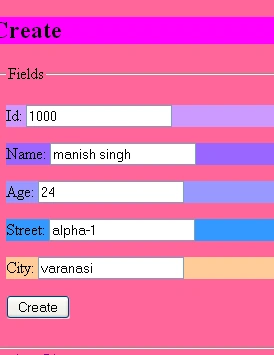
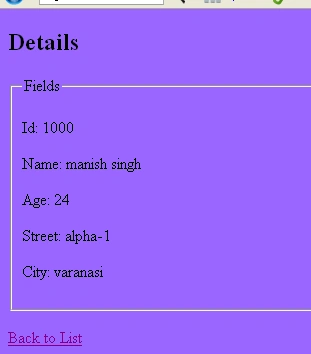
Step7: Press crtl+f5 run your application.
output:
Manav PandyaPosted Jan 12, 2018, 12:00 AM
Nice share sir ............
mohsin ahmadPosted Oct 10, 2012, 7:12 AM
if i want to make it on asp.net?