

Introduction
Azure Virtual Network (VNet) is a representation of your own network in the cloud. It is a logical isolation of the Azure cloud dedicated to your subscription
I will let you know how to create a Virtual Network (VNet) in azure step by step.
Step 1
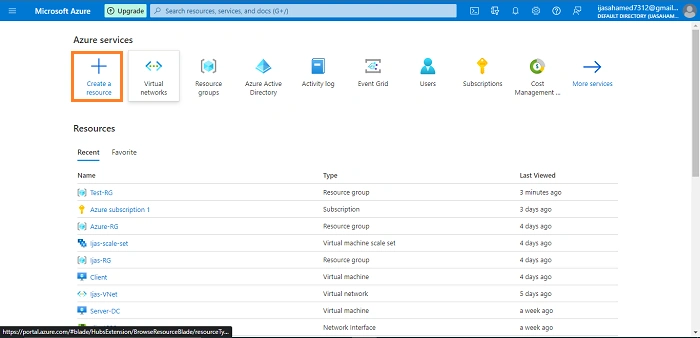
Sign in to your Azure portal.
Step 2
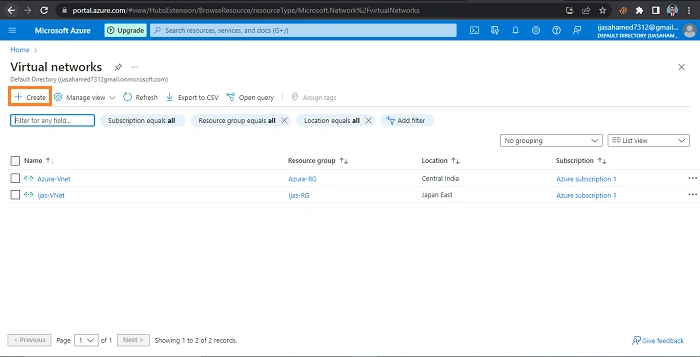
Create Virtual network. Click create.
Step 3
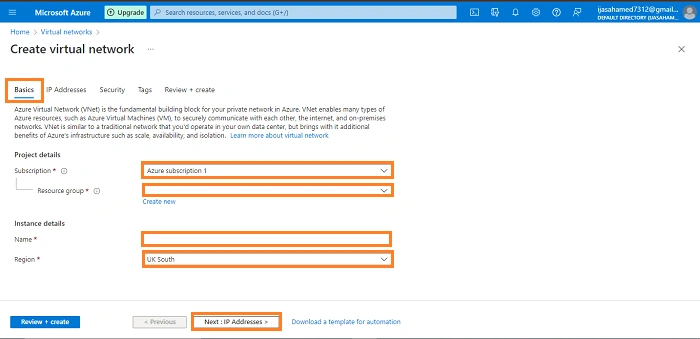
Select Your Subscription Next select or create Resources group Name.
Next Instance Details create Virtual Network Name and Region
Step 4
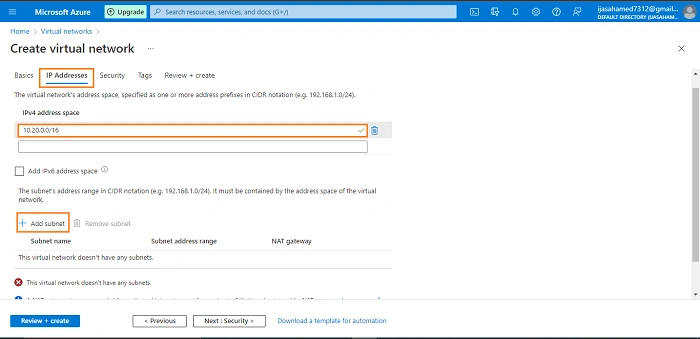
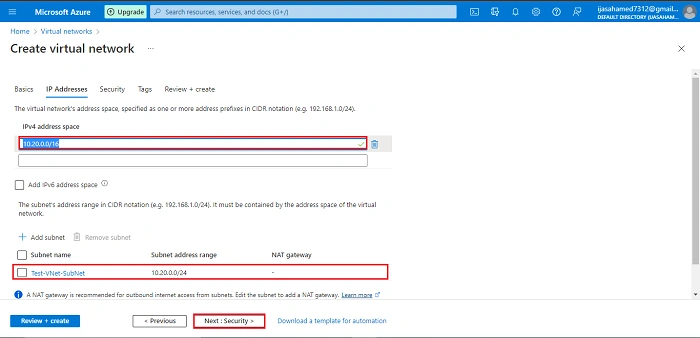
Enter Your IP and Add subNet.
Step 5
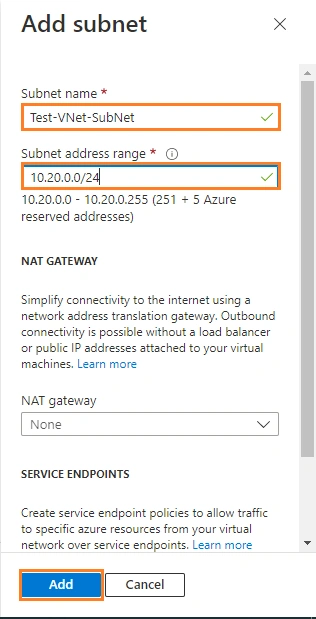
Create subnet Name and sub net Address Range, click Add Button.
Step 6
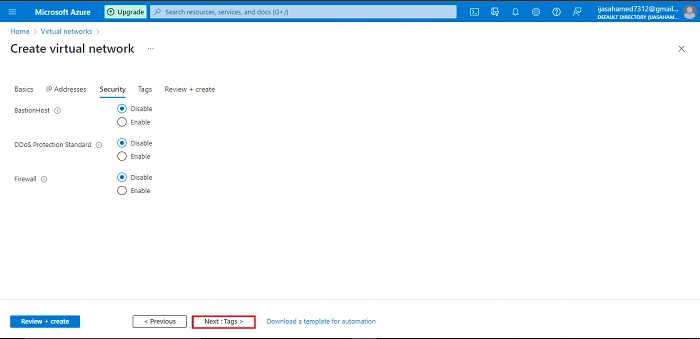
Click Next Security
Step 7
Click Next Tag
Step 8
Tags are metadata elements that you apply to your Azure resources. They're key-value pairs that help you identify resources based on settings that are relevant to your organization.
Enter Tag Name
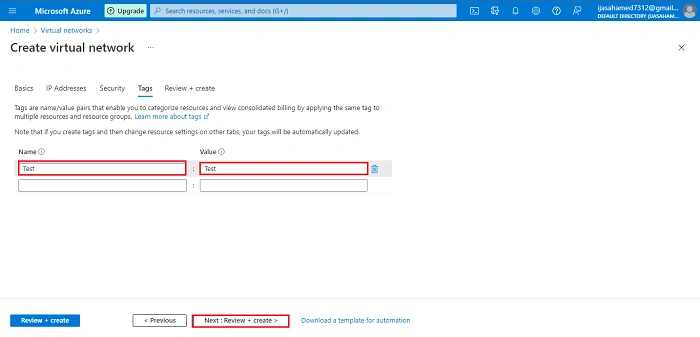
Click Next + Review + create
Step 9
Click create
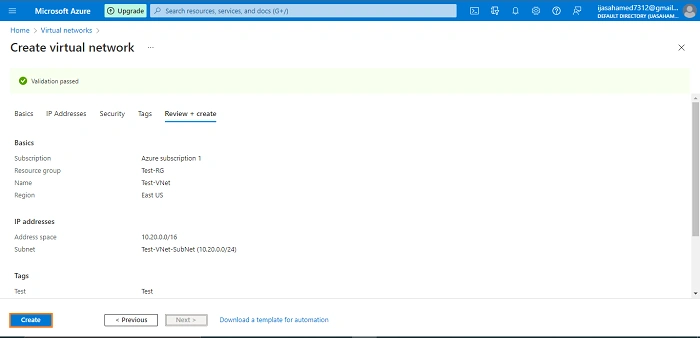
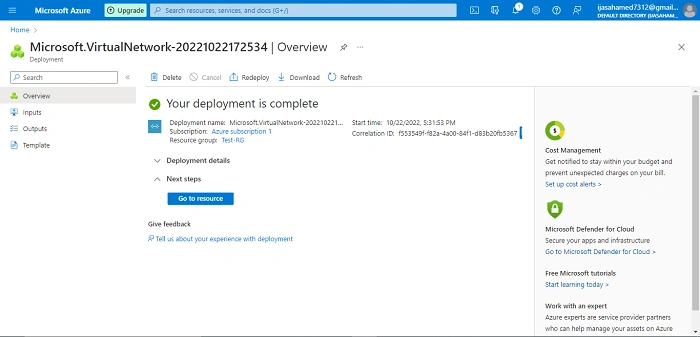
Successfully created Virtual Network
Conclusion
This article taught us how to create a Virtual Network (VNet) in our azure portal. And if you have any questions please contact me.
Thanks.
Join the conversation! Your thoughts help the community grow.