

- public static class Operations
- {
- public static int Add(int num1, int num2) => num1 + num2;
- public static int Subtract(int num1, int num2) => num1 - num2;
- public static int Multiply(int num1, int num2) => num1 * num2;
- public static int Divide(int num1, int num2) => num1 / num2;
- }
Now, we need to add a Unit Test project to the solution.
We can use either the .NET CLI or the Solution Explorer extension (which I have mentioned in the previous article) for adding the unit test project. For adding the project through the solution explorer extension, right click on the solution and select Add New Project from the context menu. From the project templates select xUnit Test Project and give the name MathOperationTests. After the tests project is created, add reference of MathOperations class library to the tests project.
If you are using the .NET CLI you need to run the following commands.
- dotnet new xunit -n MathOperationTests
- dotnet add MathOperationTests\MathOperationTests.csproj reference MathOperations\MathOperations.csproj
Rename the UnitTest1.cs to OperationTests.cs. Change the class name in code as well. Now we shall add some tests for the class library methods.
- public class OperationTests
- {
- [Fact]
- public void AddTwoNumbers_ReturnsSum()
- {
- var num1 = 10;
- var num2 = 20;
- var result = Operations.Add(num1, num2);
- Assert.Equal(30, result);
- }
- [Fact]
- public void SubtractTwoNumbers_ReturnsDifference()
- {
- var num1 = 20;
- var num2 = 10;
- var result = Operations.Subtract(num1, num2);
- Assert.Equal(10, result);
- }
- [Fact]
- public void MultiplyTwoNumbers_ReturnsProduct()
- {
- var num1 = 10;
- var num2 = 20;
- var result = Operations.Multiply(num1, num2);
- Assert.Equal(200, result);
- }
- [Fact]
- public void DivideTwoNumbers_ReturnsQuotient()
- {
- var num1 = 20;
- var num2 = 10;
- var result = Operations.Divide(num1, num2);
- Assert.Equal(2, result);
- }
- }
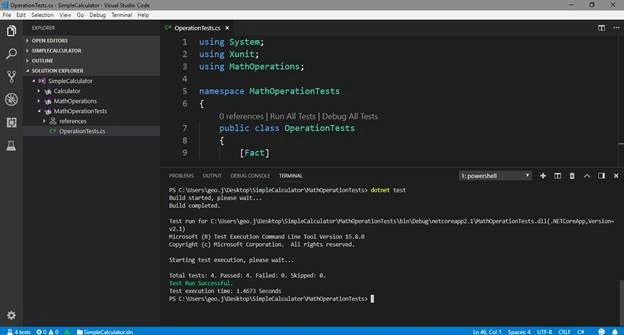
- public static int Add(int num1, int num2)
- {
- return num1 - num2; // Bug here
- }
Now run the tests again. We can see that our test for Add method is failed and is marked with the red symbol in the test explorer pane.
If we navigate to the test method we have written we can see it is now having a red squiggly underline in the Assert method. If we hover over that squiggly line an info box will be shown displaying the actual and expected values of the test. The same information is displayed in the Problems tab in the bottom panel (the panel where your terminal lives) of the VS Code. This can be seen in the below figure.
Summary
In this article, I have explained how to write Unit Tests in .NET Core application. I had explained the .NET Core Test Explorer extension for Visual Studio code which adds the test explorer functionality to our awesome text editor. If you want to know more about this extension you can visit the GitHub repository for this project here.
Join the conversation! Your thoughts help the community grow.