

Overview
This document describes how to convert disks in Azure to Managed Disks.
This process will reboot the server. Once the process is complete, the original disk will remain and will need to be cleaned up. This happens as the process creates a copy of the original disk so that if there are issues, you can roll back.
Process
Log into https://portal.azure.com and using the search bar go to Virtual Machines
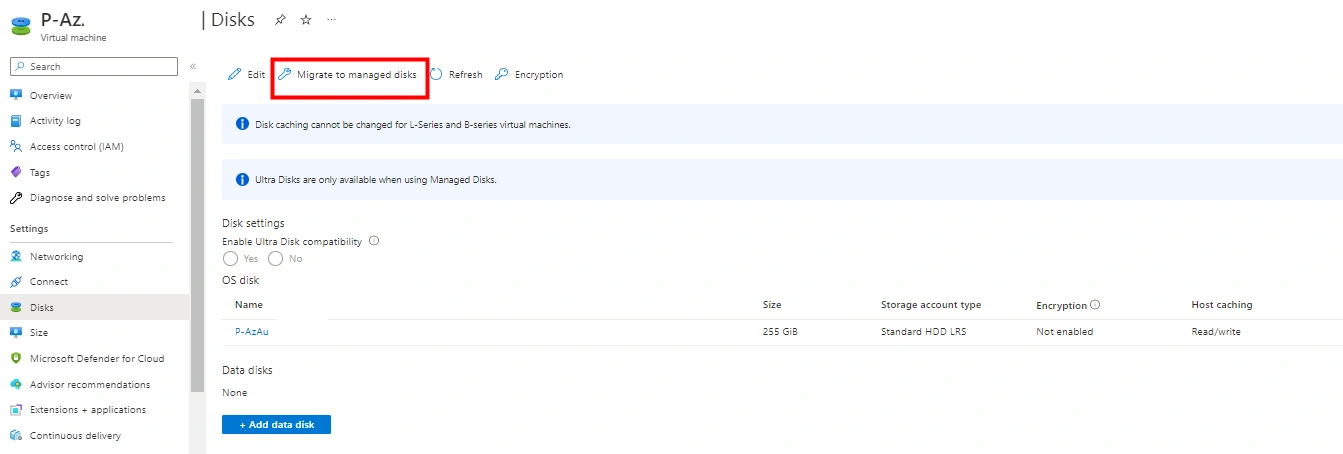
Click the Disks blade and look for the Migrate to managed disks button – if there click it

If you see this message – click it, then click Convert in the subsequent window

Once done, you will see this Window – click the Migrate button or server to restart and log in to make sure all disks are present.
Verification Process
Validation needs to be done by,
- Logging into the Virtual Server and making sure that ALL disks are present and operational
- In Azure, the option to Migrate to managed disks is no longer present
- In Azure, in the Virtual Machines Blade, the server is not listed with Use Managed Disks = No (to enable this, click Manage View -> Edit Columns and click + Add Column and find Uses managed disks and click Save - will be on the Blade list now)
Join the conversation! Your thoughts help the community grow.